
HOME WELCOME SEVEN ELAN ELISE MIDGET TYPE R MINI LAND ROVER FAMILY MG TC GUEST BOOK

LAND ROVER SERIES III
We all have a "list" of things we'd like to do before we die. Mine includes owning a Mini, Lotus 7, Lotus Elan, Citroen 2 cv, and an old Land Rover. I've had all but the 2 cv and the Land Rover. However I have driven both.
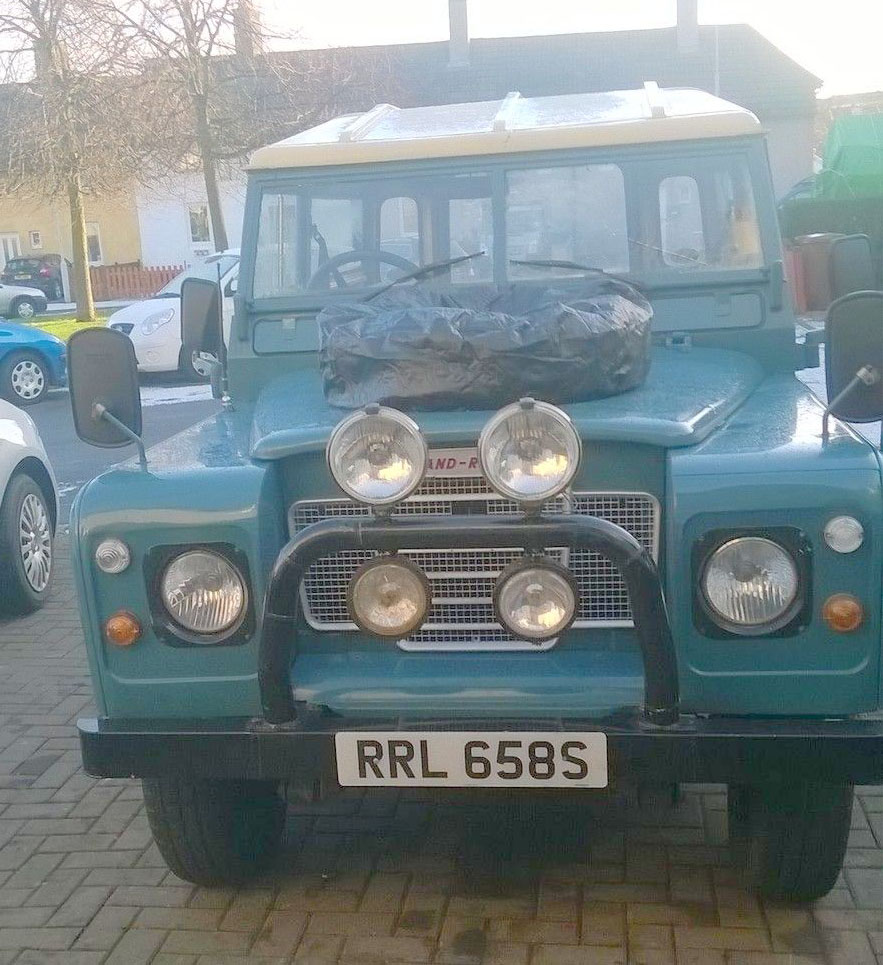
So time to tick another box. We sold the MG Midget a few months ago and I've been murmuring about getting a Land Rover. When we were in the UK over last weekend (18/1/15) we stayed in a Premier Inn which had a Land Rover Series 3 in the car park. As we walked past it Lynne said she liked it. That was all I needed. I searched ebay and Autotrader all week and found one in Scotland. (couldn't really get one further away, could I)
I wanted a Series 2a but ended up with a Series 3. Condition and price made it an easy decision. Money transferred overnight and I'm now the proud owner.
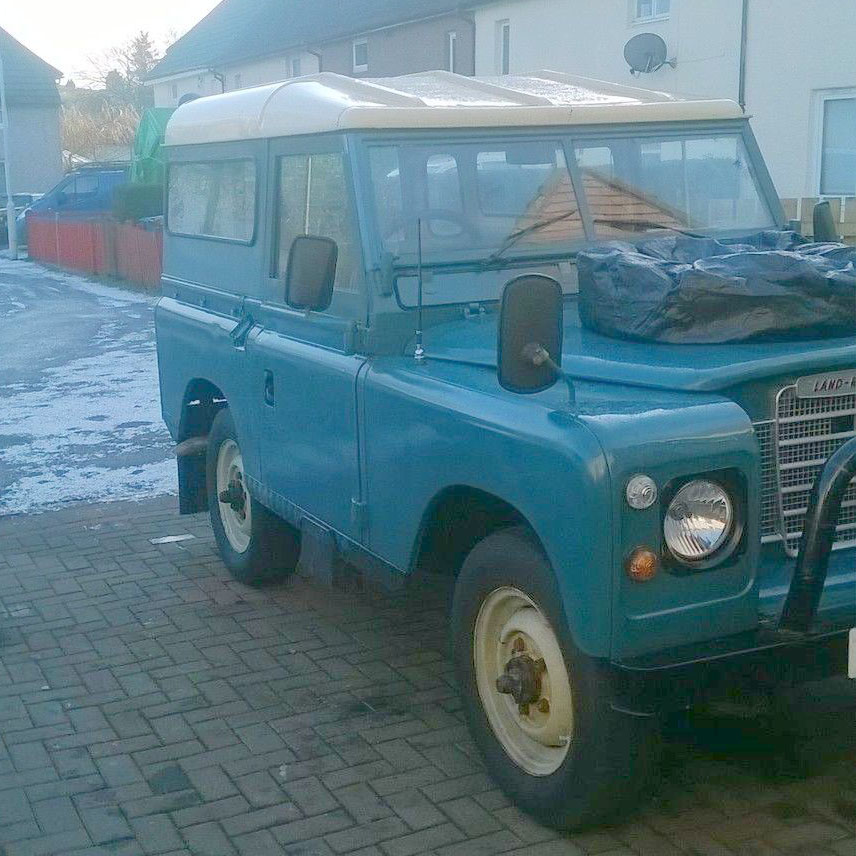
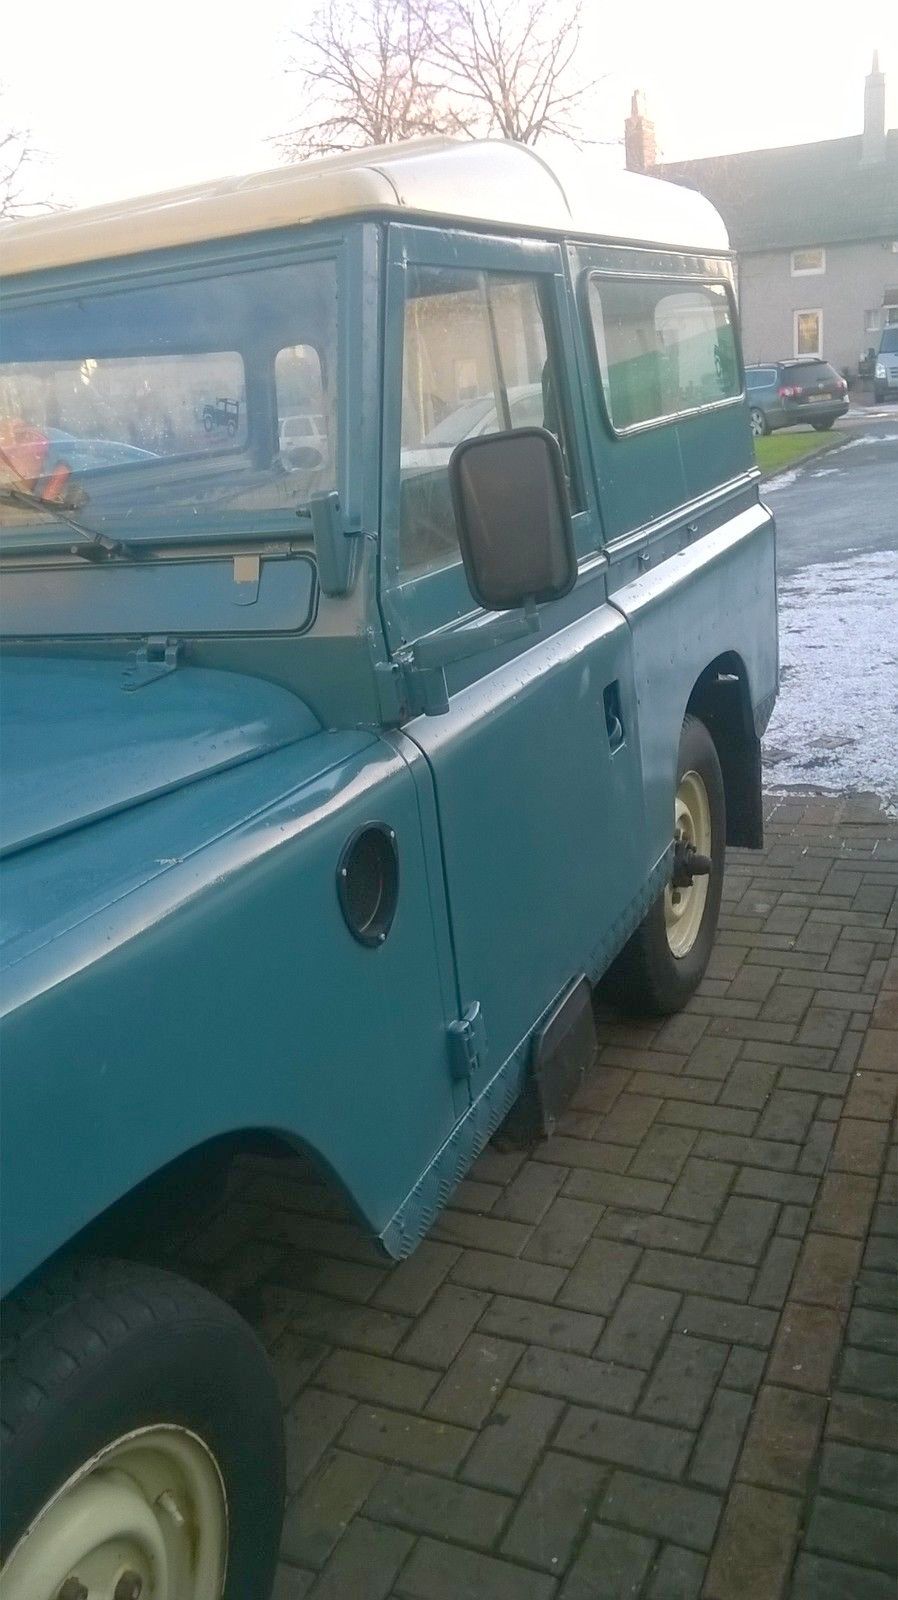
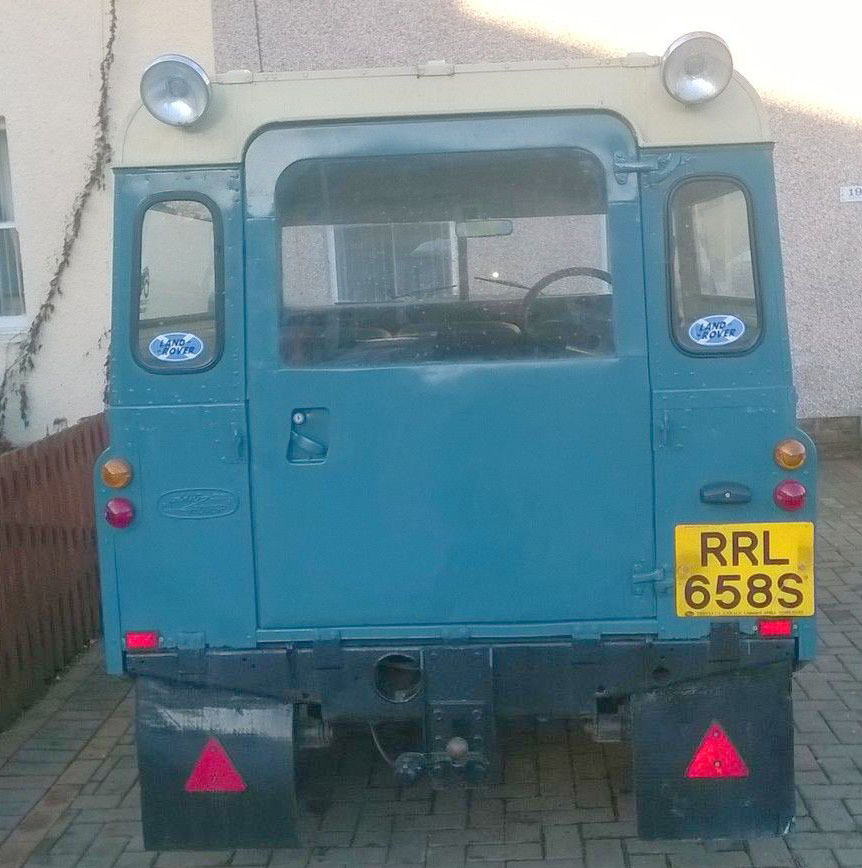
I've planned to collect it on 3rd February but in the meantime here's some pictures taken by the current owner.

We collected it on Wednesday 4th February (2015). 8 hour drive from Rosyth to Sheffield spoilt by a stupid policeman. I'll write up the story of the trip HERE
The car performed well. Managed 55 to 60 mph all the way back. Had a small problem when it cut out whilst ticking over at the services (waiting for Lynne to get sandwiches and coffee) and wouldn't start. Left it for 10 minutes and away it went. Then, as I turned into a side road in Portsmouth it cut out and wouldn't start. I had to move it out of the way on the starter. I got some petrol but it still wouldn't start. The driving on the starter had flattened the battery enough to stop it restarting. Nice lad from Iceland (we were at their back door) got his Escort and jump leads and way she went.
This morning, 7th February, I've driven it without all the stuff in the back and it's much easier. I've tightened both mirrors which kept dropping down in the wind and put the heater switch feed wire on the correct fuse so it goes off when the ignition is off. I've tightened the dash as that was loose and rattling. I didn't look at the fuel and temperature gauge which don't work, that can wait for now. I'll sort it when it gets a bit warmer outside. But I did remove the two wing mirrors. I've put some bolts in for now and will fill and paint later. I suspect the owner before last fitted the wing mirrors because the door mirrors dropped. All it needed was to tighten the Allen headed pinch bolts.
I've got the 7 to finish, the Mini needs a few days work and then I'll get round to the Land Rover. Oh, I've also got to spend several weeks cutting grass and cutting back 5 years of undergrowth. Should be a busy year.
All in all. I'm more than pleased with it.
Monday 9th February (2015).
I started the day by filling the crack in the 7 nosecone and painting the yellow band around it and painted an edge on one of the rear wings. Then the Land Rover got some attention.
I removed the bull bar and spotlights.
.jpeg)
Coming off, only one (tight bugger) to undo now.
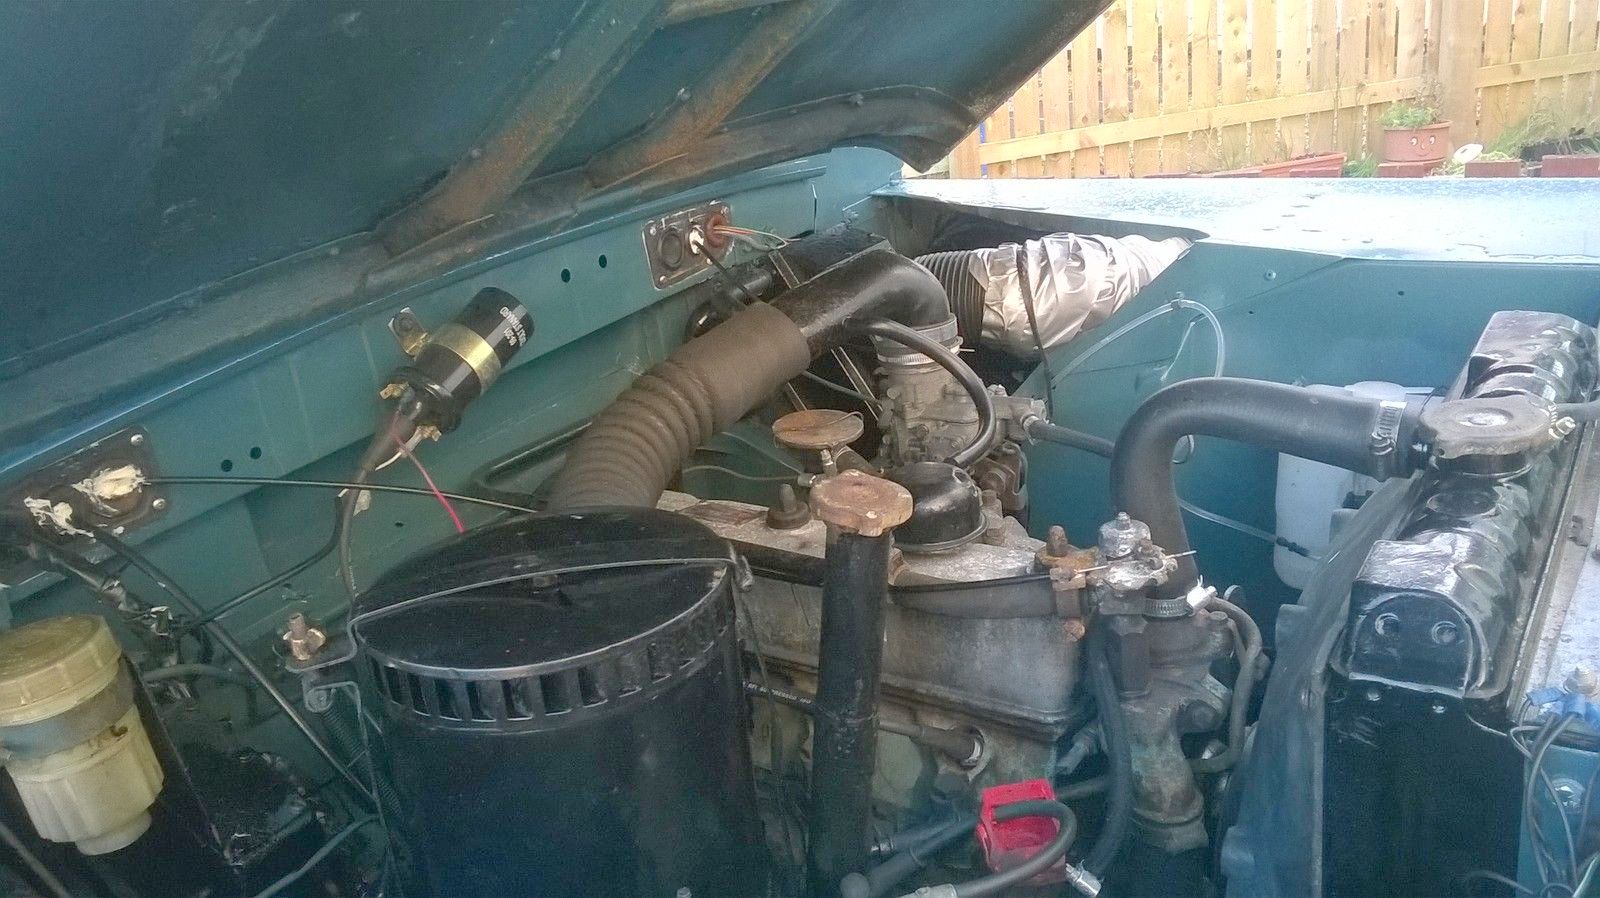
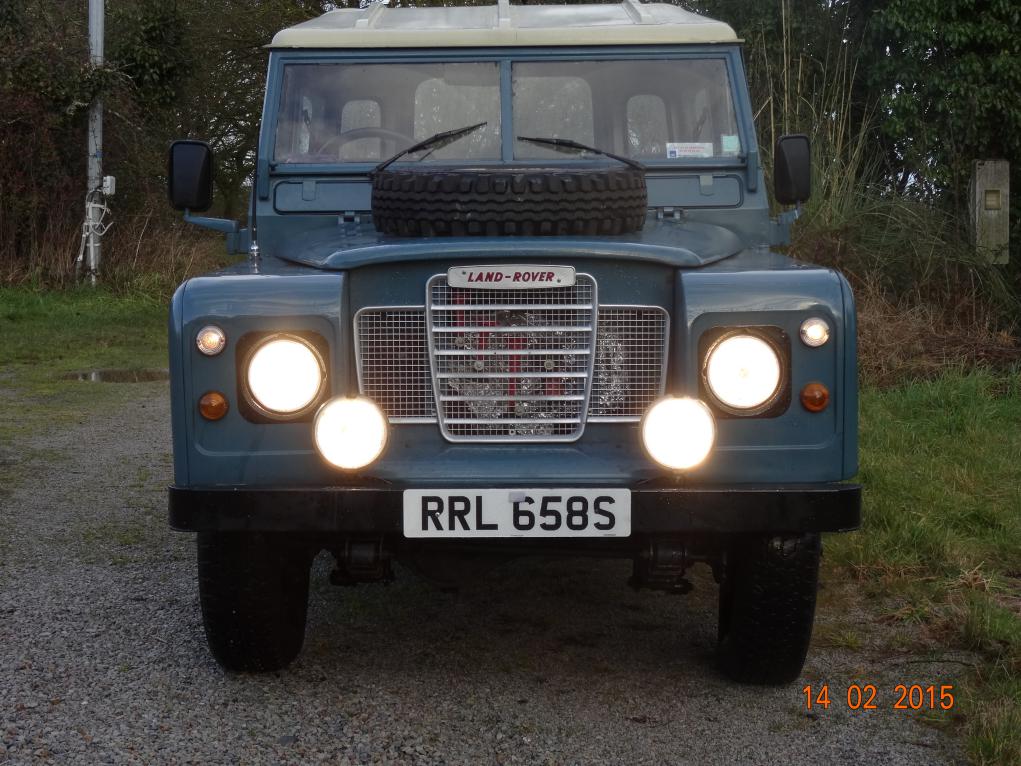
The two good spots have gone back on using two of the four holes used by the bull bar. I then changed the headlights to LHD units. Problem is they won't accept H4 bulbs so I "modified" the bulbs to fit. I'll have to revisit the headlamps as there are bits missing from the mountings and the lamps "wobble".
.jpeg)
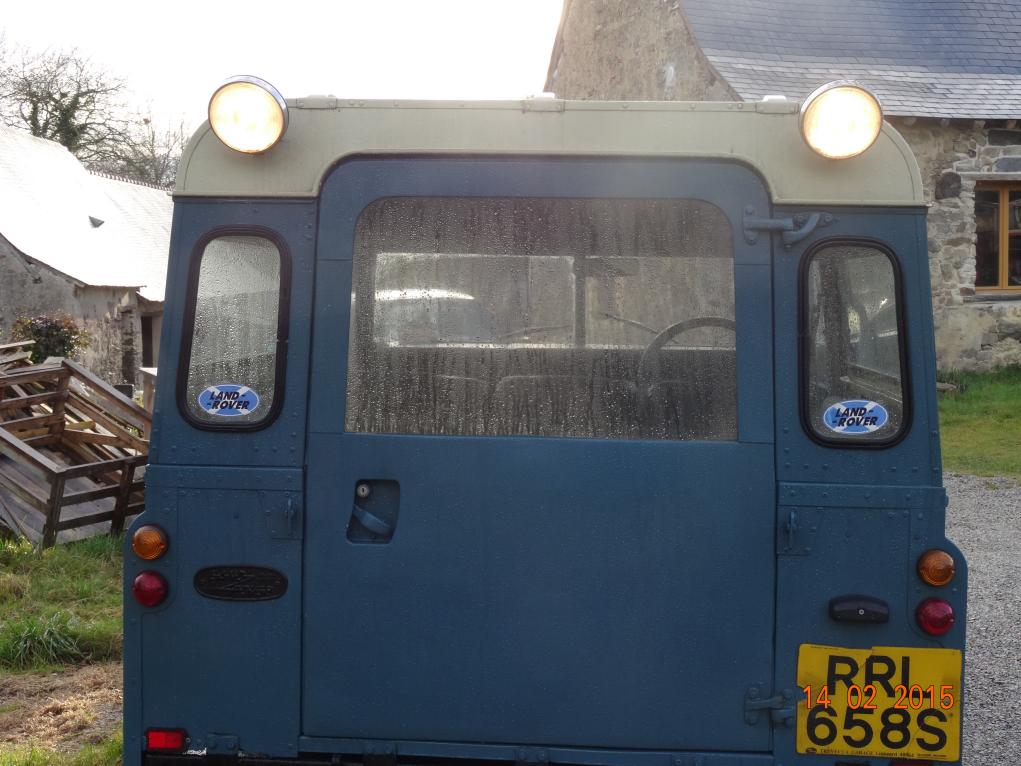
New front, better than before.... And you may notice that I've removed the mirrors fitted to the wings.
A word about that. For clarification lets call the owner before the previous "pyromaniac" (he set fire to the engine bay due to his dangerous wiring-insurer wrote it off as a Cat C). Anyway pyromaniac seems to have fitted two wing mirrors to the front wings when there are perfectly good door mirrors. Both the man I bought it off and I couldn't see why. But after a few miles I realised that the door mirrors were dropping down with the vibration (good vibrations?). When I got back I tightened the balls holding the door mirror swivels with an allen key and they're just fine now. Maybe that's why he fitted the wing mirrors. Who knows, if you saw some of his wiring I've taken off you wouldn't be that surprised.
OK, which do you like?
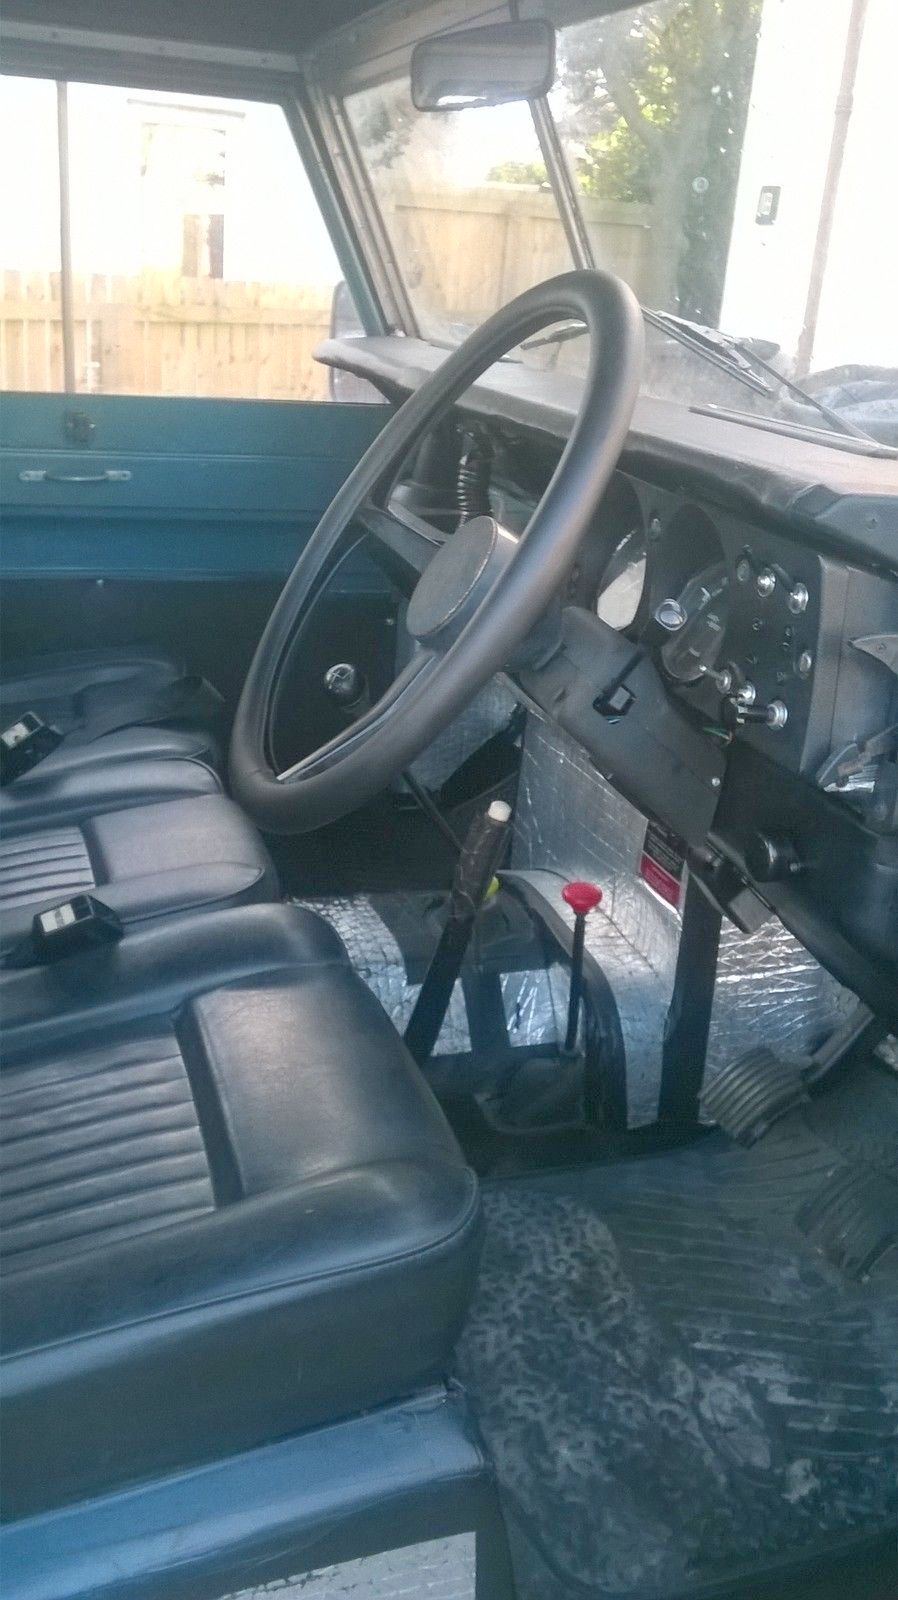
Then started checking the temperature and fuel gauges. There appears to be no problem as they both have a 10 v feed and the temperature gauge wire from the sender is OK and the fuel gauge wire has a resistance (between 0 and 1 on the ohmmeter). I'll test the temperature gauge sender unit in the morning. I packed up at this point as it was dark and getting cold. I'll attack it again in the morning. When I rummaged through the spares I found old temperature and fuel gauges so I may try them tomorrow. Other mystery is the ignition switch which has a starter position but has a separate starter switch. There are two unused terminals on the back of the switch but both are live all the time. Of course it may be a faulty switch but I'll test a bit more tomorrow.
OK, it's now tomorrow.
Worked on the car all morning. I took the dash down (again) and checked the live feed to the two gauges, OK, both have 10v. Then checked the feed from the sender units, OK a resisted feed to both. Then checked the gauges were earthed. Found the earth wires to the gauge housing went from one stem to another therefore no earth. Moved one to the speedo stem which has the main earth. The housing is now earthed but the gauges aren't. Closer inspection shows the gauges have paper gaskets between them and the housing. It should earth by the tiny screws but they are rusty. I make up and fit two earth straps from the gauge screws to the speedo earth straps. Still not working. Spend a few minutes trying to find the starter terminal on the ignition switch. There isn't one, may have broken off but I'll have to remove the switch to find out, can wait for warmer weather.
.jpeg)
Behind the dash.
Lunch and then I fixed the loose headlight, checked the lights (one sidelight not working and it's not the bulb) and the brake lights aren't working. I'll fix them over the next few days. I've still got to wire up the spotlights, wire is there just need to run them into the dash and fit a switch. I also need to fit a warning light to the reverse light switch. Reverse lights? They're bloody great big spotlights!
I go into town to post a letter, fill up and book an MOT. On the way back I notice the fuel gauge is working. I also think the temperature gauge is working but as Land Rover are overcooled and it just above freezing outside the gauge is reading just above C. I'll see if it's gone down in a minute.
.jpeg)
Fuel gauge at FULL and I think the temperature gauge is also working. By the way, the speedo is correct but you must add another 30,000 from the first speedo (which is in box of bits). So, 117,000 miles for a Land Rover, just run in! (and we added 1,000 miles getting it from Rosyth to here. Actually it's only 640 miles, seemed a lot longer)
Today, 11th February 2015 I was going to A) fix the front left hand side lamp, B) fix the brake lights and C) wire the front spot lamps in and do more research on why the previous but one owner fitted a horn button as a starter button when the ignition switch has a starter position. I suspect the tag for the starter wire has broken off. If so I'll solder a short piece of wire with a spade connector and refit the starter wire. However, I've done something to my right ankle and it hurts and I cannot walk on it. So I'll sit here at the keyboard improving the site (ie, mucking it all up).
My son-in-law Paul has decided I must remove the rear mud flaps and the side steps and it will double in value. I agree about the flaps, they're coming off, but if the side steps are genuine Land Rover options they'll stay on.
This picture shows both.
Friday 13th February (Ahhhhh)
No work yesterday or the day before as my ankle hurt so much I couldn't stand on it. No idea what I've done. This morning I've fixed the n/s/f side light (wiggled the wires), repaired the brake light switch. Not a quick job, I tried filing the push bit but in the end ran a drill through the case to get the push bit to operate freely. Then had to alter the nuts as they were making the push bit thight as the nut was tightened. It all works fine now. Then, just before lunch I tried to find the starter position on the ignition switch. It doesn't exist so I reckon Mr Pyro has mixed two switches. I'll fit a better starter button than the present horn push. I'm now in the middles of fitting a warning lamp for the reverse lamps, I lighting switch to operate the dash lights and the interior lamp and the front fog lamps. So, no good wasting time writing it up, I'll get working......
Finally at 1900 I get it finished and do a final test before putting the dash back in. Reverse lights don't work! I'll sort it in the morning then put all the tools and wiring and connectors back and give it a road test to see if it drives better with 25 psi in the tyres instead of the 35-40 that was in them before. I'll take some pictures tomorrow.
Thinking about this over night I realise that I've put the reverse lamps on the panel light switch whereas I wanted the interior light on that switch. So this morning (Saturday 14/02) I moved the reverse lamps to the fog lamp switch and wired in a length of wire for the interior lamp. It's coiled up on the top of the dash for now. All checked so I put it all back and .... notice the fuel and temperature gauges are not working. Lunch and then take it all down again. Turns out, after some testing, that the new voltage stabilizer isn't working. So a rummage in the box of spares and refit the original and hey presto they work. So, off to the super market to get some fruit and then Brico to get some rat poison and a trap (for the "thing" that's been running around upstairs the past few nights. It's probably a mouse but it must have hob nail boots on).
The front with spot lamps working and LHD headlights installed. I hope Paul likes it.
Rear fog lamps working. I know they are illegal in the UK and I suspect they are in France but very handy when you're working on something at night.
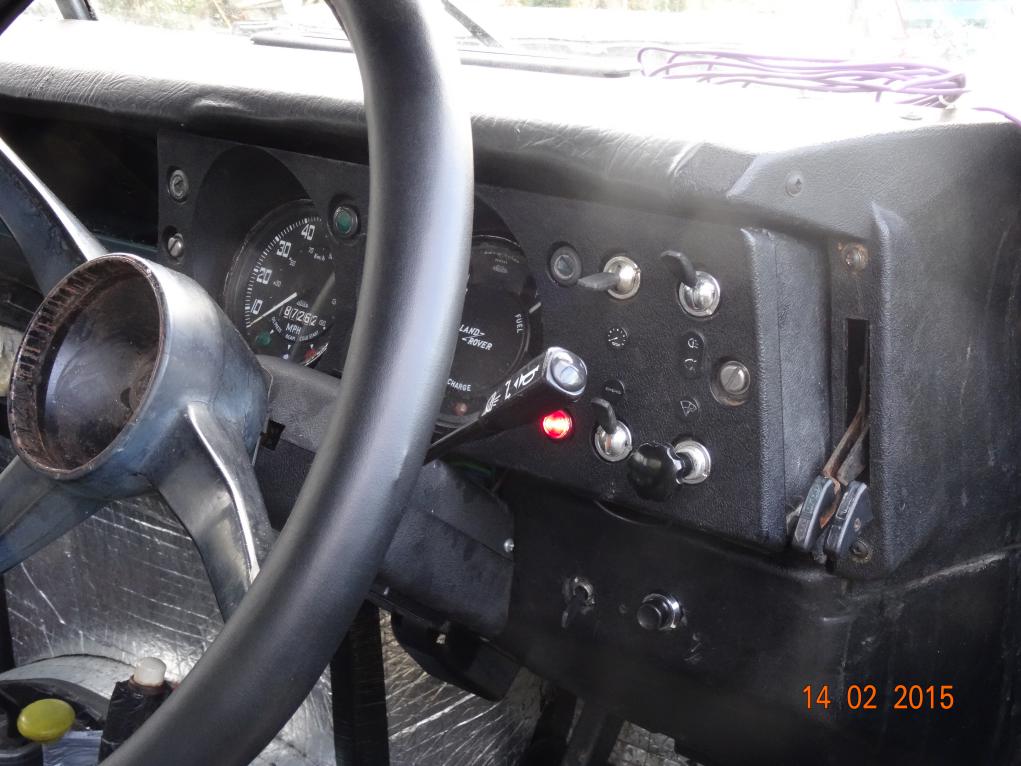
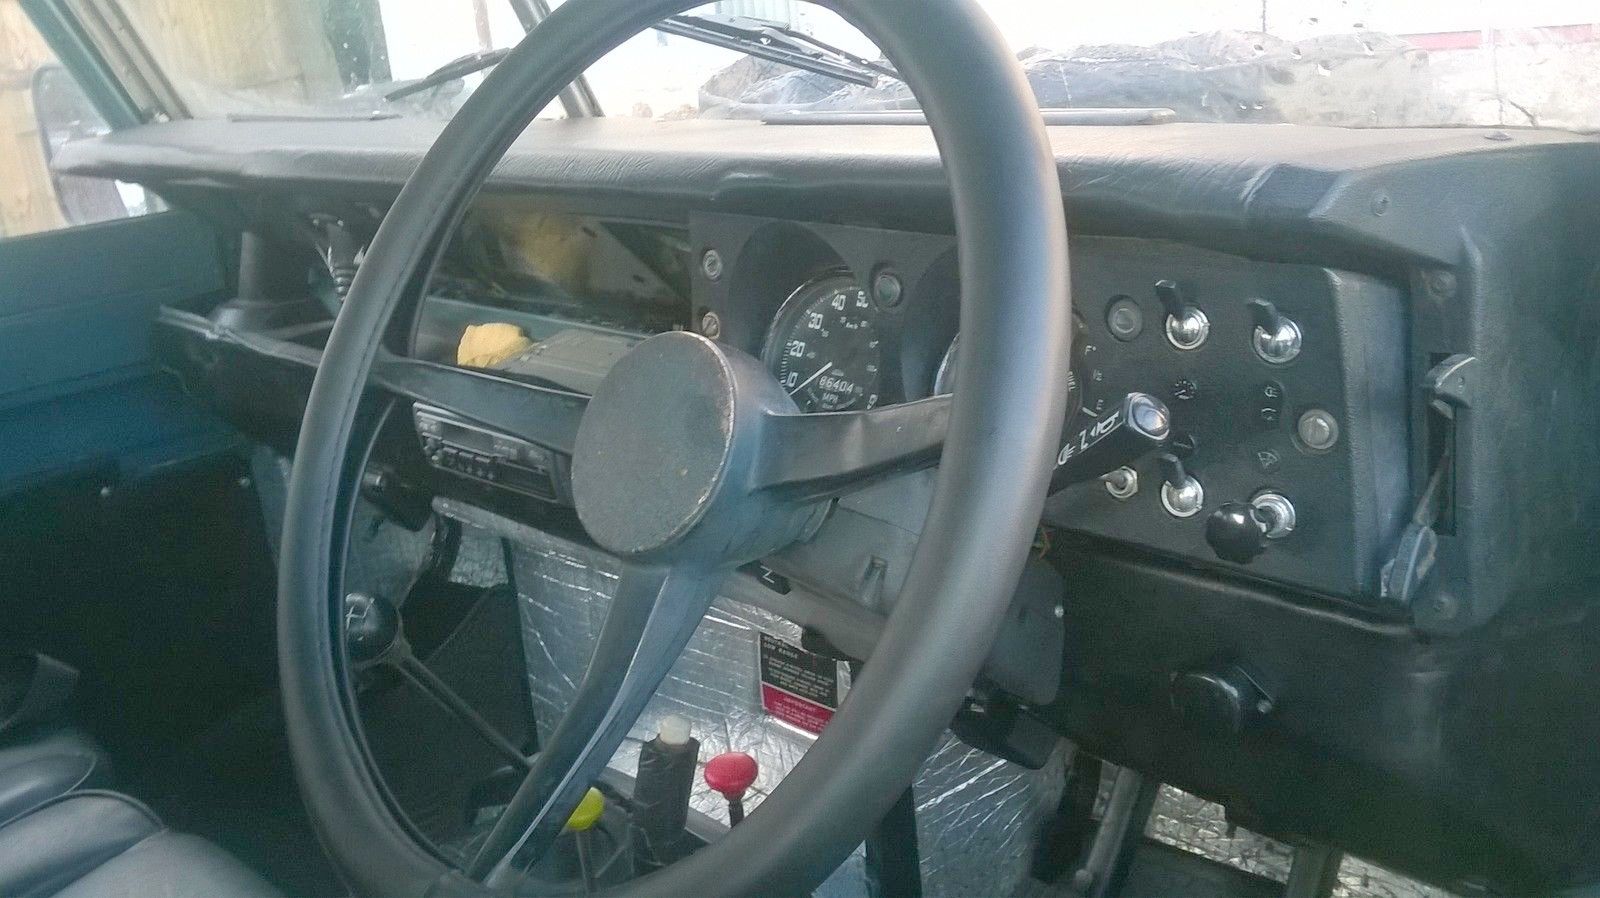
The red light on the dash (just under the indicator stalk) is the reverse lamp warning light. The bottom toggle switch is: Reverse lamps to the right (where it is now) and spot lamps to the left, all off in the centre. The button to the right of this switch is the starter button. The top right switch is a normal light switch off-side-head. To the left of that is the switch off-dash lights-interior light. The coil of wire for the interior light can be seen on the dash top.
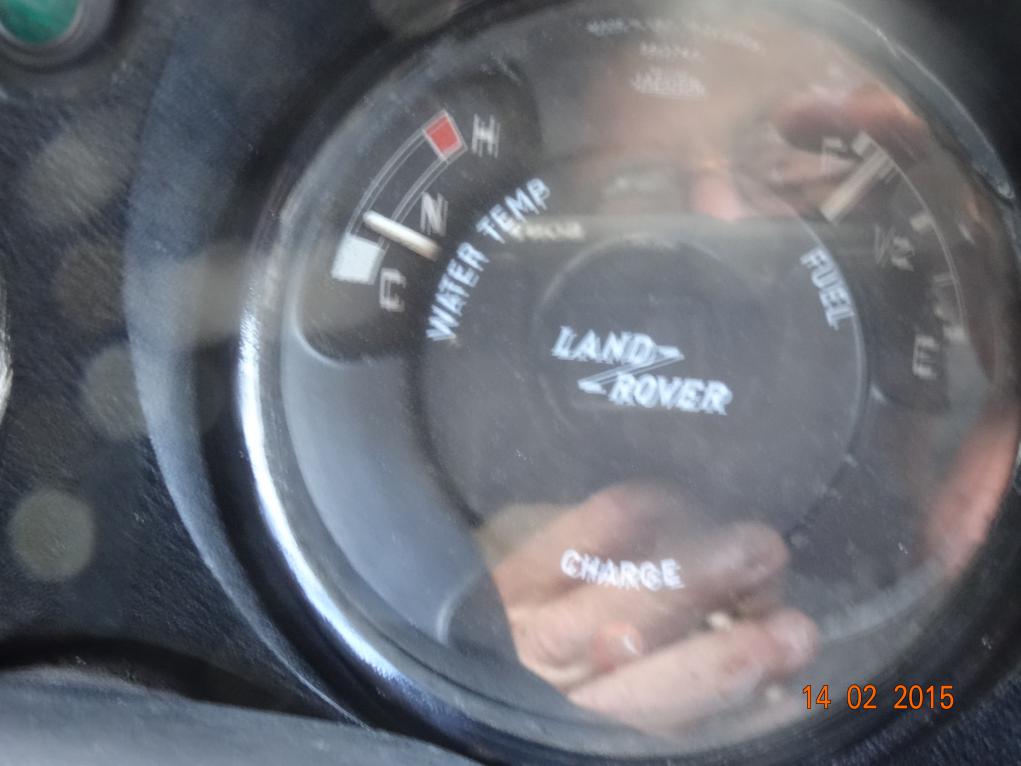
Just to prove the gauges work now, excuse my fingers holding the camera!
Tomorrow, I must look at the steering, Dropping the over-inflated tyres from the 35/40 to 25 psi has made it much better but I think the steering idler box or steering box may be dry of oil and "sticking".
Then I've got to remove the dash (again!, it'll learn to do itself soon) to repair the washer switch which has a poor contact inside it, wire in the cigar lighter and wire in the interior lamp. After that I may have to remove the front wheels and drums to check the brakes. They are not working well, the n/s locks when braking hard and the whole lot judder when reversing. I suspect the shoes are on the wrong way round.
I will also have to take the fuel tank down and clean it out. Three time the car has stopped with all the signs of running out of petrel. Wait 10 minutes and away it goes. I suspect there something floating around the tank which then blocks the outlet and moves away when the pressure is released.
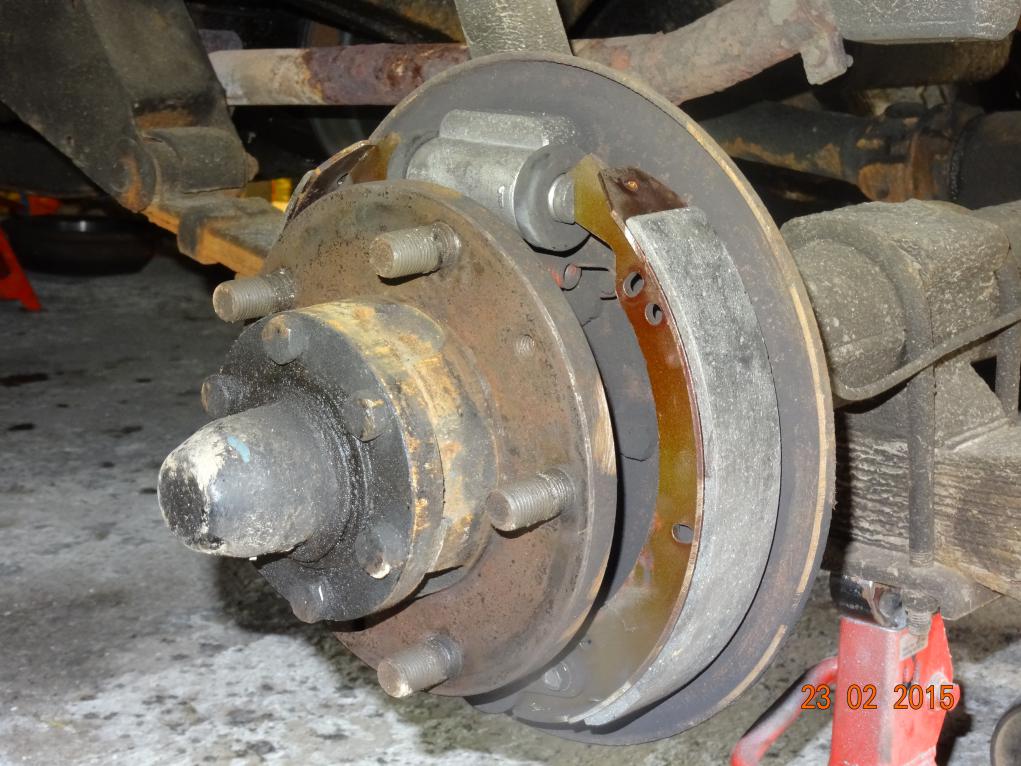
On Sunday 22nd January 2015 I looked at the brakes again and didn't find much wrong. When I went to try it the pedal went to the floor and the car slewed violently to the left when braking. I suspected the o/s/f wheel cylinder was leaking. I gave up and came in.
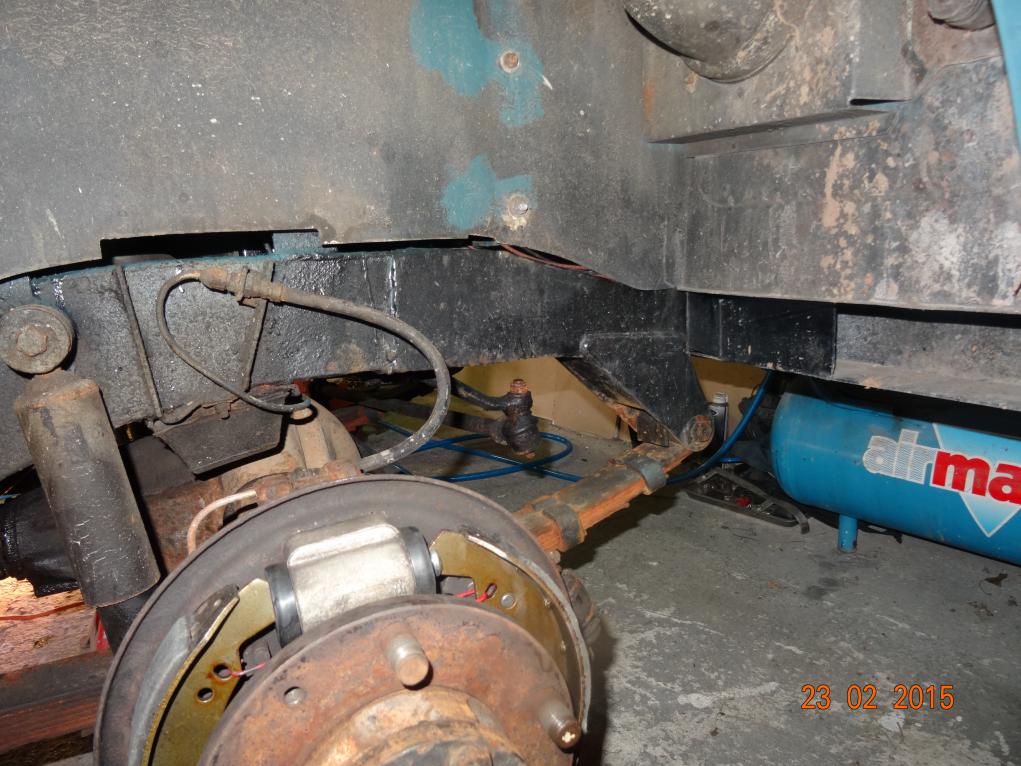
This morning, 23rd January, Lynne and I cleared all the stuff out from the wall opposite the workshop doors and got the Land Rover in so I could get all four wheels off. We then jacked it up on axle stands, got the wheels and drums off. I found the o/s/r had axle oil on the shoes. This was surface only so I cleaned off with white spirit (until clean cloth stayed clean). Then roughed up the shoes with a wire brush in a drill.
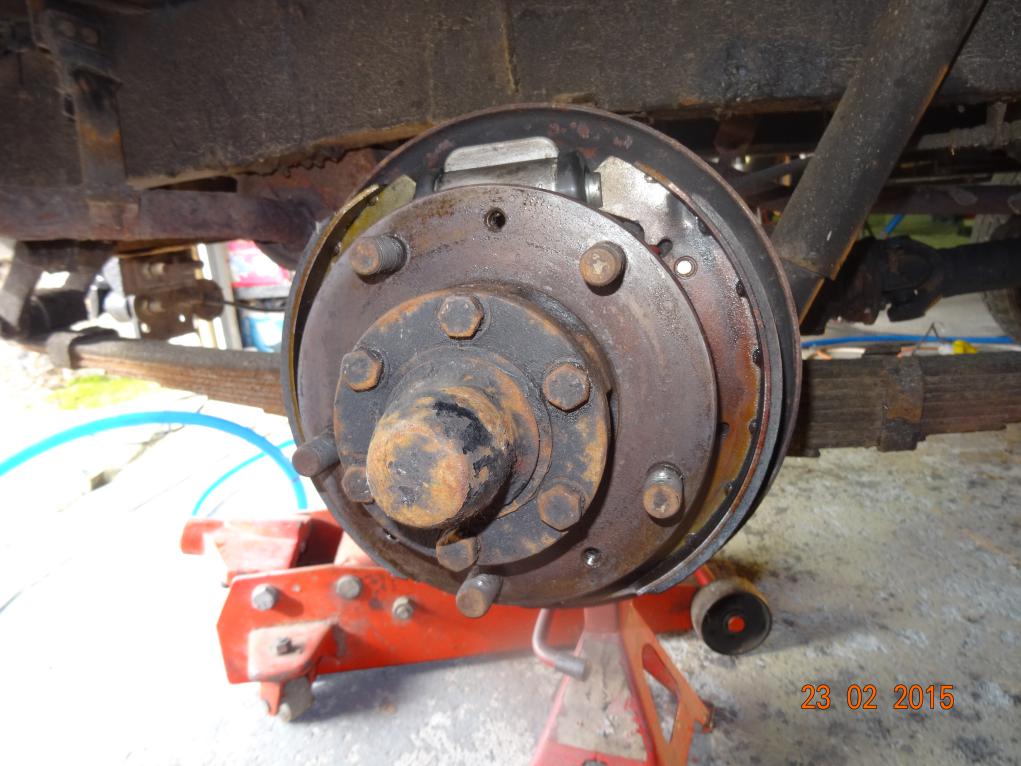
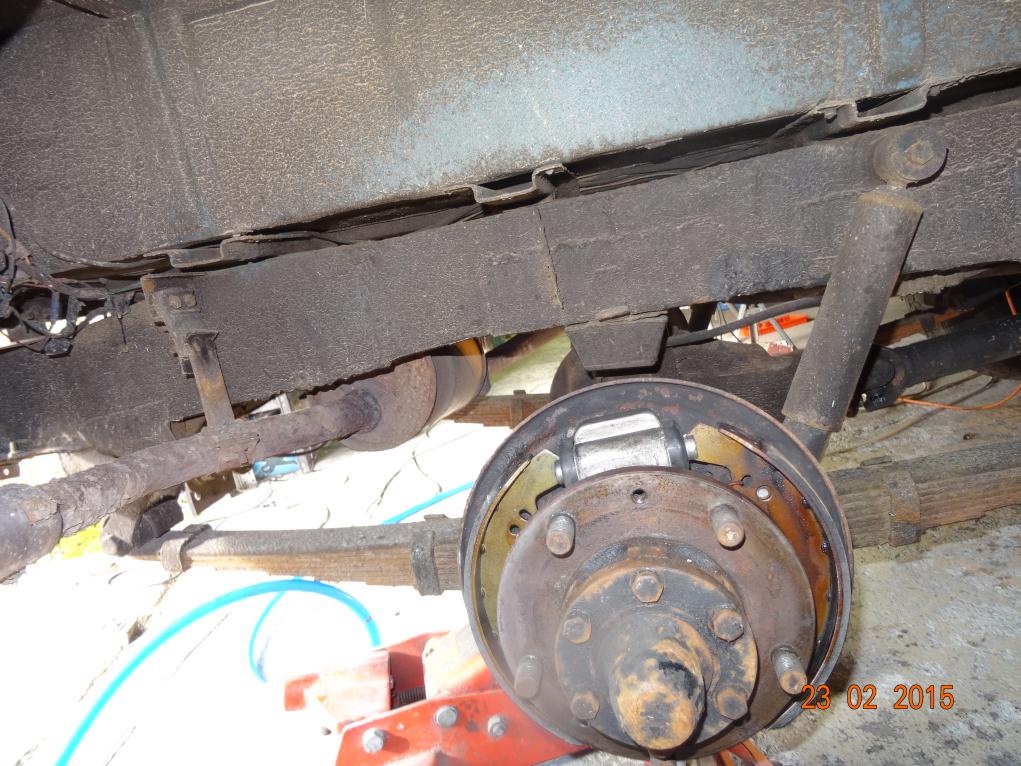
The o/s/r brakes and chassis. Looks not that old to me.
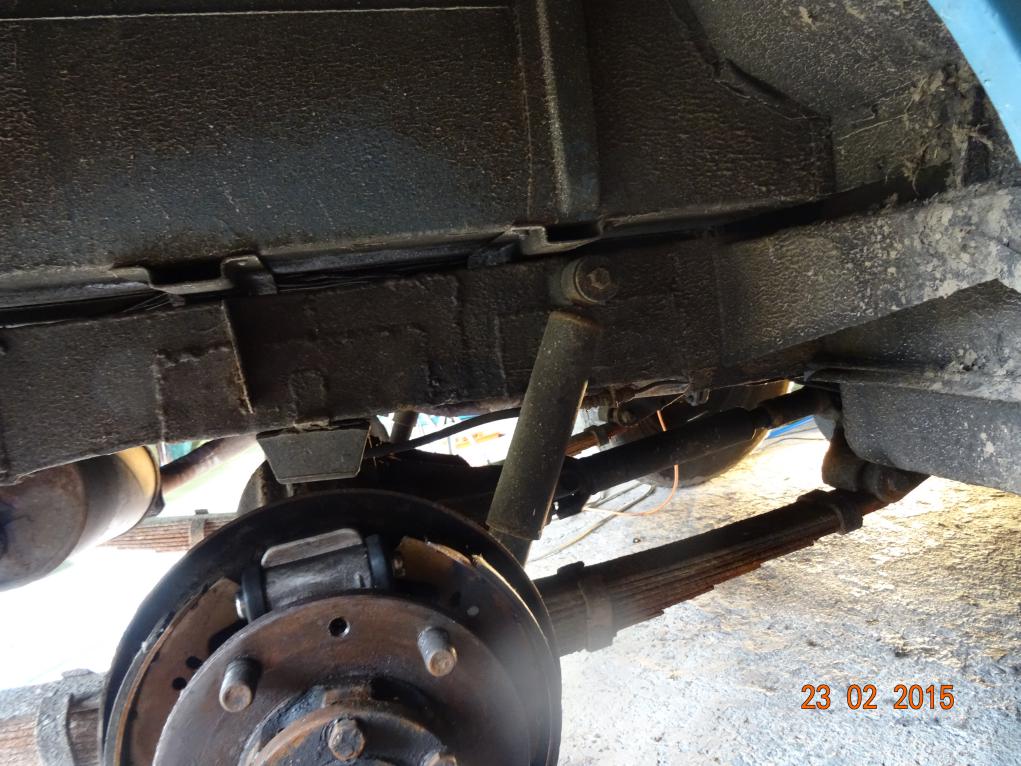
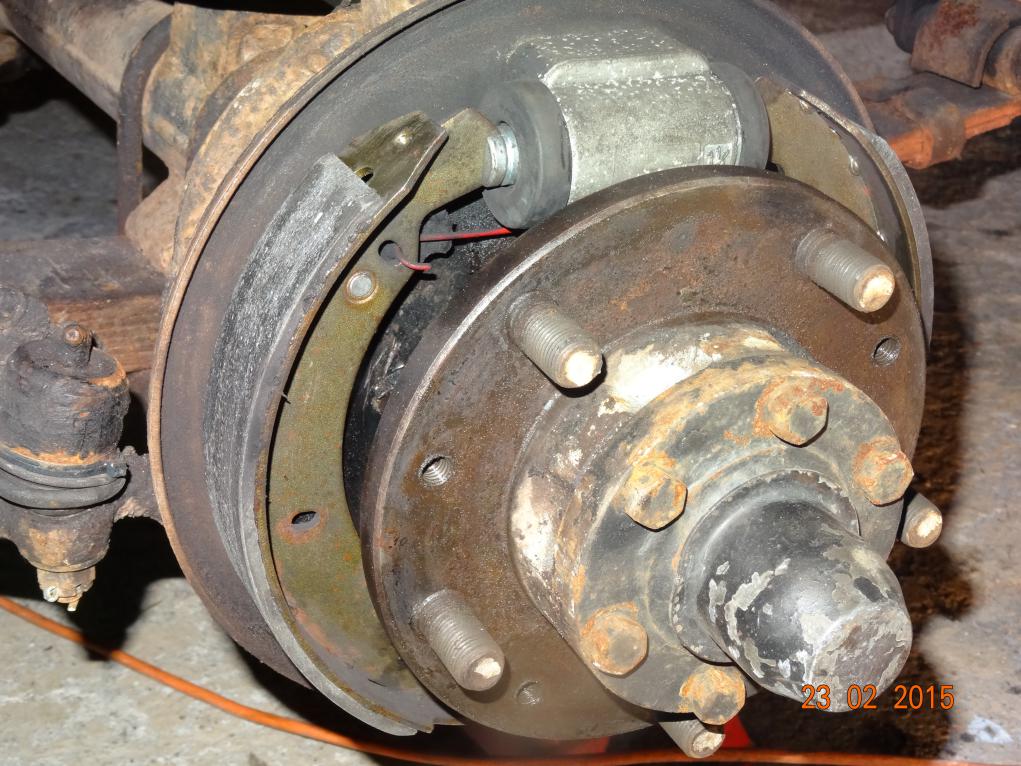
o/s/f brakes and chassis
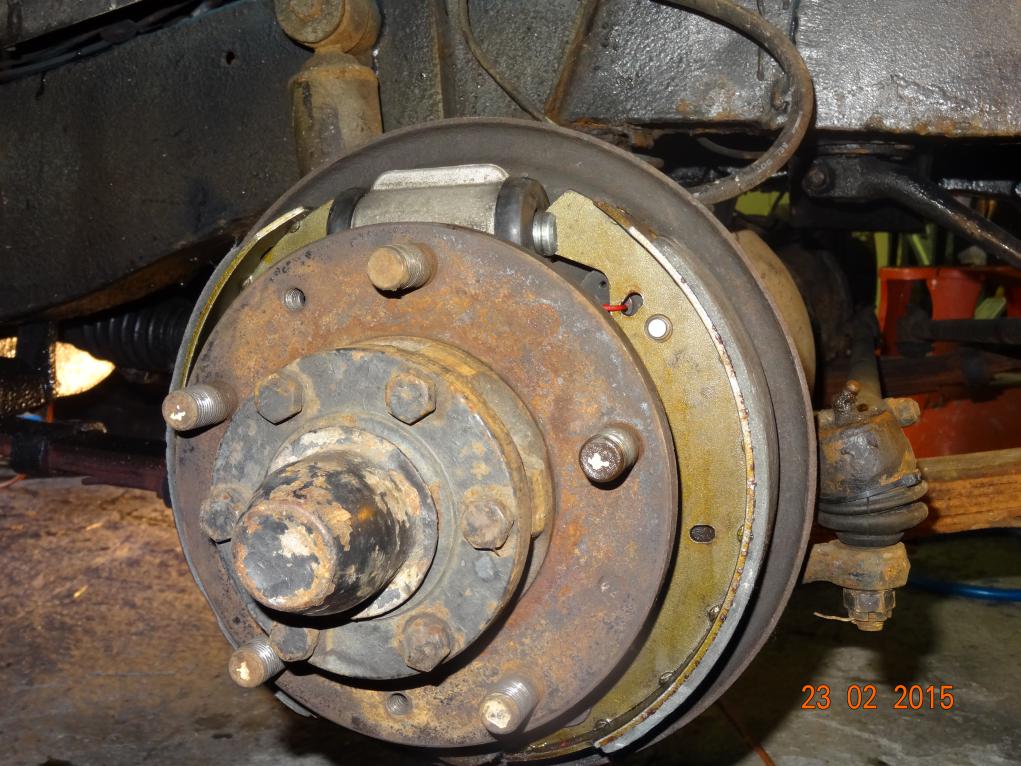
n/s/f brake and chassis
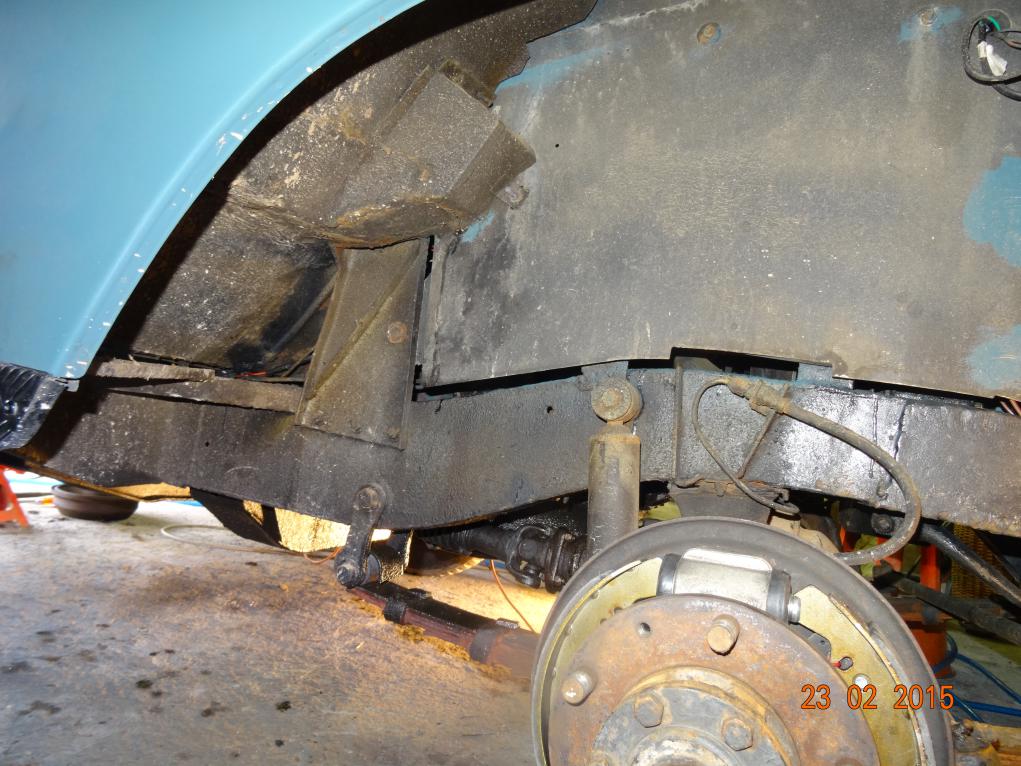
n/s/r brake and chassis
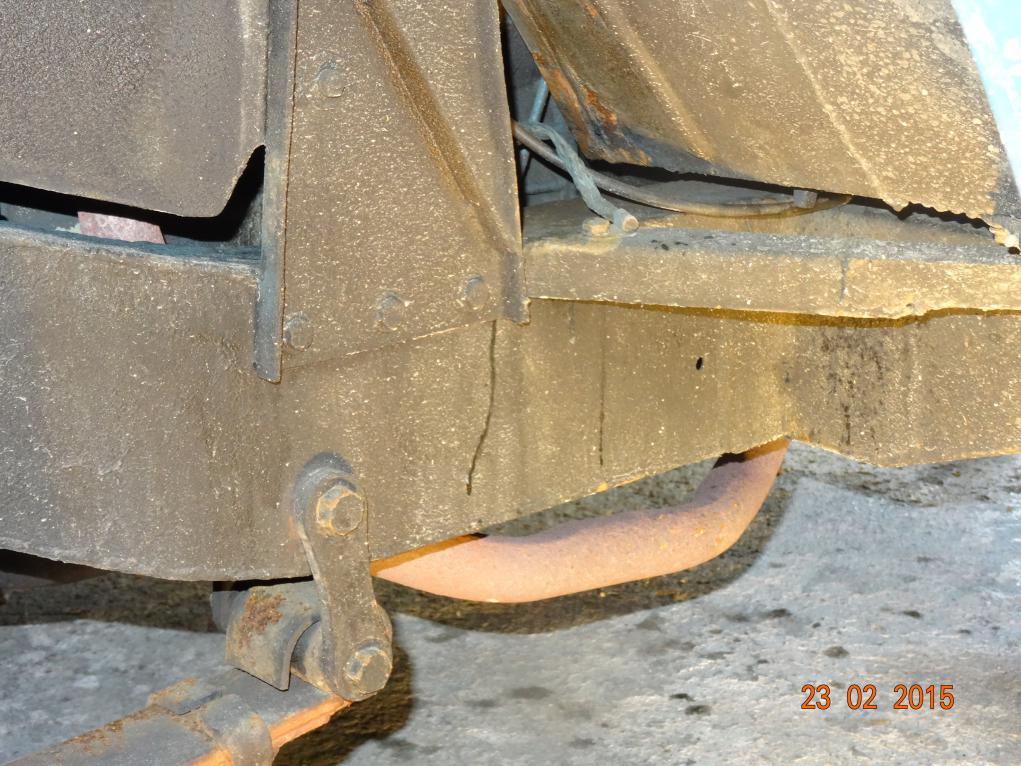
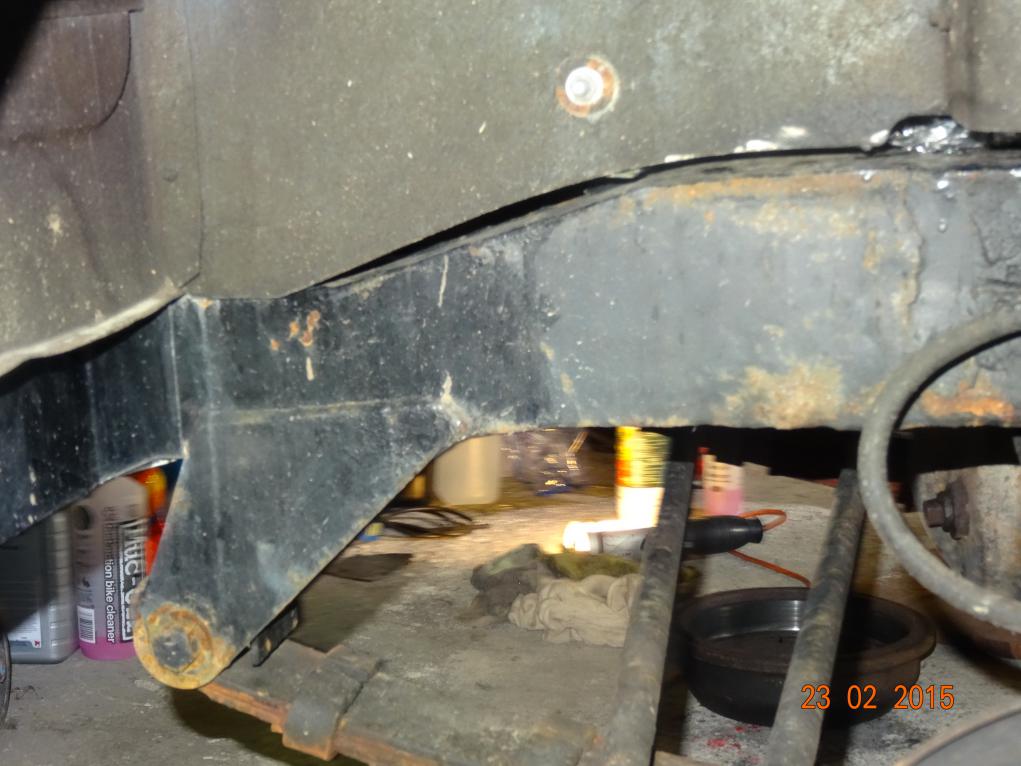
So, what do you think of the chassis. Looks like it's not the original and not that old too.
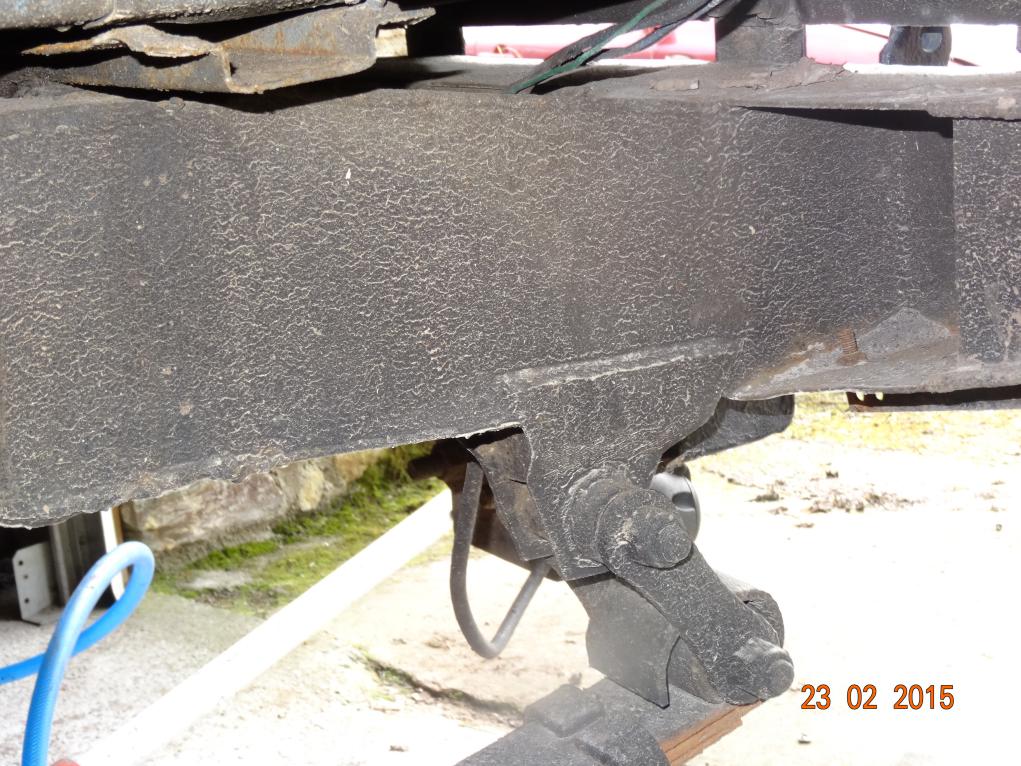
Friday 6th March 2015, the Land Rover passes it's French MOT (called a Controle Technique or CT)
These pictures were taken whilst I was waiting my turn for the CT - I turned up an hour early! I needed a picture of the chassis plate for the FFVE, the organisation that will certify the car was made before EU regulations and therefore doesn't have a letter of conformity.
.jpeg)
The rear, with 2 tonne jack and a spare can of petrol.
.jpeg)
I know, the number plates is broken.
.jpeg)
.jpeg)
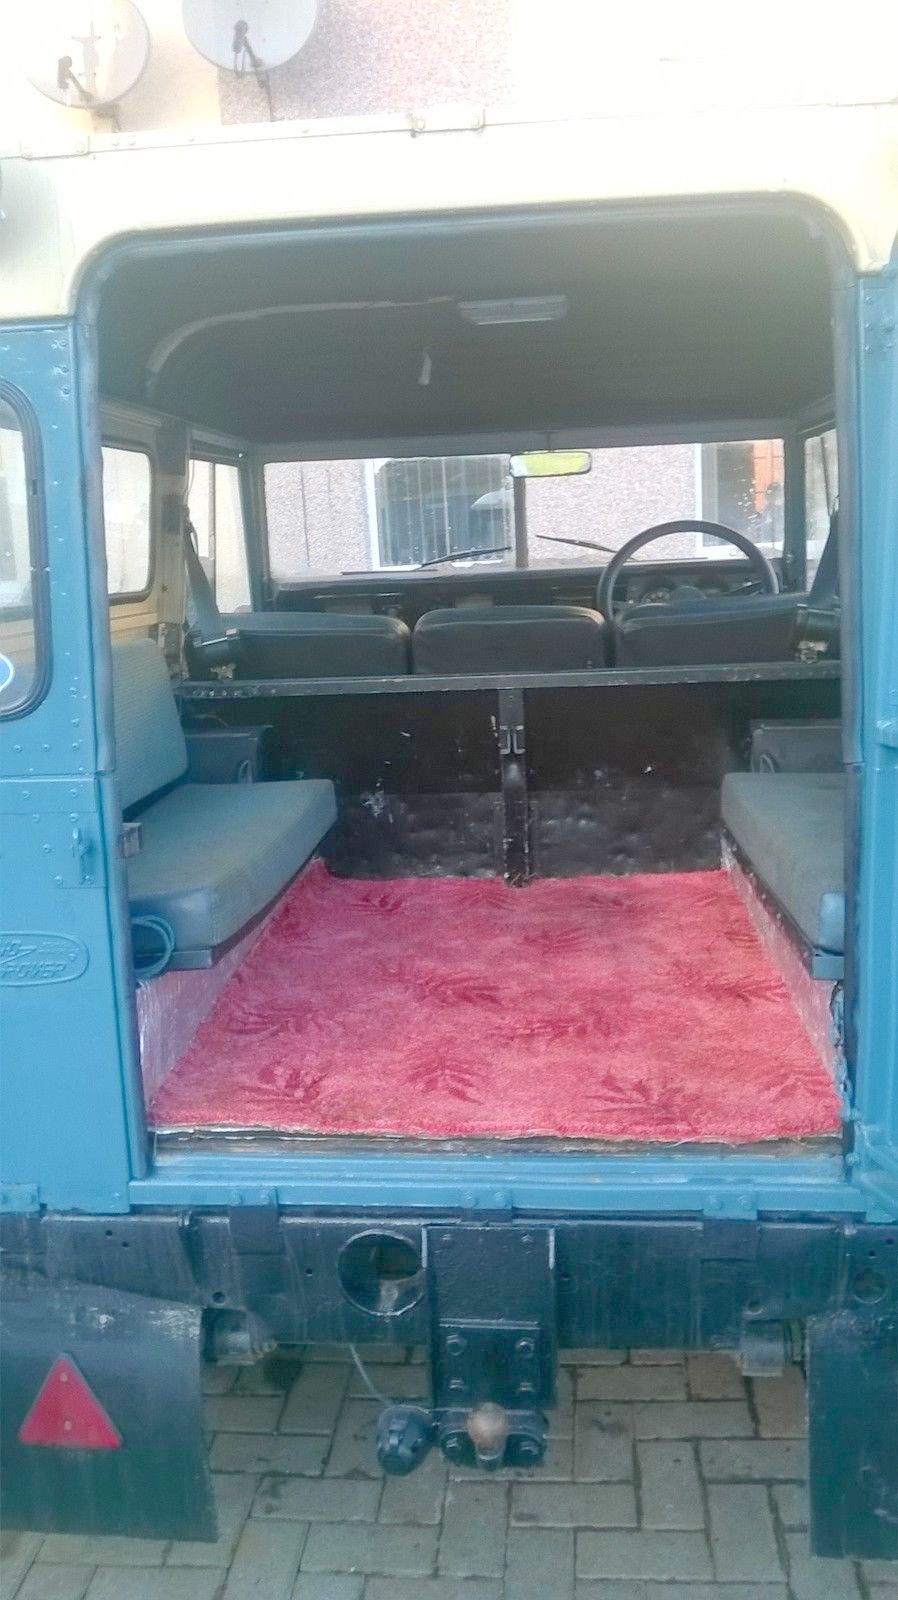
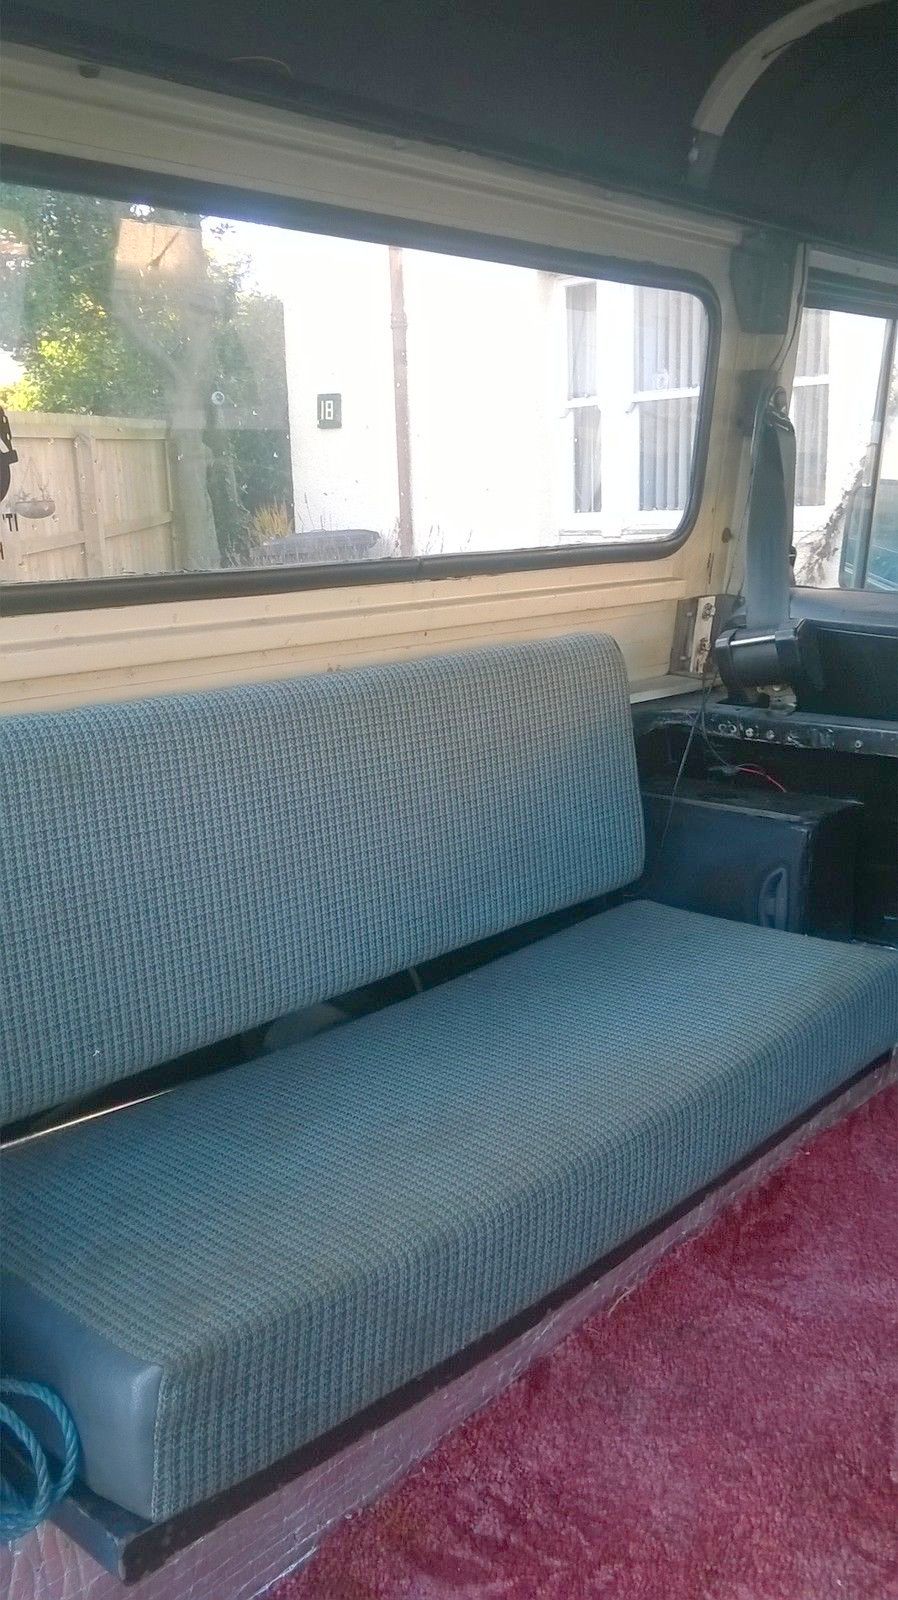
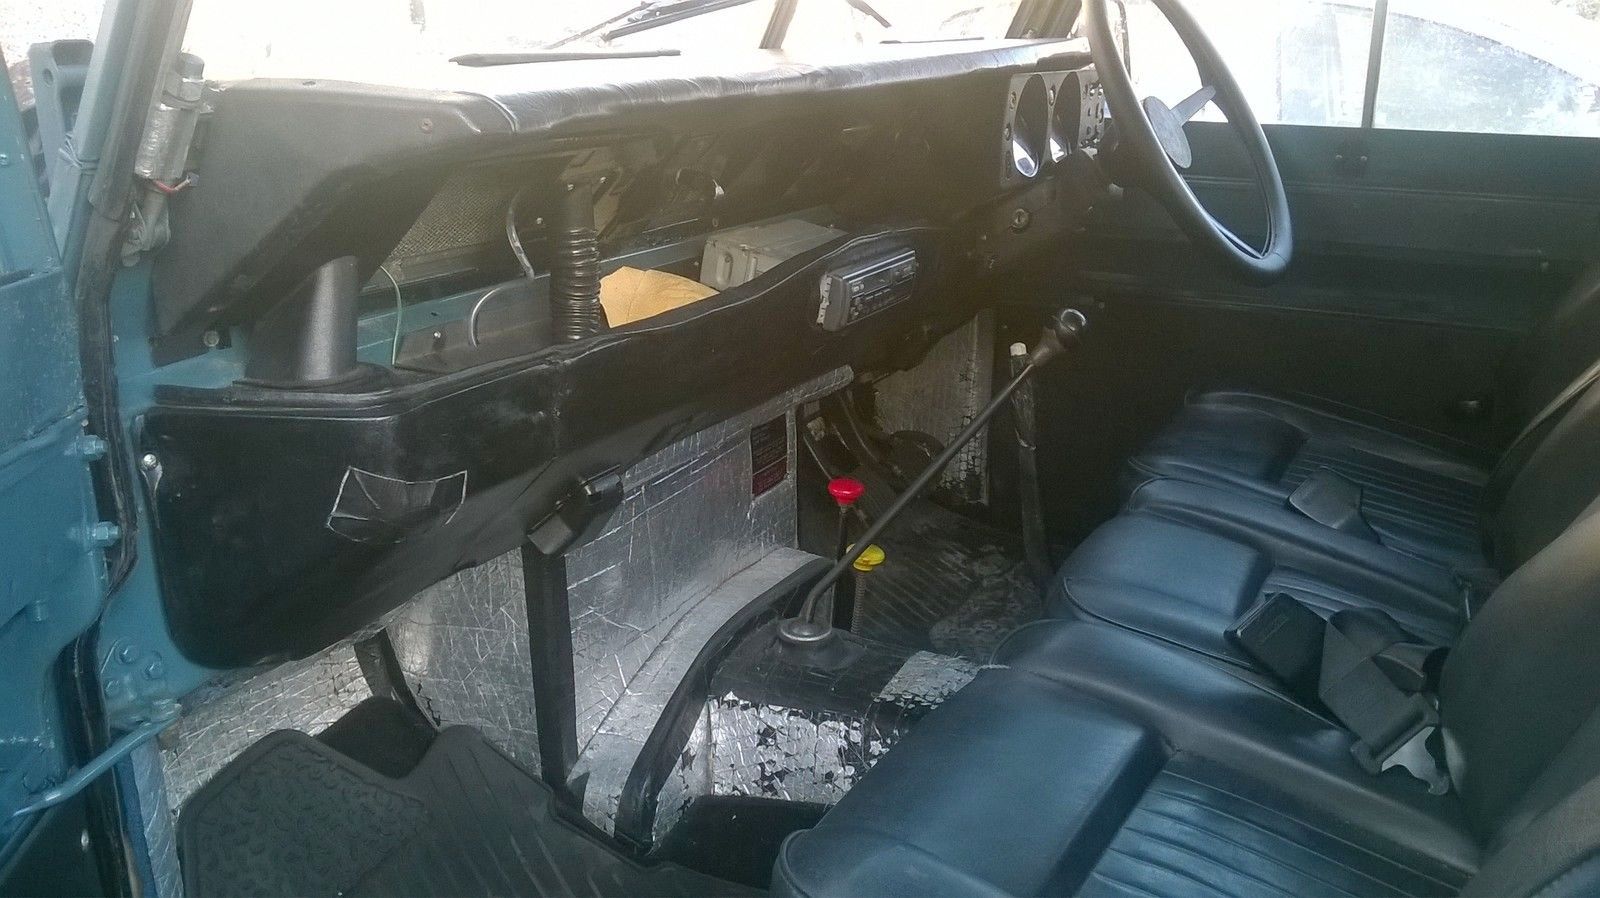
Interior. The radio panel will be covered in black vinyl and the top edges cut away to make it fit. Previous owner has laid all the silver backed soundproofing so I've ordered a set of carpets to fit. I'll also glue a white headlining on as the roof is strips of sorbo rubber sound proofing.
.jpeg)
.jpeg)
.jpeg)
.jpeg)
Chassis plate. It agrees with the V5c.
.jpeg)
In case you're wondering, the thing hanging down over the fog lamp is the door handle. I'm sat inside having a coffee.
.jpeg)
Question I'm asking myself at the moment is should the hardtop sides be body coloured or Limestone, the same as the roof. I've seen both but will probably keep it as it is as that appears to be how it started life.
.jpeg)
Must get the wheels cleaned and painted.
April 2015
I've spent ages trying to free off the steering idler box but no matter how much grease and Plus Gas I pump in the steering is still very heavy and I cannot drive in a straight line. I then decide to take the idler box out and strip it to free off. When I get the bottom arm off I realise it isn't seized, it's something else! So I take the O/s track rod end off and the steering becomes much easier, only turning one side. Remove the filler plug of the O/S hub and fill it with EP90. It was empty, same on the N/S. I connect the TRE and sit in the car turning the steering from left to right and back again for about 10 minutes and it's getting easier.
In the middle of all this I fit new door seals to the front doors.
.jpeg)
Amazing how many tools are needed to change a door seal. The original seals had a metal strip running inside the seal and were riveted on. The new ones are glued on.
.jpeg)
A box of old seals.
Then, on Saturday 25th I fit the new carpets and the white headlining.
.jpeg)
The drivers floor mat is the old one, mustn't get the smart new one dirty.
.jpeg)
Same on the passengers side, the mat is the old one.
.jpeg)
Headlining at the front. Very difficult because the roof isn't "square". The ripples should straighten over time. I've yet to cut a strip for the roof bar.
.jpeg)
Just the back end to trim, the ripples should come out as the glue dries.
I'm watching "Final Score" at the moment, when all the results are in I'll go and finish the roof lining and give it a road test to see if the steering is better.
I may well get a day off tomorrow, after I change the oil and filter on the Land Rover. Monday morning I've got some phone calls and emails to deal with and in the afternoon I'm visiting the optician.
Tuesday is MG day, the day the TC arrives. So the Land Rover is finished for now, the Caterham is 99% done (other than polishing after spraying in clear lacquer. ) I'm waiting for two garden hose ends to fit to the new copper oil pipes to stop them weeping. I've done the top two but may wait until next year when I change the oil as I will need to drain it to fit the new pipe ends.
So, a year and 4 days after collecting it (it is 8th February 2016), I finally get round to fixing the steering. It's been a nightmare to drive as the front hubs are seized. I freed off the near side hub with Plus Gas and am fitting a new hub kit to the off side. I'm also fitting a new petrol tank as a seam has rusted away and it's leaking. I found out have filled it with 80€ of fuel, I'm still crying about losing it all.
.jpeg)
Start by taking the wheel and drum off. See I am smart!
.jpeg)
The bottom of the brake shoes.
.jpeg)
The steering stop bracket. Just so I know where it goes.
.jpeg)
The hub in the vice to remove the bottom steering pin. Dirty, or what.
.jpeg)
All the fixings cleaned on the wire brush. Took over an hour but worth it as it will go together much easier with it all clean.
.jpeg)
Cleaned up axle flange with back plate hanging around.
.jpeg)
The hubs, swivel and other parts on the bench having been cleaned.
.jpeg)
Fuel tank with fittings removed.