
HOME WELCOME SEVEN ELAN ELISE MIDGET TYPE R MINI FAMILY GUEST BOOK
Carbon upgrade Engine upgrade Other upgrades Rear brakes 2004-2006 upgrades Accident rebuild pages Refurb 2014-15
![]()
Having spent a fortune on the Engine and suspension upgrades in 2002, I decided the only way to go faster (well to get there quicker, to be pedantic) was to lighten the car. I had already fitted an aluminum bell housing so when I heard about Richard-in-France and his growing carbon fibre parts list I rang him. After passing the time of day I said, OK send me everything you've got.
There were times when I nearly regretted this, cars in bits and the suns shining. I took the opportunity to remove some of the excess wiring from under the dash, but ran out of time to do what I planned which was to connect all the dash wiring to the loom via block connectors so the dash can be fully removed.
Richard has promised to make bonnets and then to make the side and rear
panels in carbon. I've volunteered to be the guinea pig and, hopefully I'll end
up with a full CF car. My target is to get the weight down below 500kgs. That's
about 40kgs to lose.
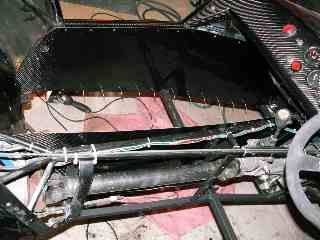
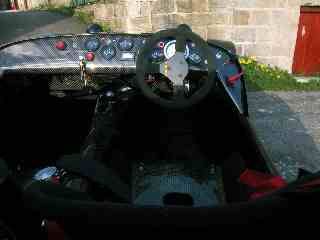
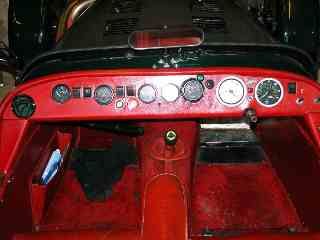 This is the interior before carbonisation.
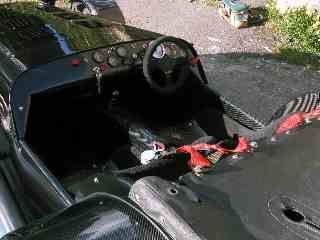
And this is the carbon version....
 This is how it all happened. The dash, you should have seen it 2 hours
earlier!
This is how it all happened. The dash, you should have seen it 2 hours
earlier!
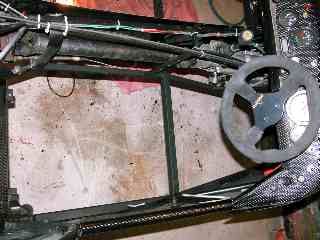
This could be Fred Flintstones car!
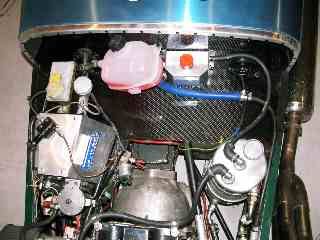 The engine side
Coming together now. I couldn't have done this job without the air rivet gun. I used nearly 500 rivets!
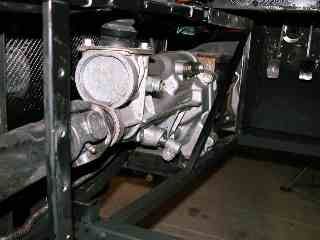 The gearbox from an unusual angle.

The back panel in position
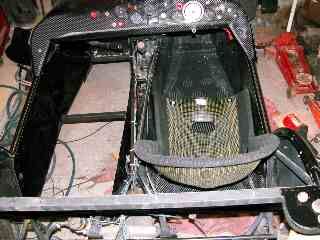
First Tillet seat in position on half carbon floor. It was at this point that impatience got the better of me and I took car up the road to try new seat. I had bonded the nearside carbon wing on a few hours earlier. The polymer wasn't set, the wing flew up and landed in front of the car and I RAN OVER IT!
Getting there.
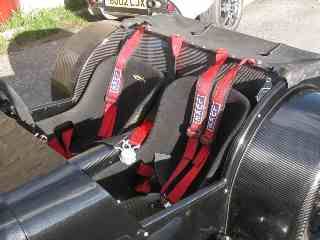 Two seats in now, and most of the rest.
and from the rear
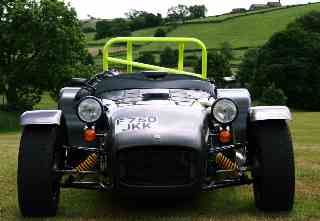
The whole thing, from the front, in it's new livery. June
2004
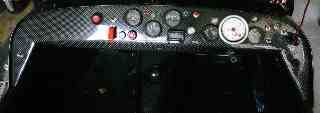
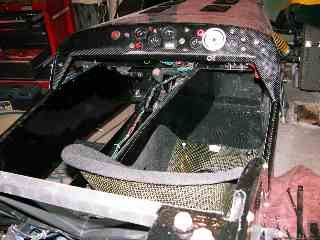
The dash. The "design" is aimed at having the switches used most around the steering wheel arc. The 3 important dials (oil pressure, water temperature and tacho) are visible through the steering wheel. The other dials are...
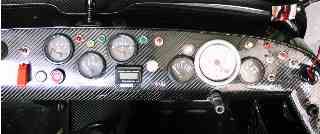 .....from
left to right, volts, fuel and oil temperature. The digital Speedo is the oblong
meter below oil temp. The switches are, from left to right, (top) rad fan
override, (bottom) aircraft style ignition, key ignition, BIG RED starter, the
silver button is horn and above is the left indicator button. The big white
warning light above the oil pressure gauge is low oil pressure (lights at 35psi)
The two tiny switch & button below horn button are the programme switches
for tacho. On the far right are the right indicator button, the silver push
switch is the on/off Speedo switch, and the small red button is the Speedo
programme button. The 3 silver toggles are light, headlight flash and dip. The
socket with the plug and wire is for battery conditioner and, finally, the
battery isolator switch (without big red key). The dash was redesigned in 2007
and can be seen in the Accident rebuild pages.
.....from
left to right, volts, fuel and oil temperature. The digital Speedo is the oblong
meter below oil temp. The switches are, from left to right, (top) rad fan
override, (bottom) aircraft style ignition, key ignition, BIG RED starter, the
silver button is horn and above is the left indicator button. The big white
warning light above the oil pressure gauge is low oil pressure (lights at 35psi)
The two tiny switch & button below horn button are the programme switches
for tacho. On the far right are the right indicator button, the silver push
switch is the on/off Speedo switch, and the small red button is the Speedo
programme button. The 3 silver toggles are light, headlight flash and dip. The
socket with the plug and wire is for battery conditioner and, finally, the
battery isolator switch (without big red key). The dash was redesigned in 2007
and can be seen in the Accident rebuild pages.