
HOME WELCOME SEVEN ELAN ELISE MIDGET TYPE R MINI FAMILY GUEST BOOK
Carbon upgrade Engine upgrade Other upgrades Rear brakes 2004-2006 upgrades Accident rebuild pages Refurb 2014-15
![]()
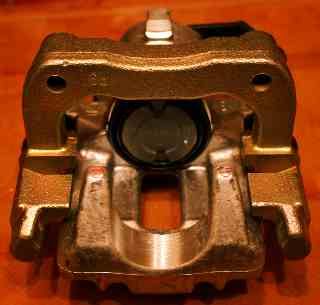
In Autumn of 2004 I decided it was time to do something about the heavy and inefficient rear brake calipers. The cast iron, single piston caliper was originally fitted to Ford Sierra's. The problem I came up against was finding a twin piston, lightweight caliper with a handbrake. This proved impossible, though, I must admit, I didn't look too hard.
I decided to fit AP Racing 2 piston units without a handbrake and a line lock to the transmission tunnel to use as a handbrake. The challenge was to make the fitting of the caliper such that it would be easy to swap back to the handbraked Sierra units quickly when due for an MOT
I have used swing bolts (used to hang large gates). I needed to bend the eyes
in 3mm each so the bolts which come through the de dion ear lined up. I will
also need to make a small adaptor brake pipe so the main pipe retains the
fitting for the Sierra caliper.
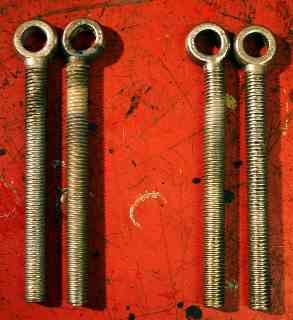 The swing bolts. The inside 2 are bent inwards 3mm each. There was some
confusion about this. Some thought I had welded the eye to the bolt. As can be
seen in this picture this is not the case. I was going to MIG weld the washers
to the base of the bolt to stop deformation of the washer. However, as you will
see below the idea was abandoned.
The swing bolts. The inside 2 are bent inwards 3mm each. There was some
confusion about this. Some thought I had welded the eye to the bolt. As can be
seen in this picture this is not the case. I was going to MIG weld the washers
to the base of the bolt to stop deformation of the washer. However, as you will
see below the idea was abandoned.
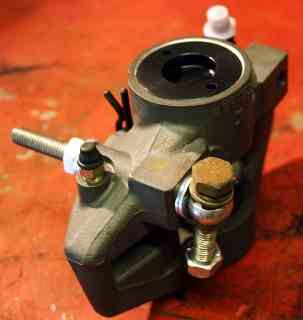 A
swing bolt in position with the bolt which goes through the De Dion ear going
through the eye
A
swing bolt in position with the bolt which goes through the De Dion ear going
through the eye
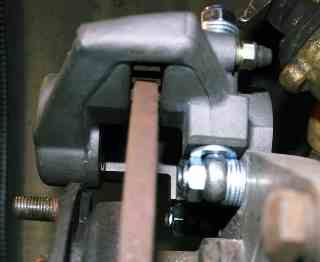 The
finished product showing the caliper in position. Washers are used to adjust the
depth & height of the caliper
The
finished product showing the caliper in position. Washers are used to adjust the
depth & height of the caliper
After some question about correct engineering practice, I
have now made ali block mounts. The caliper will mount to the 2 bolts which hold
the hub flange to the de-dion ear at the forward edge. This has the added
advantage of the bleed screw being mounted at the top. Final machining of the
cut-out will centre the unit on the disk without the need for packing. The brake
pipe will have a union fitted and will fit the existing pipe. To change calipers
back to original will remove 2 bolts and undo one pipe, fit old caliper with 2
bolts and refit pipe to old caliper, bleed and refit handbrake cables. I
trust everyone is happy with this solution. I have designed a transmission
handbrake, or rather, sourced the components to make it. The fitting of the calipers
and the new handbrake will be done from 11th December on. If the new handbrake
works the calipers will not have to be changed over for MOT.
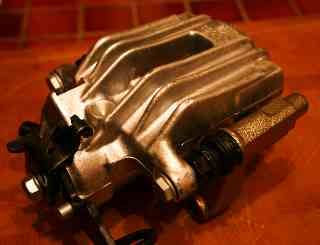
Another rear brake project involves the VW Golf rear caliper. This unit is lighter then the standard Sierra unit and, I'm told, works better. I'm investigating how easy it is to fit for members of the Lotus 7 Club.
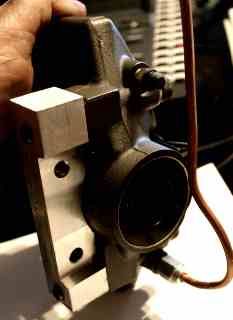
The prop-shaft brake
I finally got round to making the prop-shaft handbrake. An
old piston ring clamp, some strips of metal a length of threaded rod and hey
presto a handbrake. No cables, no levers that can't be reached and less than a
kilo in weight. This is the prototype, if I ever get round to a
"production" version the handle will be a proper one. I will paint the
handle red (Oh yeh, heard that one before) when I get time and it's raining so
no blatting. This brake should pass an MOT (as long as it actually holds the
car, which it should do when wound down tight). It allows AP twin pot competition
calipers on the rear (No handbrake) and still remain legal. It would appear that
Construction & Use regs do not specify a handbrake must be operated by a
lever. Think of old road rollers with large wheels to operate wooden brake
blocks. The pictures were taken on 29th April 2005.
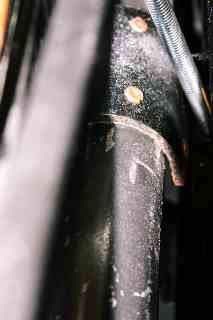 This is the band brake around the prop-shaft. The picture is taken from above
looking down and forward.
This is the band brake around the prop-shaft. The picture is taken from above
looking down and forward.
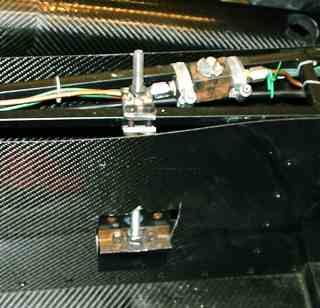 This
is the brake pictured from the side. The thread sticking up will have the handle
on it and the bracket sticking through the interior side panel will be hidden by
the seat. A by product of this aperture is the heat coming through when
travelling over 40 mph (who goes slower). It's like having a heated seat!
This
is the brake pictured from the side. The thread sticking up will have the handle
on it and the bracket sticking through the interior side panel will be hidden by
the seat. A by product of this aperture is the heat coming through when
travelling over 40 mph (who goes slower). It's like having a heated seat!
 Pictured
from underneath. The nut at the bottom left is through the o/s chassis rail
(centre). There are 2 of these. The screw that winds the band together goes
through the bracket held to the band by the 2 screws on the left of the prop.
Pictured
from underneath. The nut at the bottom left is through the o/s chassis rail
(centre). There are 2 of these. The screw that winds the band together goes
through the bracket held to the band by the 2 screws on the left of the prop.
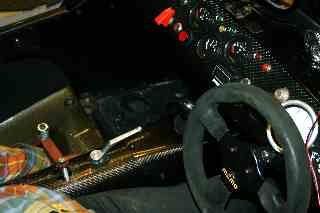 The
winding handle. The chequered shirt is my fat gut and left arm. The lever facing
forward is the line lock.
The
winding handle. The chequered shirt is my fat gut and left arm. The lever facing
forward is the line lock.
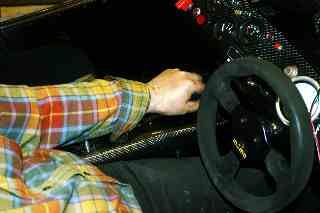 And
this is my arm holding the gear lever to show the handle is not in the
way. On the very rare occasions I have a passenger, I will place the handle the
other way whilst driving.
And
this is my arm holding the gear lever to show the handle is not in the
way. On the very rare occasions I have a passenger, I will place the handle the
other way whilst driving.
However, after all that work, I removed it as whilst it worked fine when stationary it wouldn't stop the car when moving. As this is a testable item on the MOT there was no point in leaving it on. I now have no handbrake and refit the Sierra calipers and standard calipers for the test and then swap back to the twin pot units.