
HOME WELCOME SEVEN ELAN ELISE MIDGET TYPE R MINI FAMILY GUEST BOOK
Carbon upgrade Engine upgrade Other upgrades Rear brakes 2004-2006 upgrades Accident rebuild pages Refurb 2014-15
Refurb during 2014-2015
I started a refurbishment of the body during 2013 but didn't do much other than remove the wings. Then in 2014 I removed the engine to fit a new concentric clutch slave cylinder along with the 1/2" clutch master cylinder. This also enabled me to spray the body without the exhaust in the way. I collected 2 pack clear lacquer from a member of the WSCC who has a body shop in May 2013. I couldn't do much during 2014 due to my damaged back but started again in October 2014. Here are some pictures.
10th October and feeling a bit better. So yesterday I changed the cam belt and removed the exhaust pipes on the BDR. I also removed one of the distance pieces from the new clutch slave cylinder as the release bearing would have been pushing on the fingers of the clutch. Today I took one of the pipes to the tractor workshop and he has welded the split properly. I tried it with my MIG but just made it worse. It's stainless steel. I then painted the 3 pipes with ultra high temperature paint (black) and then made 4 nuts for the difficult ones to get a socket on. Each pipe has 4 studs and its the front top one that's difficult because the pipe rises (to go through the bonnet) and gets in the way of the nut. I'll take some more pictures tomorrow when I've finished painting and have it all reassembled,
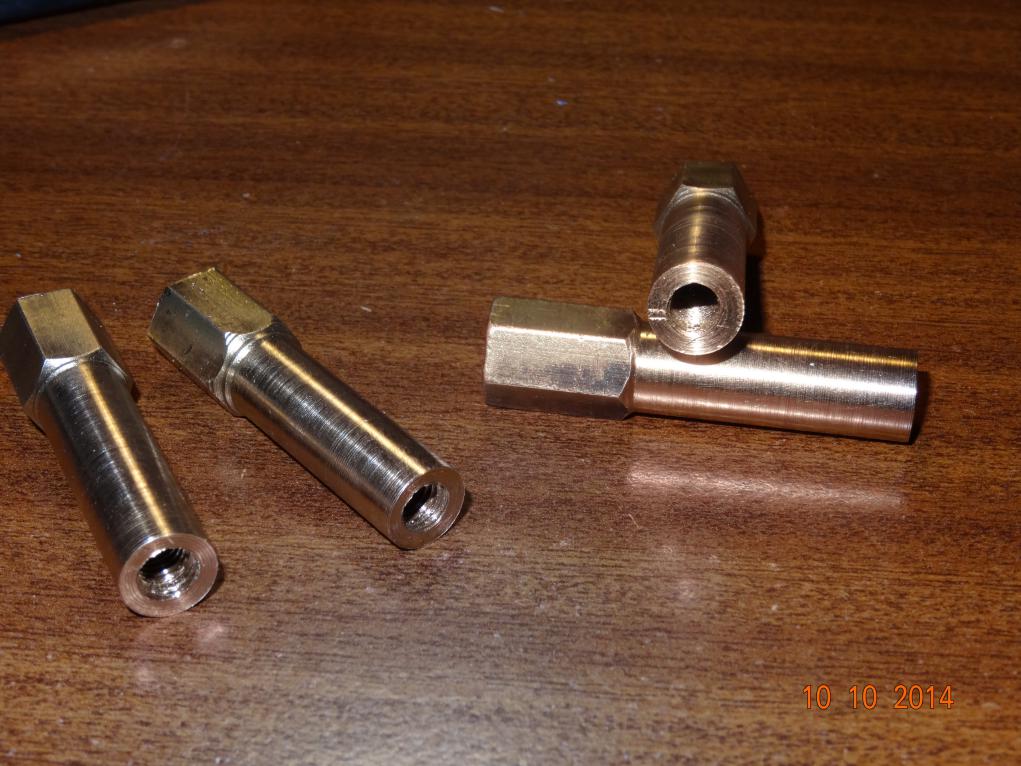
So this is one of the nuts in use.
.jpeg)
And this is how buried they are.
.jpeg)
Pipes drying on the line, just like washing.
.jpeg)
.jpeg)
Amazing how you always miss the important parts.....
.jpeg)
....And then how you run out of paint just before you've finished!
.jpeg)
Never mind, I'll try and get another tin, but not really hopeful over here.
This afternoon I'll have a go at changing the split steering rack boot. As long as I don't need to lay on the floor and I don't have to strain my back it should be OK.
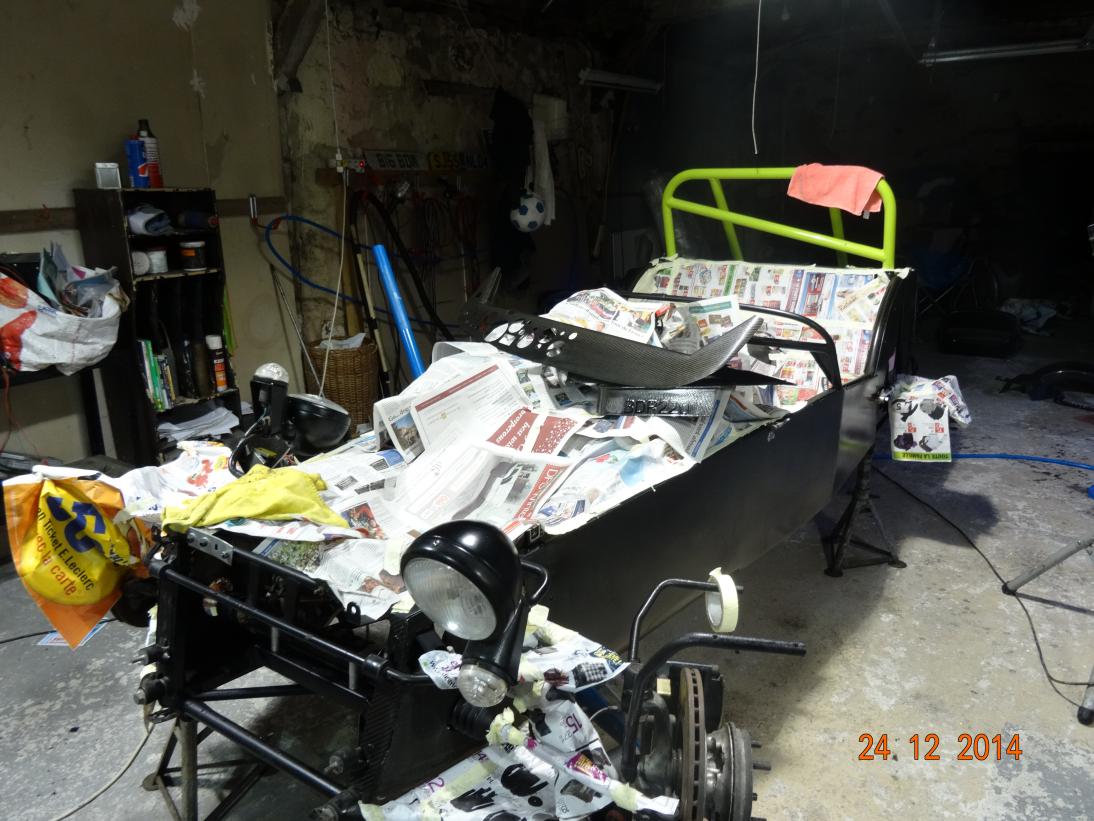
1st November (2014), Thought I'd take some pictures of the car as it is now. It's been like this since May, before my back disintegrated.
.jpeg)
This is waiting for a final rub down with wet and dry and then spraying with a clear lacquer,
.jpeg)
So is this side.
.jpeg)
The engine's out so as to fit the new centrifugal clutch slave cylinder. It will make spraying the left hand side easier and I painted the exhaust whilst it is out.
.jpeg)
Like this. Isn't it nice.
The following are some pictures taken when I first restarted working on the car itself.
In the meantime, I've been doing some bits on the car. The dry sump system had an oil cooler and thermostat fitted. The pipes were braided rubber and some sort of poly something or other. I wasn't happy about the pipes and the cooler and thermostat aren't needed with a dry sump. So I have plumbed in some fixed copper pipe.
.jpeg)
The tank end.
.jpeg)
Across the front. I had to fit a flexible centre as the complete pipe couldn't be got in.
.jpeg)
The pump end. I've measured the position of the pipes by using the coil HT lead and the engine mounting chassis bolts holes as datum points. Bet at least one will be in the wrong position.
I've also found enough bits (never throw anything away) to make a flat lensed amber lamp with a 380 bulb (5w side and 21w brake with both wired in as one) and fitted it to the top of the scuttle. This is the new oil pressure warning lamp. The existing warning lamp in the dash will be wired to the fan override switch so it can warn of high water temperature.
24th December 2014.
Probably the last update this year. About two years ago I started work to spray the Caterham with a two pack lacquer. However due to my back I didn't do much work in 2014. The car was up on stands with the engine out, wings off just waiting to be rubbed down and sprayed. Earlier this month I started to prepare the car and the first coat of lacquer went on 19th December.
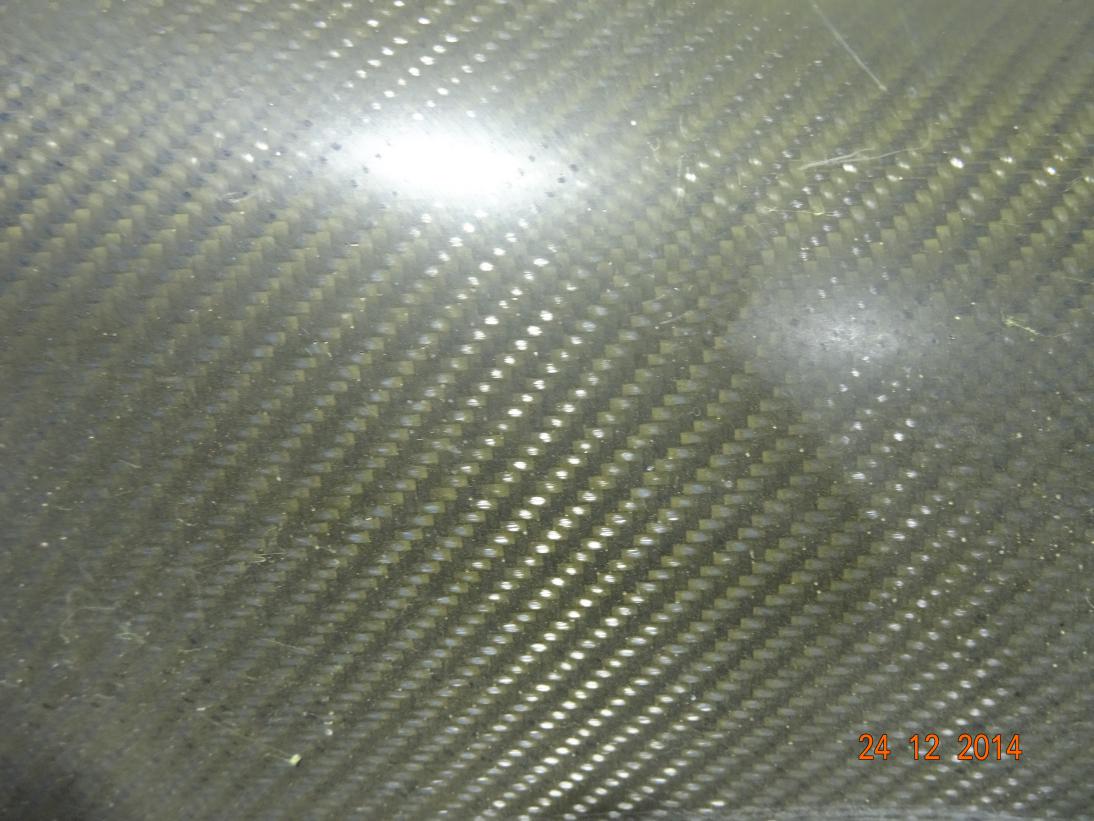
This is the panels, made from carbon fibre, before being sprayed. They got like this due to the resin being "eaten" by sunlight aka Ultra Violet light.
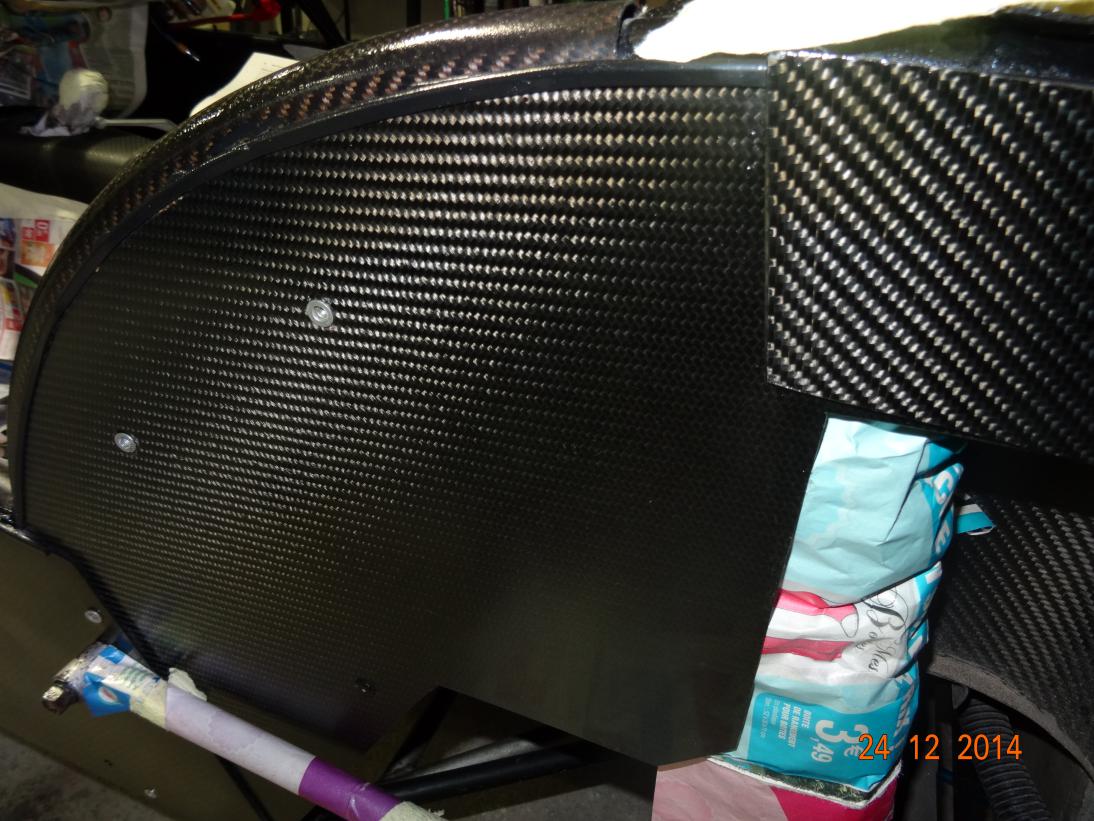
And this is a panel after the first coat of lacquer. I plan to give it three coats, rubbing down with 2000 grade wet and dry between coats. The final job will be to polish with G3.
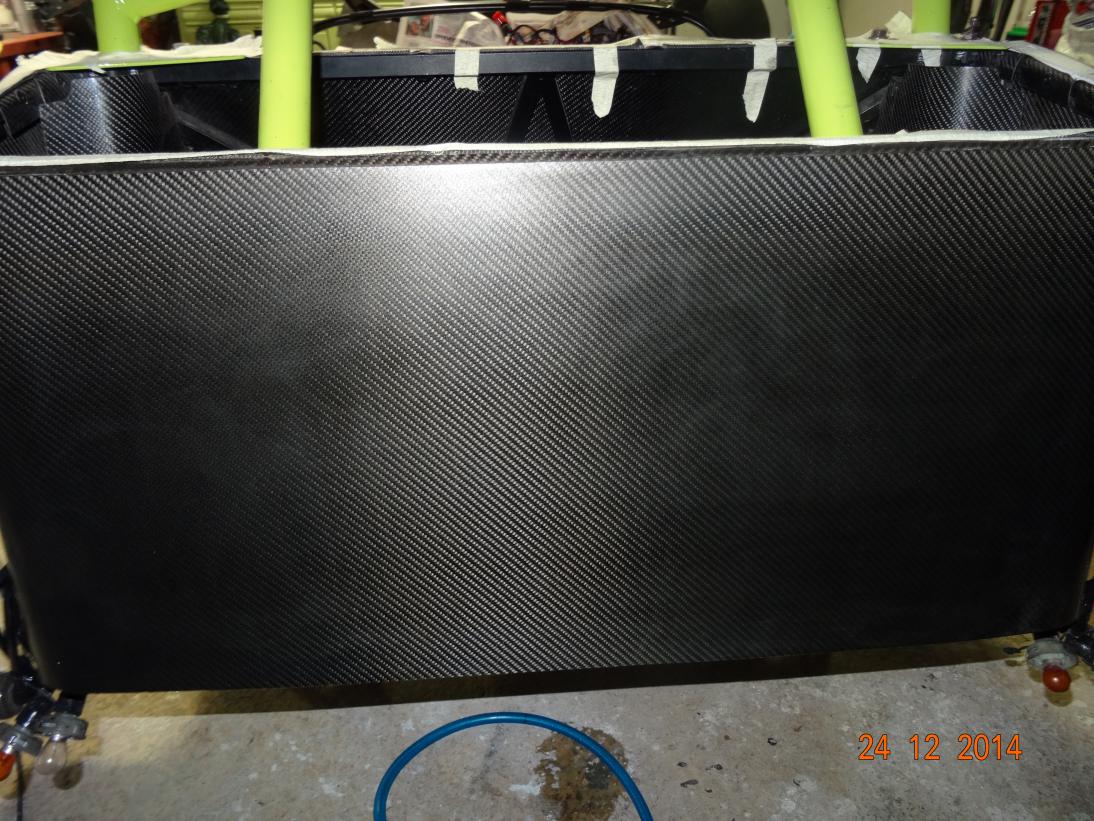
The rear panel.
Car, engineless, wingless and masked up.
The bulk head. The spray went a bit wrong as I had the gun too close. I'll get it all off and do it again.
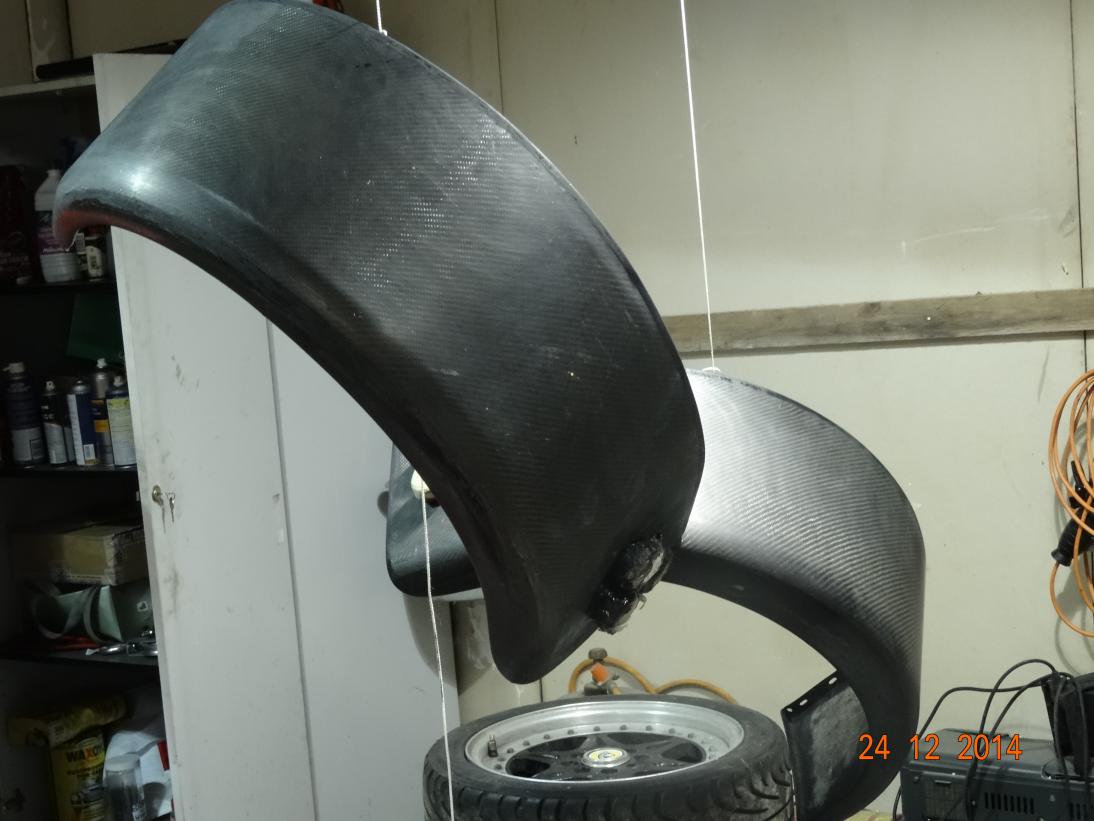
The rear wings. I had painted these matt black but it looked so bad after the first coat I spent 2 days getting it all off. I'll rub them down again and spray.
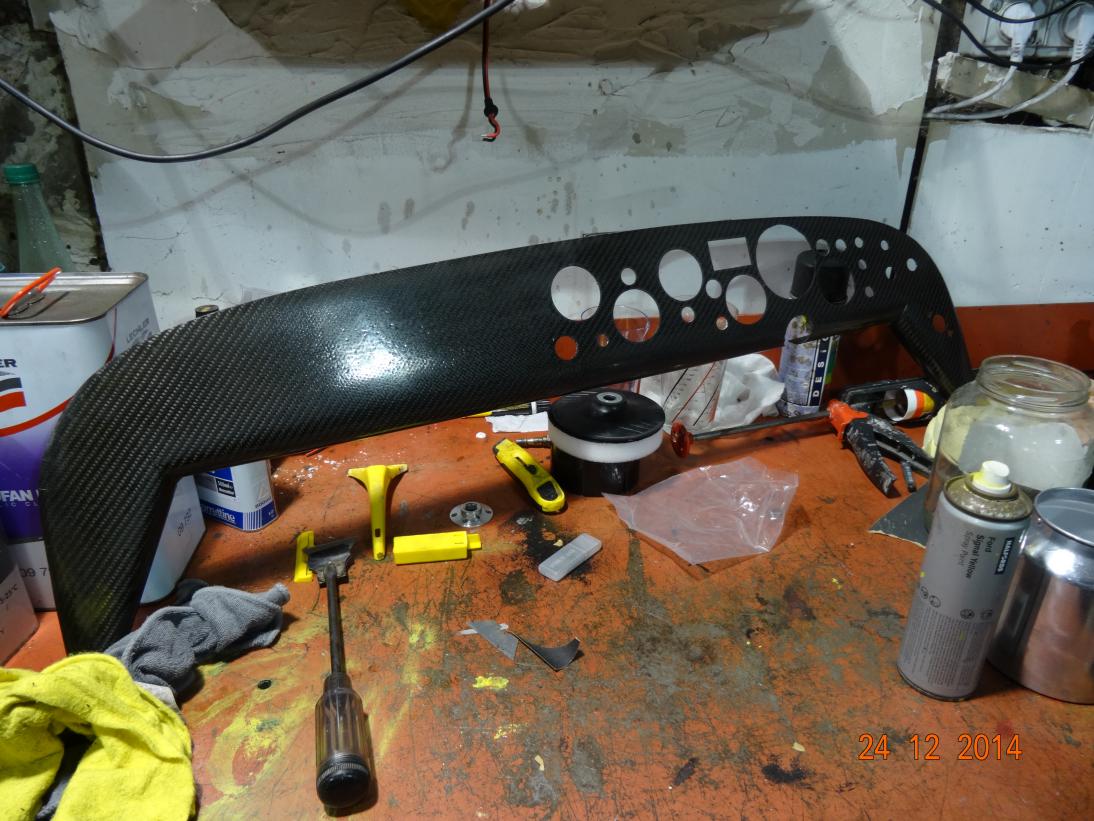
The dash. It has a lot of "orange peel" in it so I'll rub this down again and respray.
.jpeg)
.jpeg)
Two pictures of the rear wings after I'd scrapped and rubbed the matt black paint off. I will rub down the black edges and the wings some more after Christmas. Then spray with the clear lacquer.
.jpeg)
The nose cone. I've sprayed over the number plate but masked the little Lotus badge.
Whilst I've been doing this I've fitted a 1/2" bore master cylinder for the clutch, a new clutch centrifugal slave cylinder, a GPS speedo which is about the same size as the original SPA digital speedo. I had 4 SPA units, 2 under warranty and one was exchange at ?60. This last one stopped working after the accident in 2006 so I've been using a cycle speedo since then. OK in daylight but not at night as they aren't lit. I'll take pictures of the new speedo when the dash is back in.
But, in the meantime this is my latest attempt to get it fit the dash. Problem is the speedo has no edge on the front so will fall through the dash.
.jpeg)
This is the aperture the speedo goes in.

That's it, no thread on the back and no edging around the front panel.
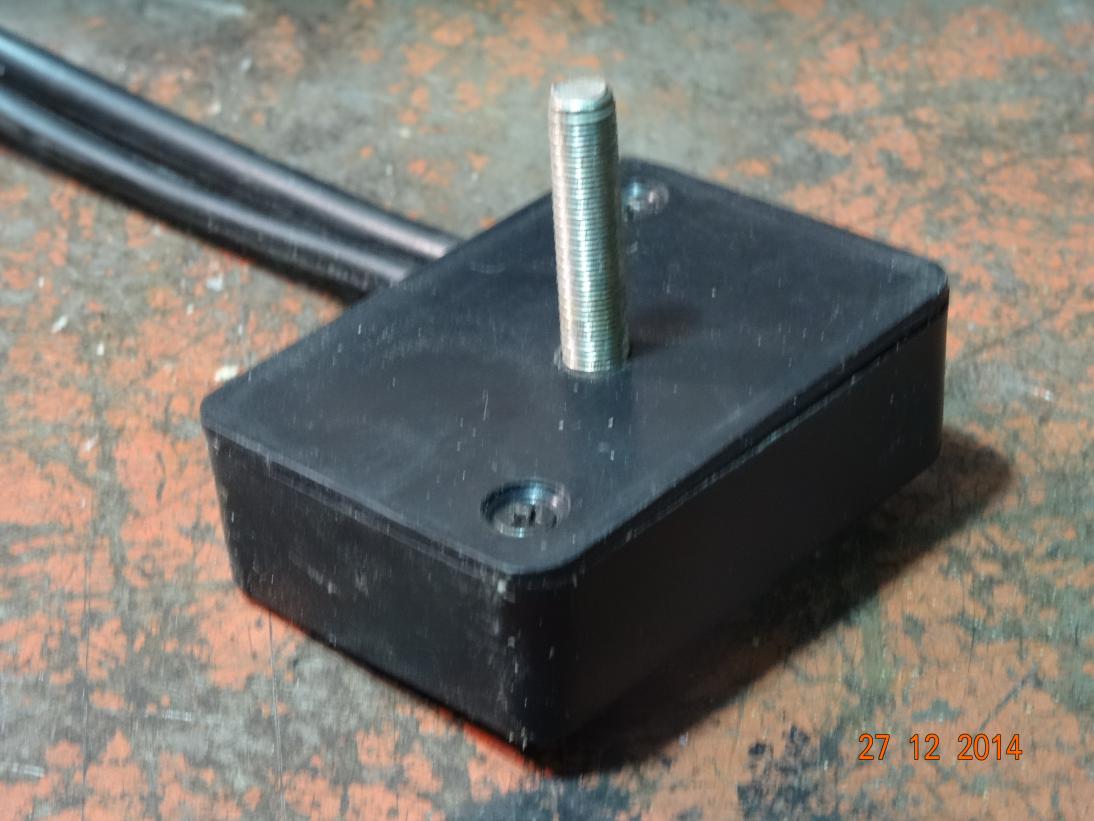
So I removed the back panel drilled and countersunk it and fitted a screw.
I've stuck some matchsticks on the edges to make a lip and covered it in black insulating tape. The finished product looks better than the picture as I've got the side stuck down properly.
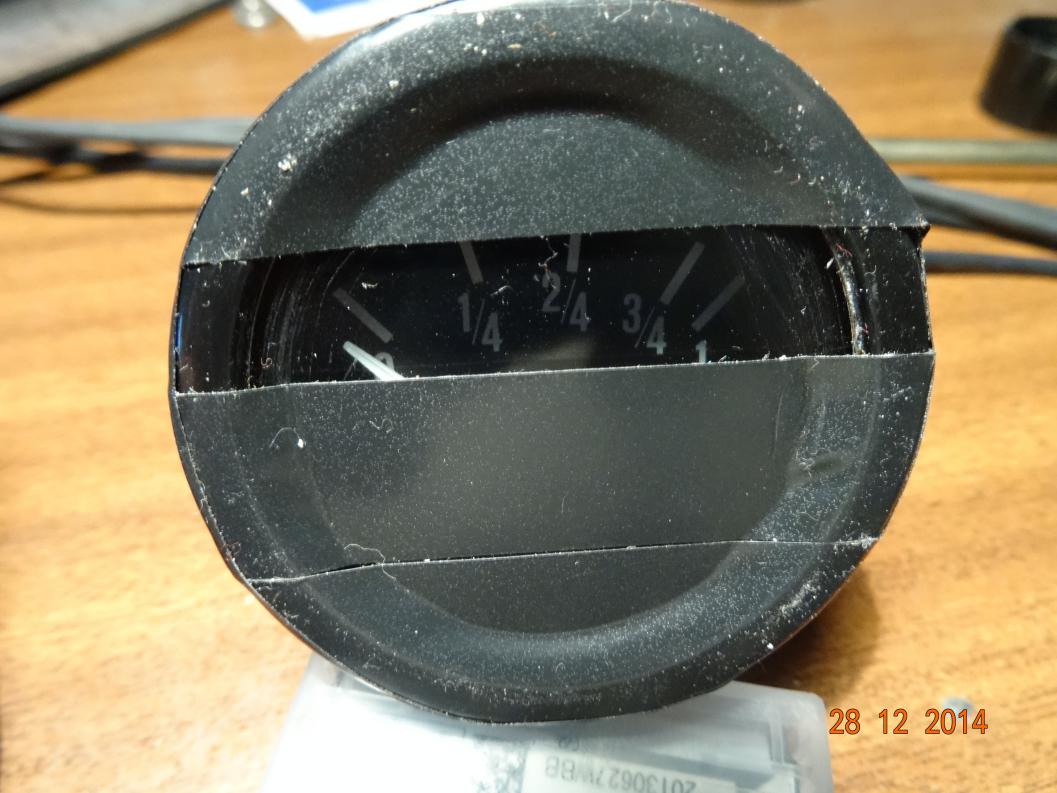
The fuel gauge is the only original gauge left. It had a rusty bezel and has scratches around the edges of the lens. Now, what does this remind you of?
OK, OK, don't shout all at once, I know they're CRAP. So here's what Norm did next.
.jpeg)
Neat carbon edged surround.
.jpeg)
With a screw fitted on the back
.jpeg)
And fitted to the dash. The white "powder" will clean off, it's carbon dust from rubbing down with wet and dry. When this is sprayed with clear lacquer it will look much better, the inside edges won't show. It is slightly tilted to minimise reflections.
And I've taken the tape off the fuel gauge. It will get a further coat of black paint and more rubbing down to get it smooth and I'll just have to put up with the scratched glass.
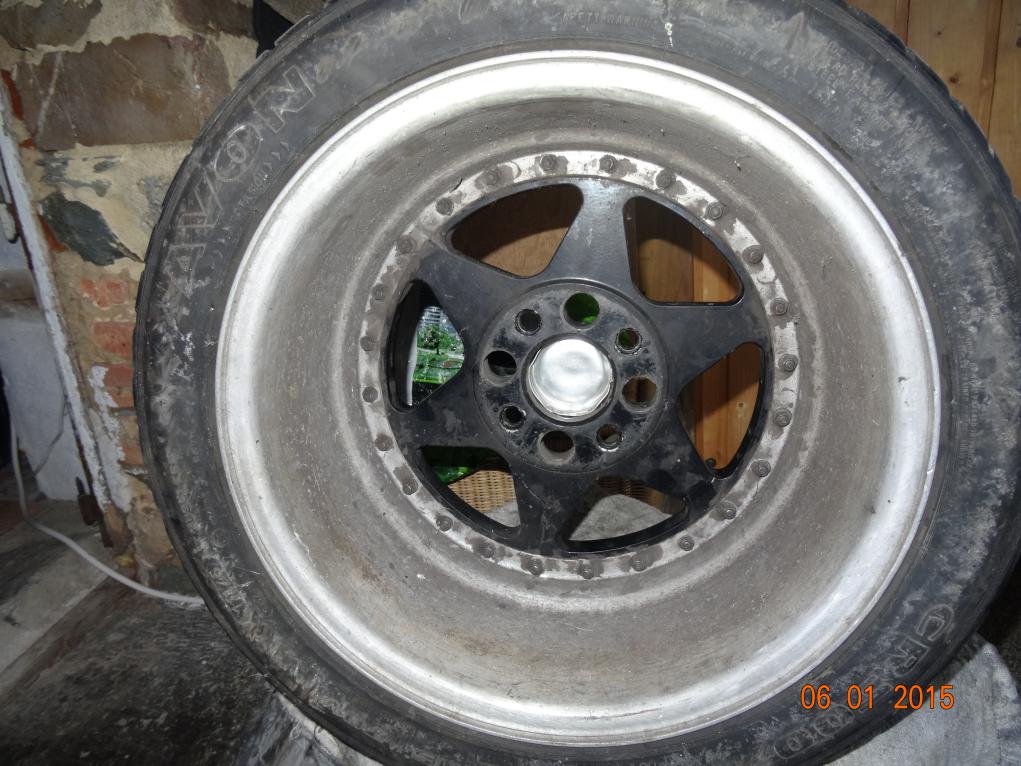
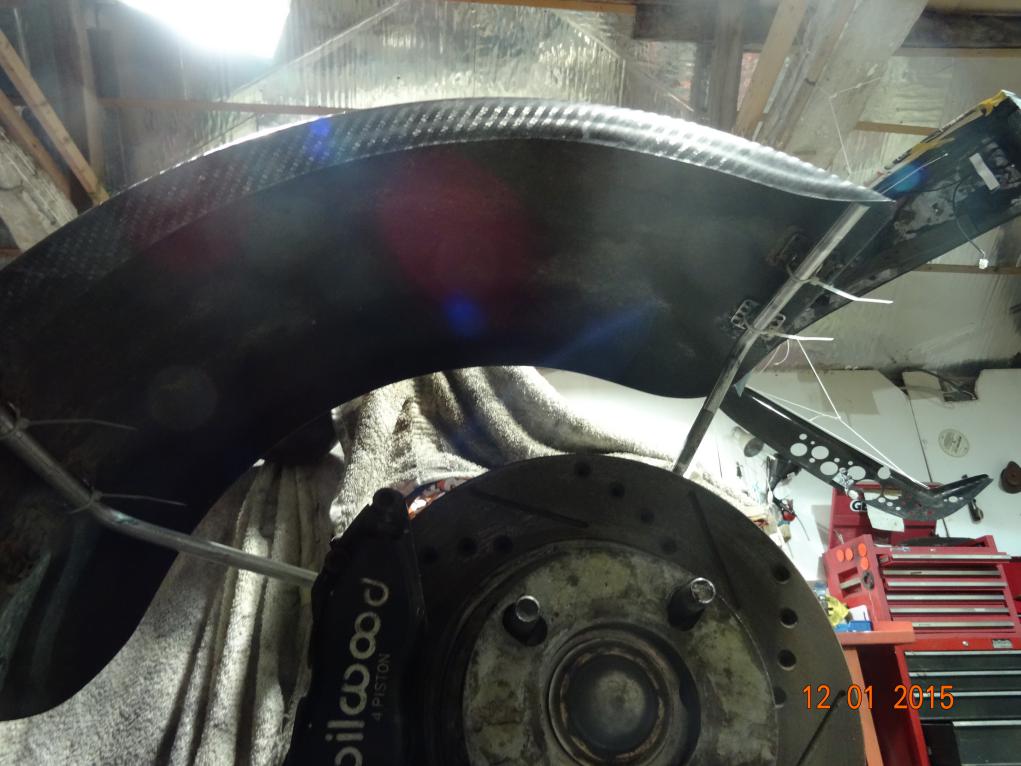
This the inside of one of the front wheel, which weren't that bad. The rears were much worse.
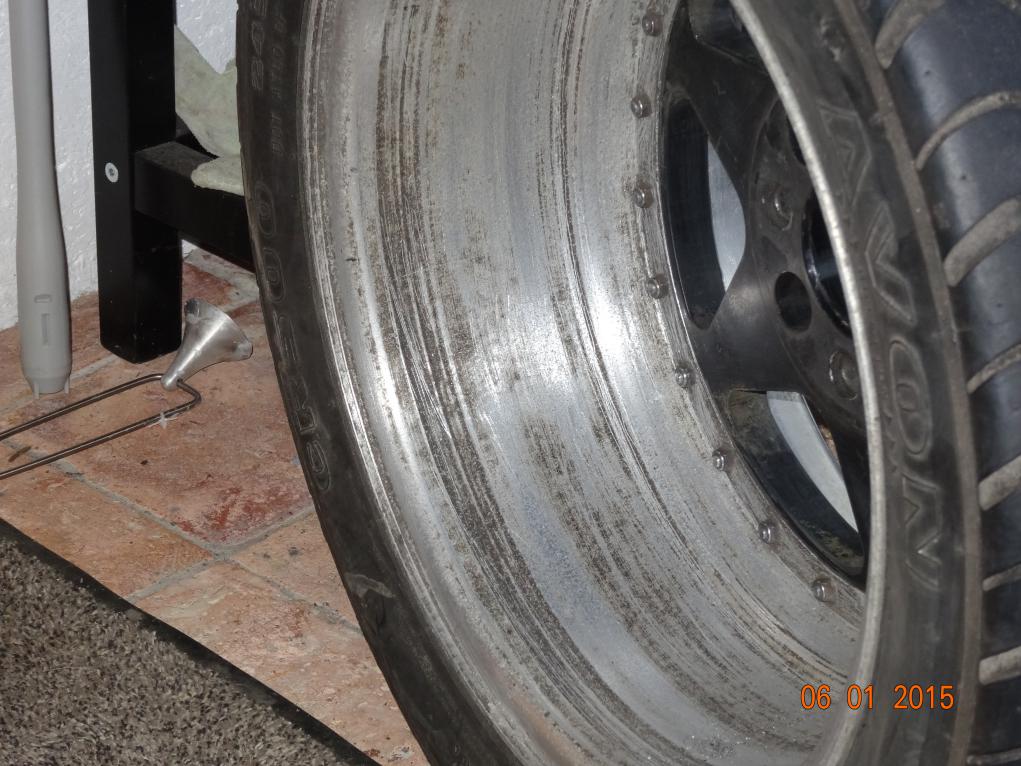
The inside after cleaning (wire wool and wet and dry)
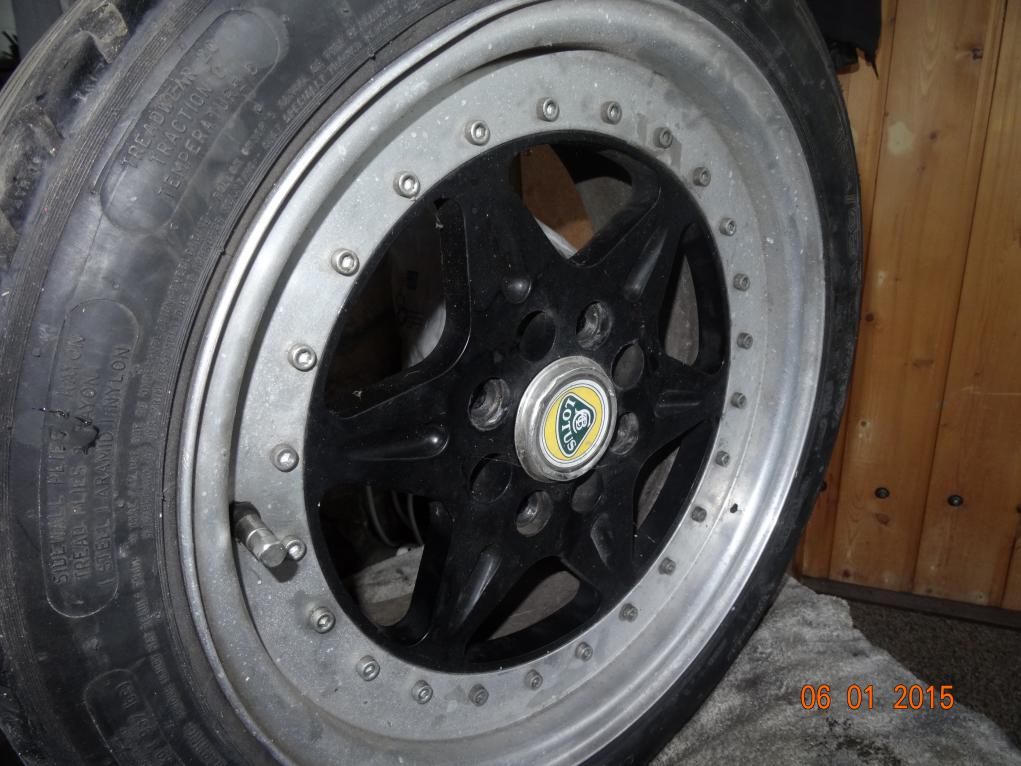
The outside of a front wheel before painting (after cleaning)
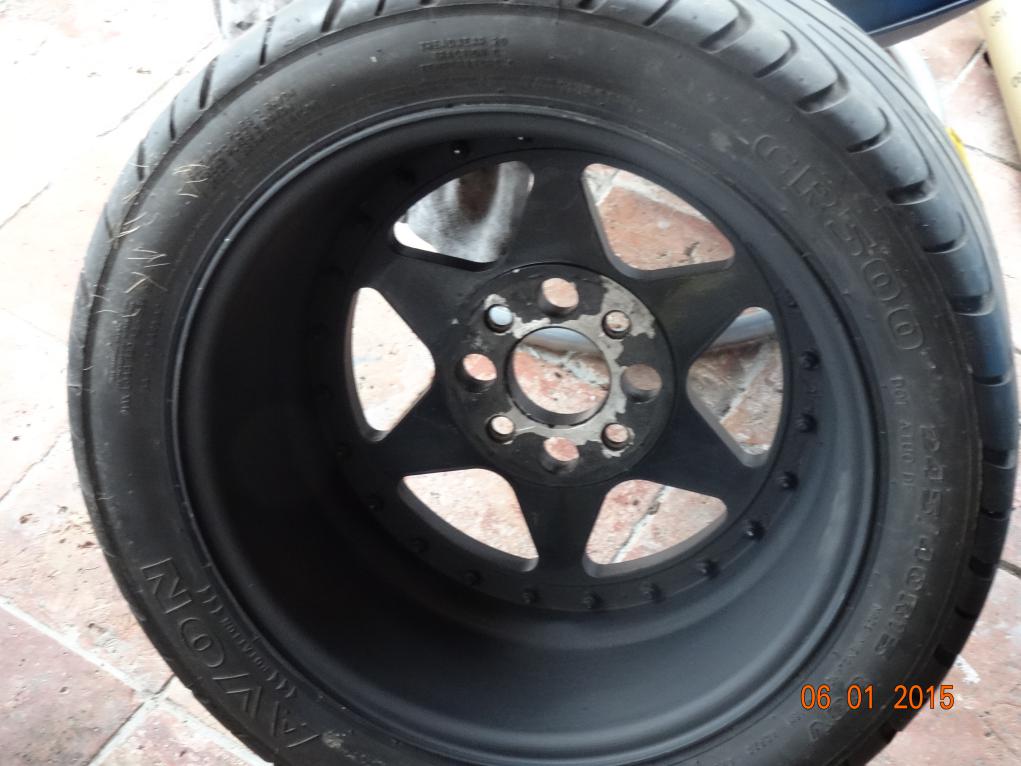
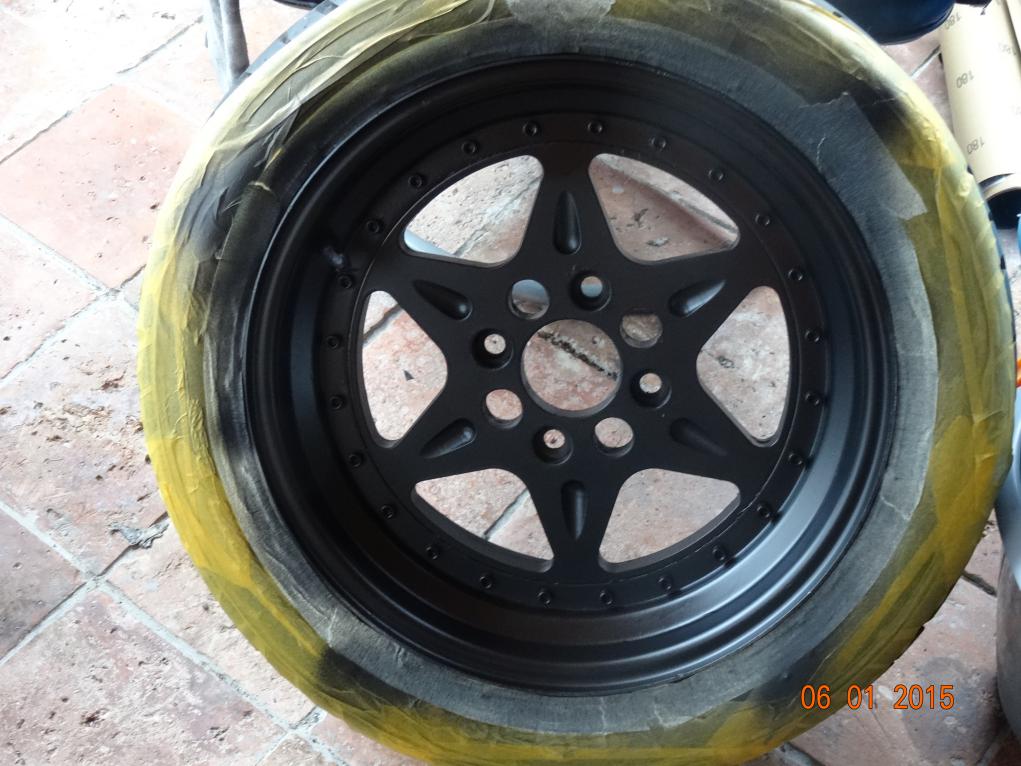
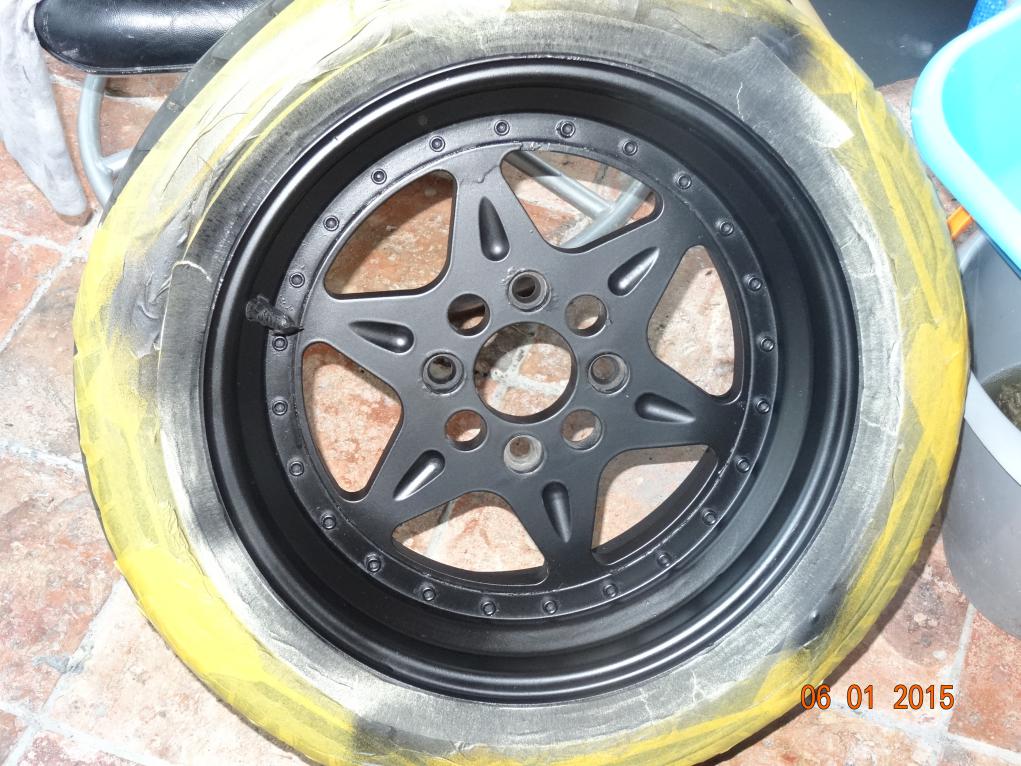
Pictures of the finished wheels. (some were given another coat)
.jpeg)
Oops, this is how a tin of spray paint goes when left outside on a frosty night.
.jpeg)
More finished wheels-after more coats of paint.
.jpeg)
.jpeg)
More bubbling paint, I painted it 3 times before getting a new tin.
.jpeg)
.jpeg)
The right hand boot lid panel with clamps holding the edges on, stuck on with epoxy resin. The edges were cut from an old bonnet. Didn't work too well as one fell off when the clamp was removed.
.jpeg)
Now clamped using super glue.
.jpeg)
The front end of the silencer with a new coat of high temperature paint.
.jpeg)
The dash after rubbing down to bare carbon fibre. The new digital GPS speedo is fitted as that will need a coat of lacquer.
.jpeg)
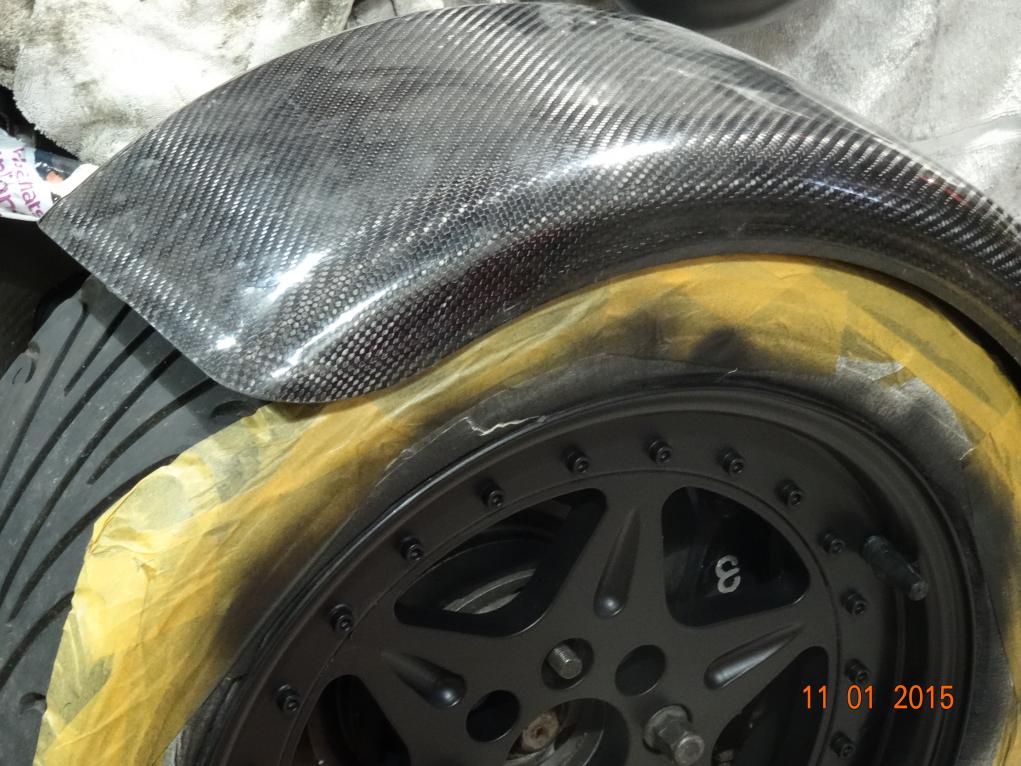
The rear wings with the edges painted in silver. It's a bit darker than shown in the picture which is under 2000 watts of halogen lights.
.jpeg)
A pair of Kevlar carbon seats. The Kevlar has been rubbed down, the rest of the seat is covered in a carpet material (to stop the person sitting in the seat from sliding in the corners)
.jpeg)
Wheels-all lined up.
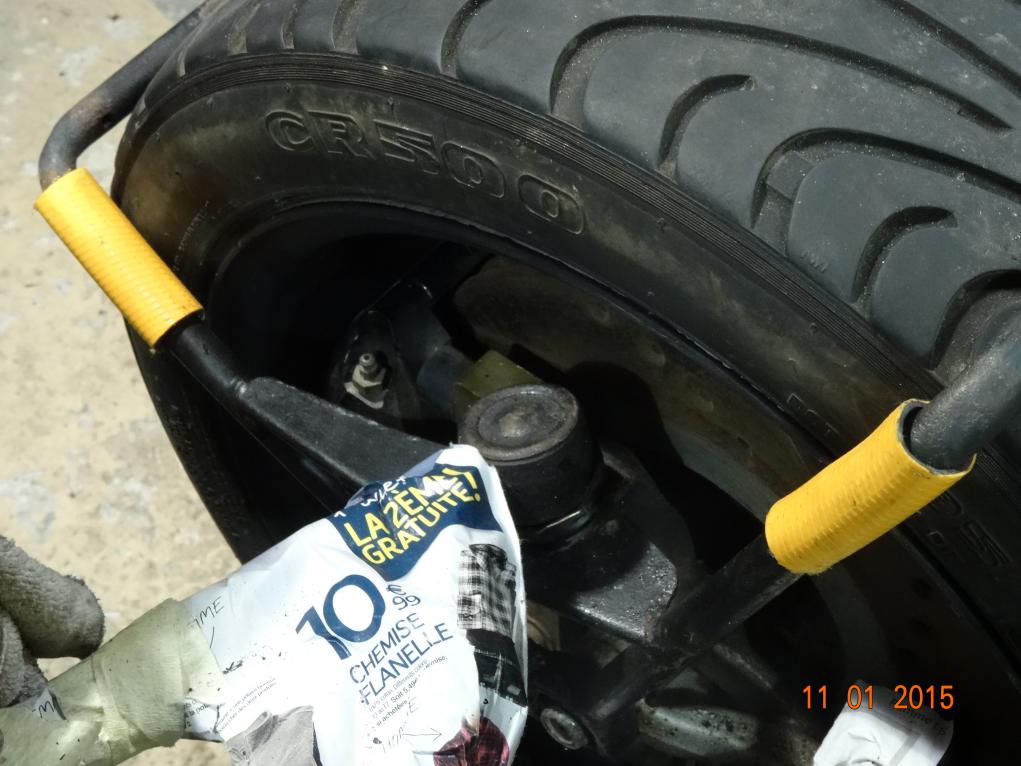
The Caterham front wing stays are not the best as you can see from this picture...

So, I have cut the section between the wheel rim and the part that goes under the wing. I've tapped threads in the ends and fixed the two ends together with threaded rod. Then the final adjustment will be (not done it yet) will be with heater hose or copper pipe. The end result should leave the wing much closer to the tyre.
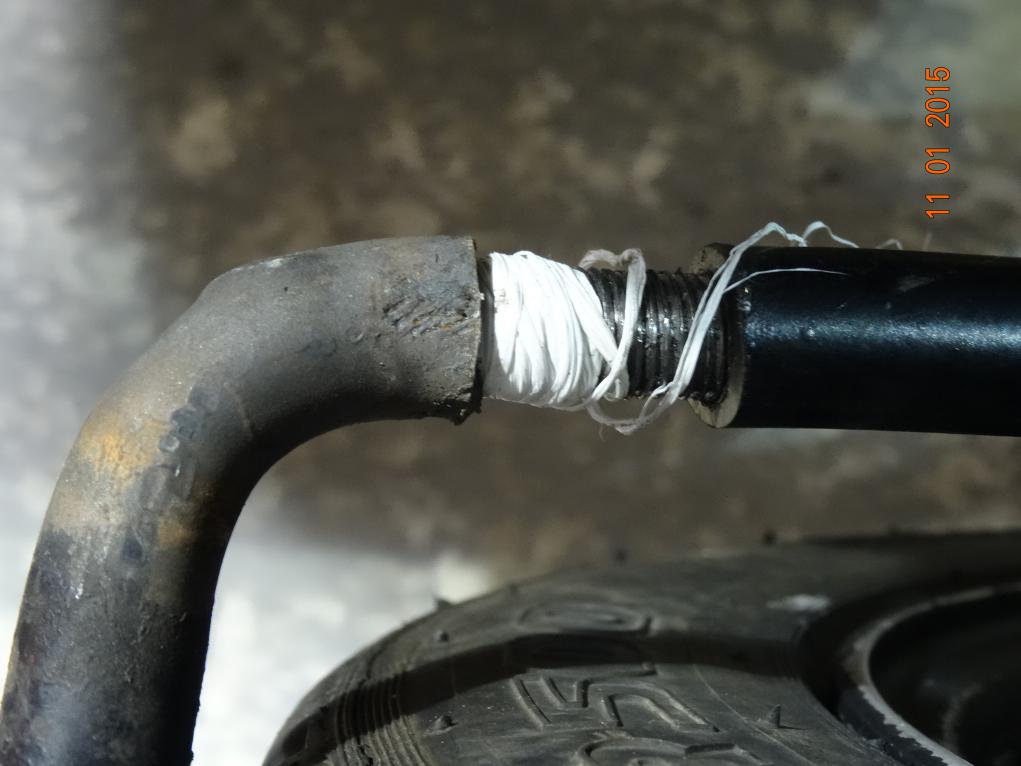
Horrible really. So first thing Monday morning saw me on my way to Brico and I bought two lengths of 12 mm ali rod. This is much better.

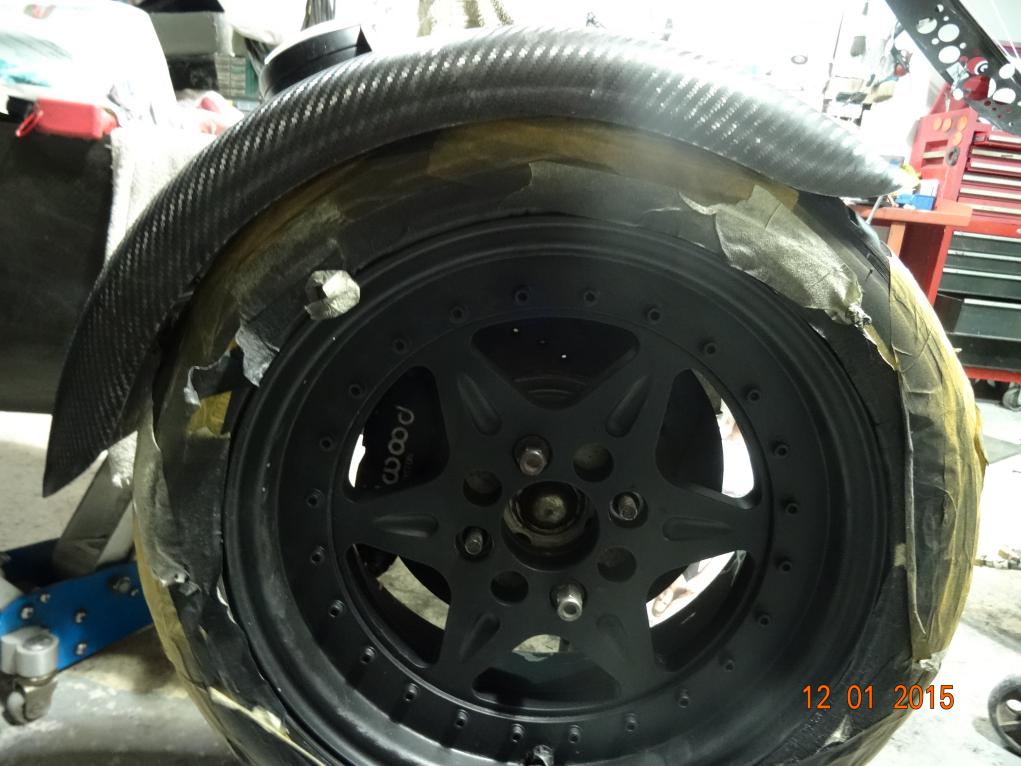
Only problem now is that the wing is so close to the tyre it's difficult to get the wheel on. I've moved the wing out as far as they'll go but it hasn't made it any easier. I'll manage - they look really good with a proper fit.
20th January 2015
On our trip to the UK I collected lots of bits I had ordered, mainly through amazon and ebay and had sent to the office. My daughter brought them to the pub and we filled the Mini. When we got to Portsmouth we called into Machine Mart and collected a load of stuff they were holding for me. I bought two 30 drawer cabinets and have spent the past two days sorting my new and old nuts, bolts, setscrews and washers into new, labeled drawers. Like this....
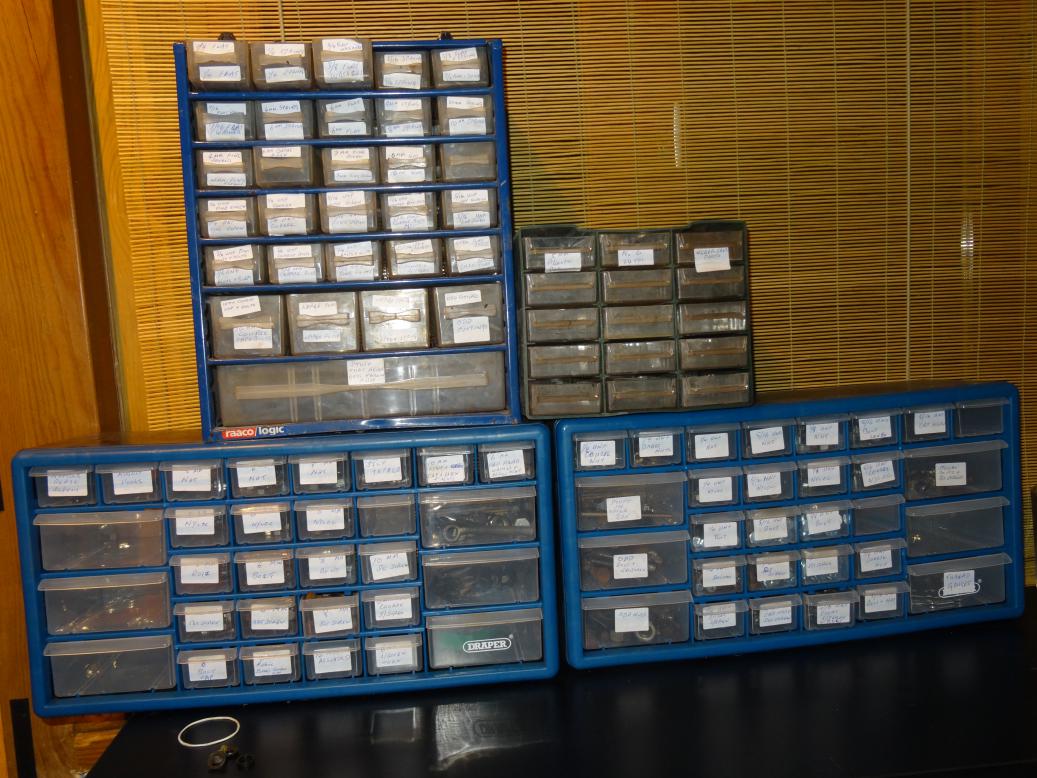
The two new ones are at the bottom, the old ones on top. There's another two in the workshop but they're all sorted with other stuff.
The rest of January and February was spent rubbing down the wings, dash, scuttle and 3 boot lids. Then masking the edges of the rear wings and painting the edges dark silver and then masking the nosecone and painting the front edge yellow,
Putting it all back together.
The weather got dry and warmer at the beginning of March. So a good wash down (and a good sweep up) saw me do the first coat of clear lacquer. The next day it was rubbed down with 1500 grade wet and dry (using a sanding machine-too hard by hand!). This was repeated 3 times and then my diary read:
Mon 9/3 Tues 10/3 Wed 11/3 Thur 12/3 Fri 13/3 Sat 14/3
Final rub down Polish G3 Engine in Dash in Seats in GO OUT IN 7
& last spray Check clutch Scuttle in Belts in
Wings on
All well planned. I always set targets when I'm working, sometimes I meet them other times I don't.
So, Monday came and I thought "it has 3 coats of lacquer-it's enough". I started polishing with the G3 compound. I had an old polishing machine, left by a friend when he polished his ali 7. But the on/off switch didn't work. So I fixed up an on/off switch and changed the pliug for a French on. It sort of worked but it started falling apart. So I stripped it down, took the spindle with the pad out and used it in a drill. Problem now was that it was either running too slow, where it didn't do much polishing or it was running too fast, where bits flew off (including the mop which I then couldn't find). So at 1600 I gave up and started putting the engine in. The clutch seemed OK but it wasn't easy to see it and it needed bleeding. By 1900 it was in and nearly all connected. Just a few wires, the throttle cable, engine mounting bolts and the two new oil pipes. Oh and the silencer, now painted black.
The completed car, not fully polished, masking tape still on the tyres, pools of oil underneath, bonnet and nose cone to go on. But almost there!
Tuesday saw the rest of it all back in but a big problem was the oils pipes, which I had carefully measured to get the joints in the correct place didn't fit. Problem was the bends on the flexible hoses were to sharp. So I took the end out (there were joints with flexi hose in the middle, remove these and the pipes came out). I went to Brico and got some copper fitting and remade the pipes. It was better but the flexible joints which went on the new copper pipes were leaking. Not a lot just steady drips. So far this had taken all day. The next day (Wednesday 11th) I refitted the dash and all the wiring. Then tried to stop the leaks. As I tightened the jubilee clips they either were overtightend and stripped or another leak appeared. Another day and no further forward.
Thursday, I carried on fixing leaks (now the bottom hose was dripping) There was oil and water everywhere. I reckon I must have lost a gallon of oil. I thought I'd leave it for now and think about it. So I started up and tried to do the ignition timing. The rev counter didn't appear to work properly, it went to 4000 RPM but didn't seem to go higher. As I had made a new collar for the instrument I thought it wasn't earthed so made an earth wire for the fixing piller. I also had my new Draper multi-meter with a tacho function. I fixed it up as per the instructions (which werr worst than useless) but it didn't work. So I carried on increasing the revs and the realised that the tacho was working. I had forgotten that the first 4000 RPM are compressed on the dial then from 4000-10,000 the scale is quite wide. I revved it more and the needle climbed to 5000. I ran round the front and pointed the timing light at the crank pulley. Way out. So I moved the distributor round (not easy when it's buried under a Weber carb, the engine is very hot and I don't like shocks from plug leads at 5000 RPM). It was about right so I quickly switched off. I must have had an air lock in the block as the water was boiling fiercely. I then started refitting the seat. It took a while to get the correct bracket for the correct seat and the correct bolts. One side is imperial and the other is metric. I eventually got the seats and belts in. I left it at that.
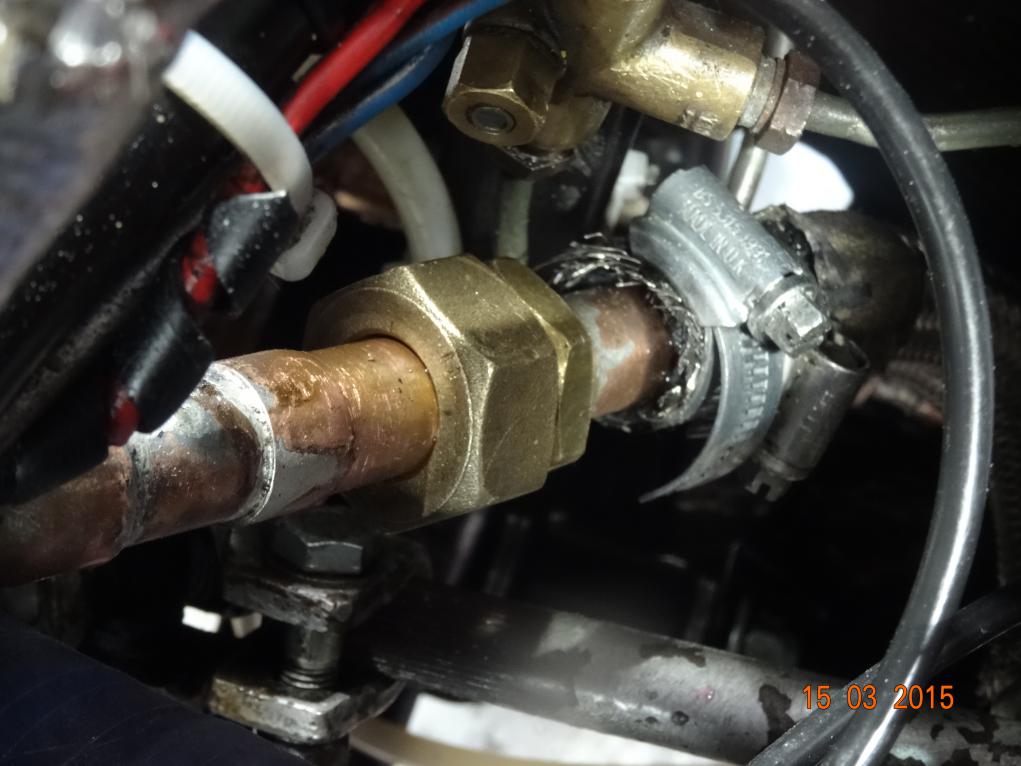
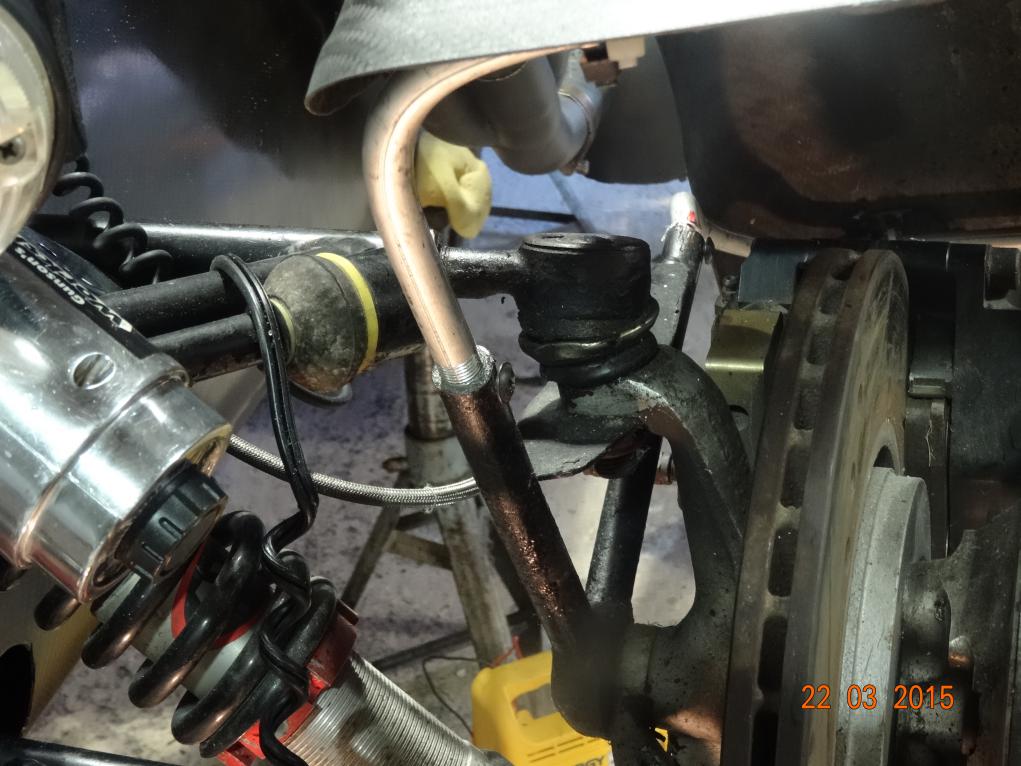
This is the top oil pipe, it returns oil to the dry sump. The connection with the brass nuts appears to be leaking. There is a fibre washer between the joints.
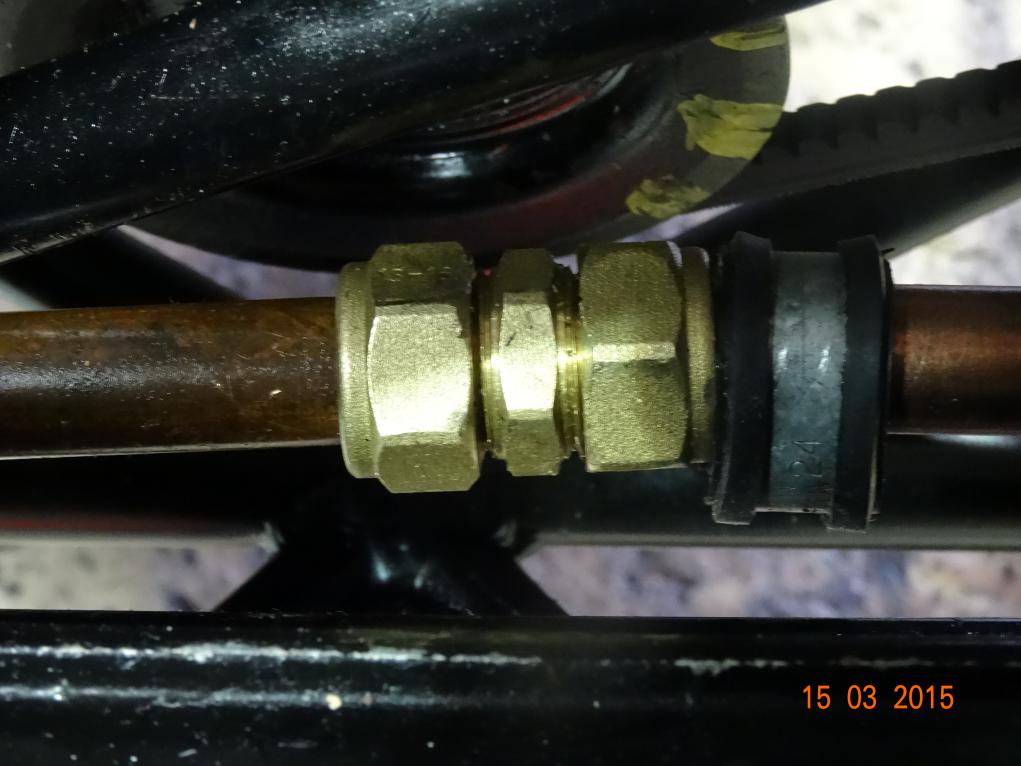
This is the centre of the pipe which draws oil from the dry sump into the pump. It runs alongside side the rack (black "tube" at the bottom of picture) It too is leaking although it's very tight.
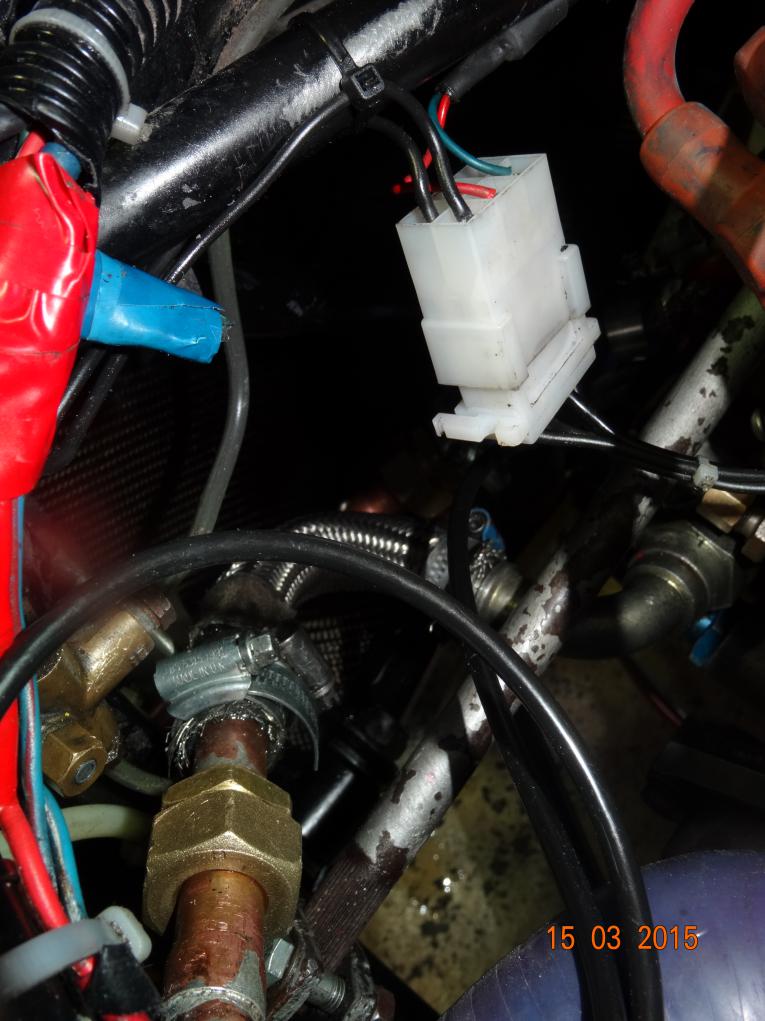
Another picture of the top pipe.
Friday, this is the day it's supposed to be finished, but I've still got leaks. I figured out that the best thing to do was to change the armoured flexible hose for silicone heater hose, which I had a few lengths of. I also wasn't happy about the two joints across the front and decided to change them for compression fittings. So off the the local builders merchant and came back with 2 compression joints, 2 right angles and 2 straights. Off with the top pipe and remake it to utilise the compression joint and the silicone hose. Not as easy to do than say. Main problem was marking the last soldered joint, which is next to the engine mounting, as it's almost impossible to get a hand down there.
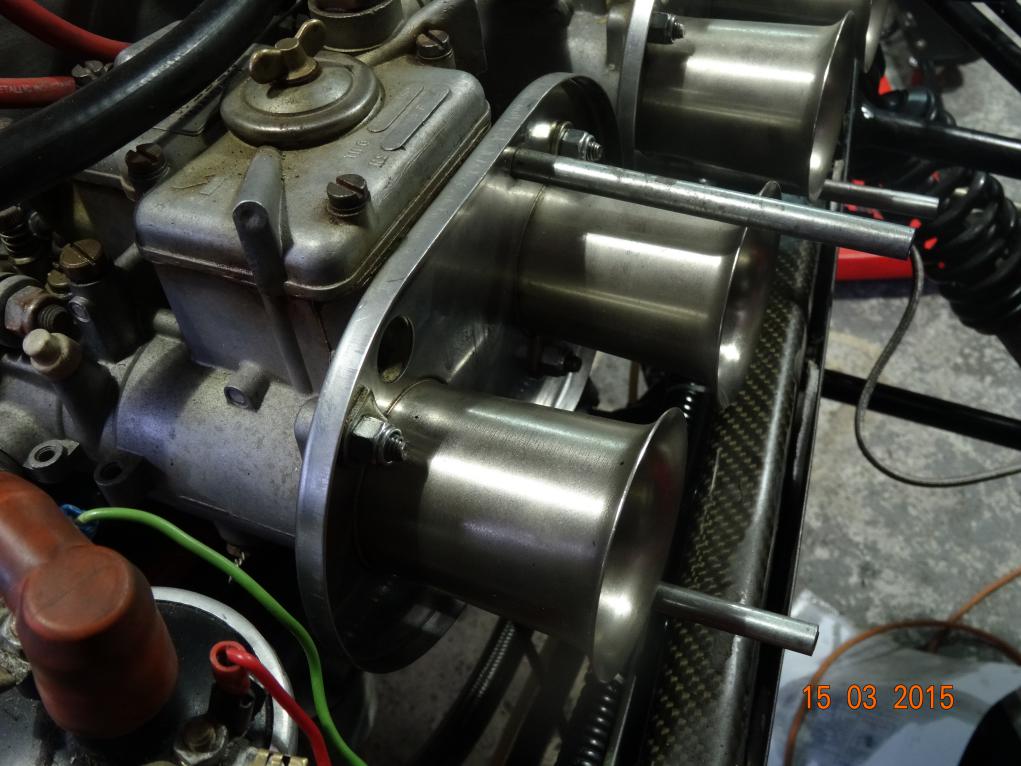
With the trumpets and air cleaner back plate off this is where you force your arm down......
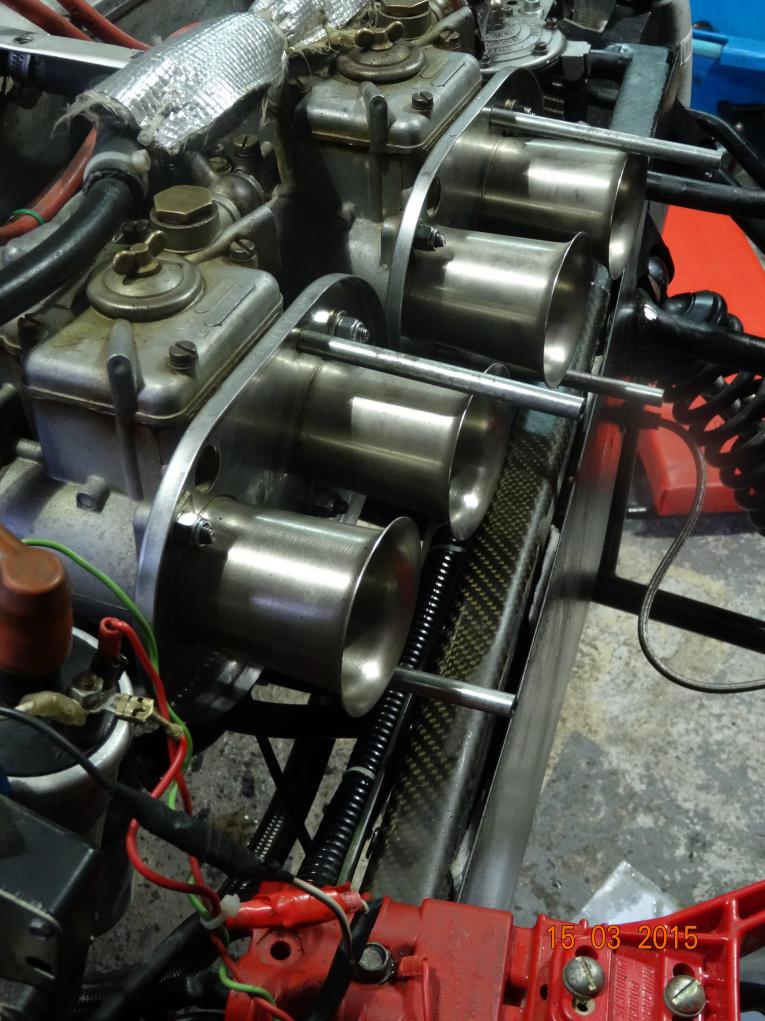
...and you have to reach the bottom in front and under the front trumpet.
I did it, soldered the joint and then tried to fit it. I had fitted the compression joint to one end and tightened it so all I needed to do was get the other end together. After an hour of trying to get them together and lined up so I could do the nut up I called Lynne to help. It took and hour to finally get it on and my left hand, wrist and arm is cut to shreds by the threads on the carbs which cut me as I feed my arm down to reach the pipe, OK, all on. Fill the dry sump with oil and watch both compression joints leak, I can't type what I screamed, you can imagine. I then spent 3 hours trying to tighten them even more than than they were. It's almost impossible to get spanners on them but I eventually got them tight enough to stop the dripping. I then spent an hour sorting out the headlight wiring (the connection on the o/s had come out so the n/s headlight didn't work). Before I did this I gave the floor a really good clean to get the oil up and laid down some sheets of white paper to see if I had any more leaks. On looking underneath after fixing the headlight I let another of those screams. The compression joint on the bottom pipe was still leaking and now I could see that the threaded joint above the compression joint on the top pipe was leaking. I had another go at tightening all the pipes. I then left it and tried to check the ignition timing again. I knew it wasn't right as I suspected the distributor had moved after setting earlier. I did the pinch bolt up to the point that is was tight to move the distributor. Set it again and whilst it was cooling down I tried to tighten the last leaking joint. Spent 20 minutes just trying to get a spanner on it. At 1830 gave up, went inside and had a shower (I stunk of oil).
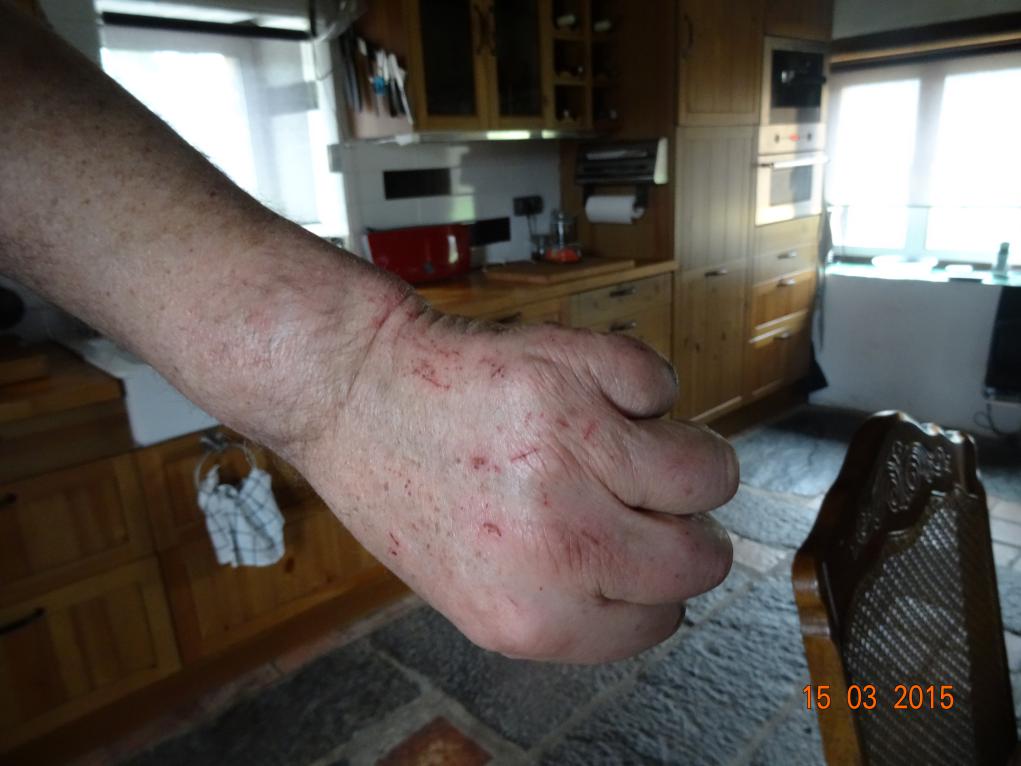
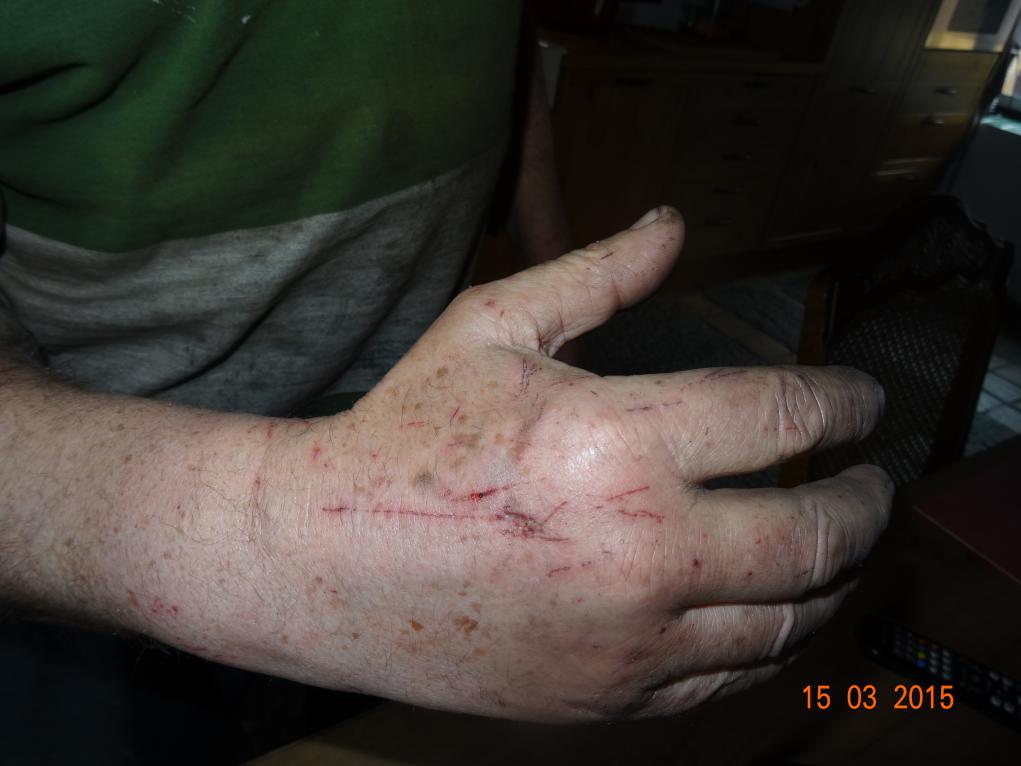
The cuts on my hands and arms. Left hand, don't hurt, but sting.

Left arm
Right hand
I have still to put the wings on, get the dash fitted and the scuttle on. The dash can't be fitted yet as the n/s indicators don't work and I suspect a wire has come off the momentary switch. I need to pull the dash out a bit to get to it. After an hour or so I find the n/s indicators are actually working, it's the warning light that isn't. In mitigation M'Lord, I can't see the indicators from beside the dash where I'm operating the switches. I test the led warning light and it's faulty. I don't have a spare so it will have to wait for now. I don't use indicators very much (another story) so it isn't that important. Dash and scuttle back on. Engine started and, after warming it up, I set the idle screw to 5000 RPM and set the ignition timing to 25 degrees BTDC. I will double check this in the morning with Lynne sitting in the car working the throttle. By the way, when I did start it, the timing was way out and the 4 exhaust pipes were glowing cherry red in about 3 minutes, the water was boiling fiercely and I had to stop before the final check, hence another check in the morning.
It's now Saturday morning and having thought about this overnight (who needs sleep) I think the fibre washer must have fallen out as I put the joint together. I will undo it it make sure it has a fibre washer and then do it up again. Then on with the wings. I then have to remove the bottom hose to cut 2" off the water pump end as the pipe is now touching the top oil pipe. Lynne will come out and sit in the car holding the revs to 5000 whilst I do the final check on the ignition timing. I have to drain all the oil, which is cheap stuff I have used to flush the system in case there's any "bits" in the copper pipes. I have some Motul 300V motor sport oil to fill with. If a product can be describes as "motor sport" then the price can be doubled. This stuff is 37.00? for a 2 litre can. OUCH!
Plan is now to finish it today and go out tomorrow (Sunday 15th)
So, it's 1225 on Sunday. I did a few bits (like refit the covers to the bottom of the bell housing, glue a piece of carbon the the broken tab on the nose cone, and a few more stupid things). Lynne comes over and it won't start, battery is flat (this is the new Li-Ion battery and I'm getting a bit concerned that it goes flat so quickly). Charge battery but still wont start. Move distributor and it starts, runs for a minute or so, and then cuts out. It will not start. Check to see if we have a spark at the plug and NO WE DON'T. Start checking all the wiring and notice there are no headlights. So, out comes the dash to see if a wire has come off. No, they all seem to be on. Then notice the two end wires on the bottom of the fuse box are off because the loom is tight and pulling them off. Get them back on (will have to reposition fuse box). Then find I have no brake lights. The main beam is now working but no dipped. As I can't get the dash out too far it means the scuttle will have to come off.
I'm now sitting here with a cup of coffee and typing this up, I need a break. Will have lunch and then get the scuttle off and see what's wrong.
Hopefully I will get it finished by tonight. If I can get it running OK I plan to drive it round locally to get the oil hot, get the oil drained, remove the two leaking joints to fix once and for all then refill with the oil that costs as much as gold.
I checked the voltage to the coil and there wasn't any. So the dash and scuttle came off and I traced the white wire back to the ignition switch. No fault found and 12 v at all the connections. Check the coil again and it now has 12 v. Worrying, but never mind. It still won't start so check if I have a spark at the plug lead. No spark. What follows is a nightmare, not for the weak to read.
I do so many tests that I've forgotton the sequence, I test away until 1900 and give up-totally confused.
Monday. I start testing where I left off last night. All day going round and round in circles. It turns out to be the carbon brush in the distributor making intermittent contact. I "pinch" the brush from the Land Rover but no luck. I eventually end up with continuity from the coil to the carbon brush but not at the plug end. I try a longer spring and get a spark at the plug. It starts..... then stops. After an hour of messing about with various spring I surrender at 1900 and order a new cap and rotor arm from Burtons. The carriage has cost more than the bits but they should be here on Wednesday. It's a mystery why this has happened as it was running fine when I first started it. Cars eh!
Tomorrow morning we're going shopping at a different super market as the one and only in Pouance just gets dearer and dearer. We're going to try Leclerc in Segre as Segre has 3 large supermarkets so, hopefully, prices will be better. I'm also going into the tax office to get a fiscal statement of ownership of the Land Rover so I can get it registered in France.
In the afternoon I'll do the long awaited work on the Mini (paint the front sub frame with zinc and chassis black), I Kurusted it last year.
So, Wednesday afternoon I should have the 7 running, get the oil hot, drain it and fix the two leaking pipes and, at last, go out in it.
I'm having a total nightmare! I have now redone the two pipes by taking out all but one compression joint to each pipe. (the extra joint was so I could get the pipe around the right angle at the chassis upright). However it will not start. Due to a faulty lead on my tester I spent a whole day chasing a non-existent problem. I lost the spring in the distributor cap carbon brush and ordered a new cap from Burtons. Still will not start. The spark emitting from the coil is very, very weak. It has to be no further than 1 mm from an earth point to see it. I've now ordered a new coil from John Wilcox. I will phone them in a few minutes (0900 on Saturday 21st March) and see if they can add an amplifier to the order. It will take 2/3 days to get here and cost ?18 postage. That's from Monday morning. We'll be in the UK on Friday so I've asked for it to be sent to the UK. I will not be able to get the car running until Thursday 2nd April-bugger (am I allowed to say that?)
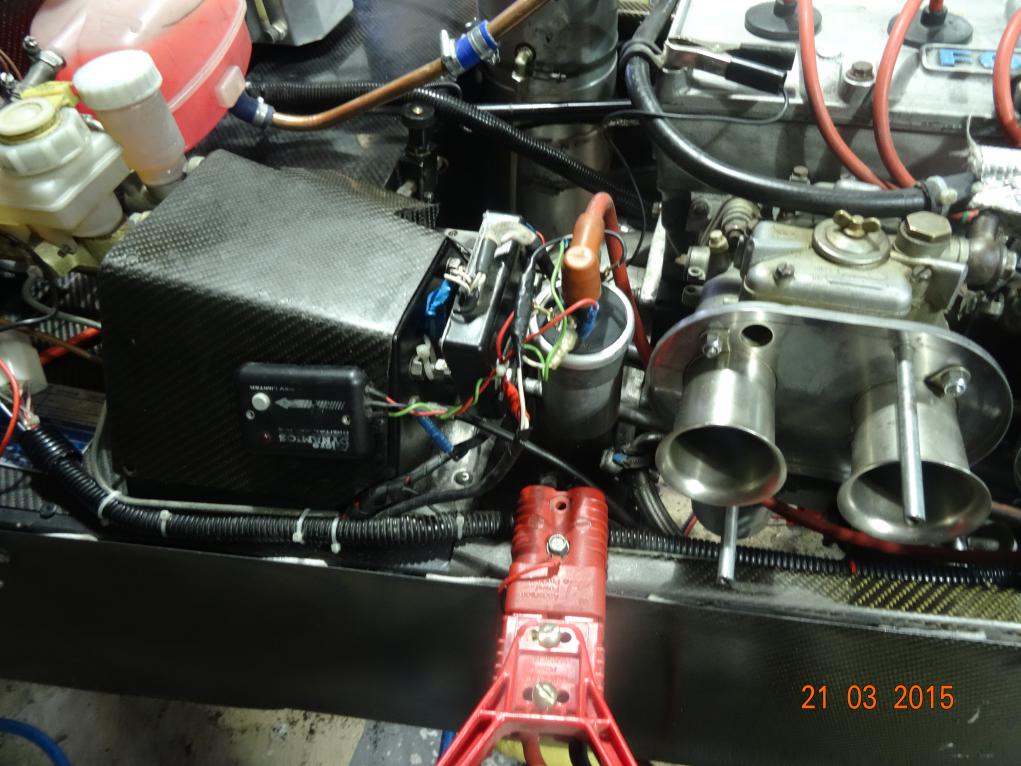
The coil and amplifier pack. The small black, credit card size, gizmo on the pedal cover is the rev limiter. The Anderson plug connects jump leads or a battery charger to the battery which sits on the chassis rail directly below the coil.
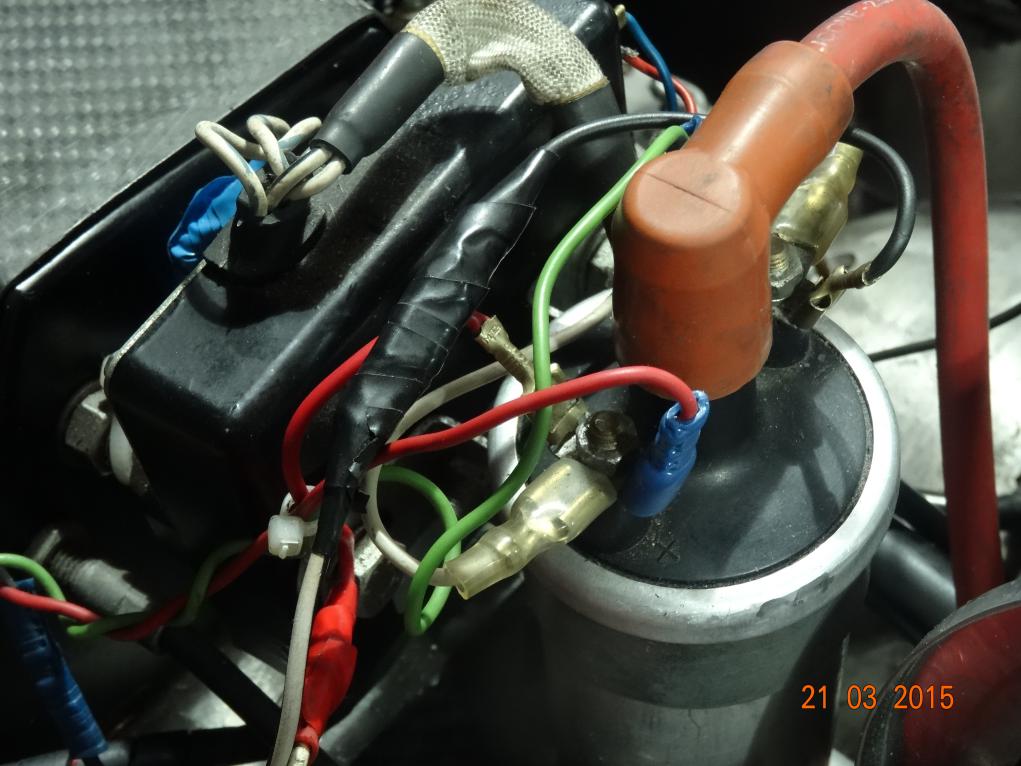
Close up of coil.

Neat plug leads, The wrapped pipe is the fuel pipe. I've run it along the bottom chassis rail and up the front to the filter/regulator and then to the carbs to avoid fuel vapourisation. It used to come along the transmission tunnel and to the filter which was fixed to the side of the pedal box. It gets very hot by the gear box so better cool than sorry.
Sunday 22nd March 2015. Whilst waiting for the new coil I thought I'd do a few jobs that will put the cherry on the top. The new wing stays, which bring the wings much closer to the wheels are not very tight so I drilled the steel tube and ali rod inside it and put self tappers in to hold them tight, Worked a treat and it was the first time I've used my new Li-ion Bosch drill. Best drill I've ever bought, light-very light and powerful.
The screw in the wing stay.
Then Lynne came over and we set up the drivers new seat belt and cut the excess webbing off. We heated a serrated knife with the blowtorch and then let the heat melt the web where we wanted it cut. Worked a treat with the webbing sealed.
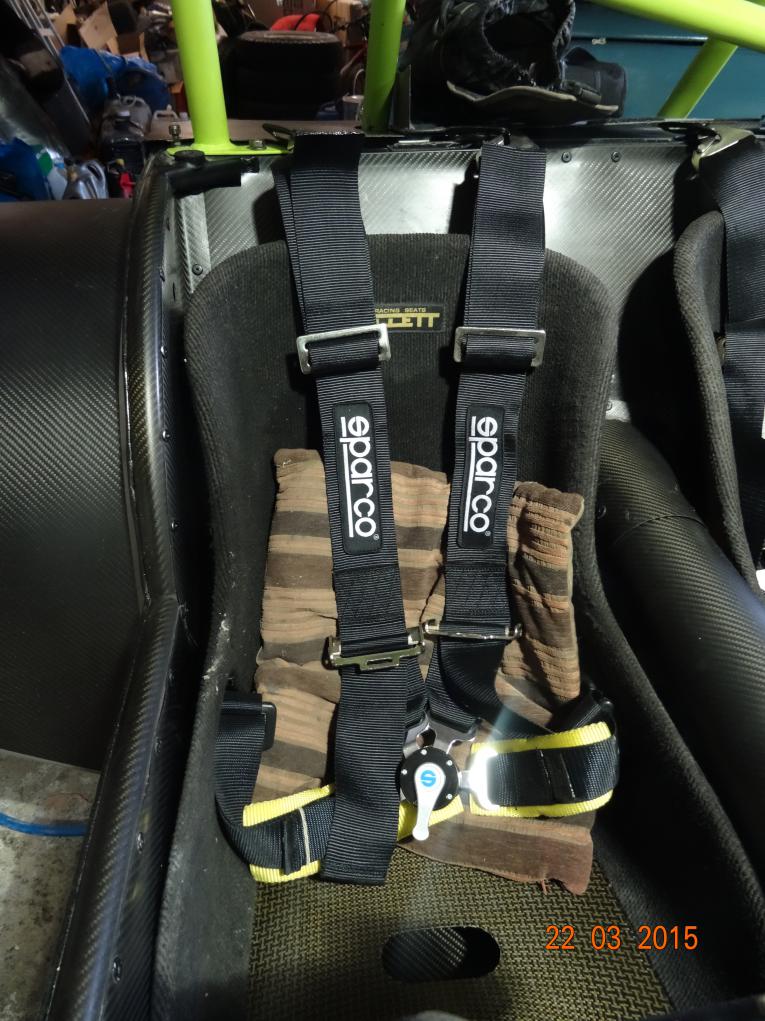
I mean, fancy having bright yellow webbing on seat belts in my car-they'll be black in no time!
Then I put the nose cone and bonnet on and applied the stripes to the bonnet. I can't do the rest of the car until I polish the new lacquer. I'll be bringing back a new polisher from Machine Mart next week and then I'll wait for a nice warm day where I can sit outside and polish away.
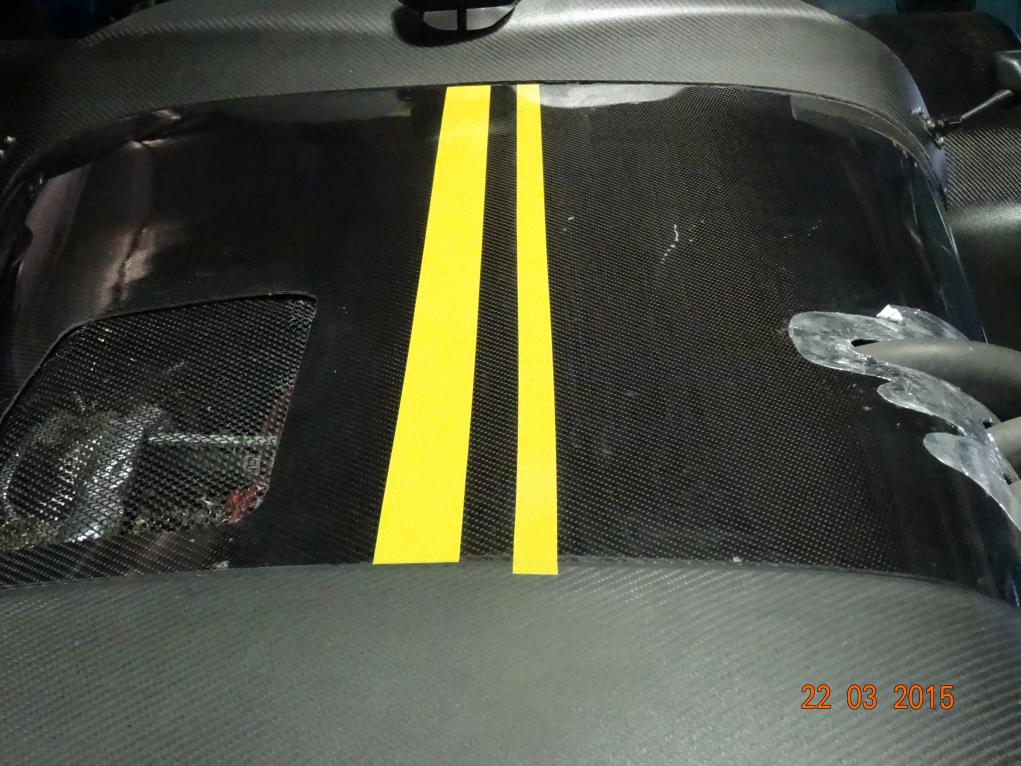
They are straight, it's an optical whatsit because I haven't trimmed the ends yet.
Yes, I know, the yellow stripes don't quite match the yellow band on the nosecone.
I think the heat reflective foil around the bonnet exhaust exit needs trimming a bit.
2nd April 2015
Back from the UK now so let's get the coil and amplifier fitted.

The new coil and amplifier. Looks nice and shiny but probably not needed.
.jpeg)
The Anderson plug goes to a terminal which has the battery charger on and the jump leads to connect to the Mini battery.
.jpeg)
The distributor which is the cause of the problem. I undid it when the engine was out and I was altering the oil pipes (pump is under distributor). In hindsight I should have marked it before turning it. Hindsight, a wonderful thing to be seen in all its glory.
.jpeg)
.jpeg)
The broken alternator. Top picture shows the two brackets and the bottom shows the cracked lug. I have a MIG welder but since lending it to a "friend" (he kept it a year and used 3 bottles of gas and 2 reels of wire making a steel staircase for someone) it doesn't work. I really must find time to fix it!
So, this morning (5/4) I went over to the workshop at 0800 to refit the alternator. It went like this.
Get tools out and lay under car on the creeper board. It's difficult for me to work under the car as I have 5 fractured vertebrae and can't lay flat on my back. Get the alternator up into it's place through the tubes of the space frame. Try and get it over the engine mounting bracket but the spacer falls out so I have to start again. It won't fit over, probably because the glued and bracketed lug is a few millimeters closer than it should be. Then I notice the rubber mounting has pulled forward and the steel insert is protruding. Get a bolt and nut with some large washers, move alternator out of the way and insert the bolt through the mounting so I can tighten it to draw the inside back in. I tighten away but it goes "solid" on closer inspection I notice the large washer on the rear had fallen out so wasn't pulling the inner. Take the bolt out, refit the washer and tighten again. With a bit of pulling (not easy with a "broken" back) I get it pulled in. Bolt out and alternator in position. The new brackets are fouling on the engine bracket so alternator out, on the bench the brackets removed and to the grinding wheel to shape the ends. Start grinding and notice the grinder is loose on the stand. Take the grinder off the stand, remove the bottom cover and find one screw out and the other loose. Tighten the loose one but the other will no do up. Find a longer screw and that fits and is tightened. Decide that as the grinder is in bits I may as well fit the new 8" wire brush I just brought back from the UK. Brush fitted I rebolt the grinder to the stand. Then notice I've left the bottom plate off. Take the grinder off, refit plate and refit grinder. This grinder is about 20 years old and the switch on it fell to pieces some years ago. The switch is taped up, in the on position and I turn it on/off from the wall socket (UK plug and socket). I switch the grinder on but it stays silent and doesn't make a whirring noise. Take the grinder off the stand, remove bottom plate and then note the wiring colours to the switch, remove the switch to the bench. It's well and truly effed. So I make up two link wires with spade connectors and connect the wires together so it's permanently on. Get some insulating tape as a belt and braces safety measure. The roll of tape has stuck itself together so much that it just tears as it is unwound. In the bin and another roll of tape is brought, from the other end of the workshop. This must be the 20th time I've walked to and fro. Taped up, bottom plate on, grinder bolted back to stand, switch on and it makes that whirring noise that heavy duty electric motors make when started. Grind the two brackets to shape. Take them to the bench to refit and the glued on lug falls off the alternator. So, I'm now sitting here typing this up whilst the new epoxy resin dries. 3 hours and I'm exactly in the same position as I was at 0800. No, actually I'm in the same position I was on Friday night, waiting for the glue to set. Good fun ain't it!
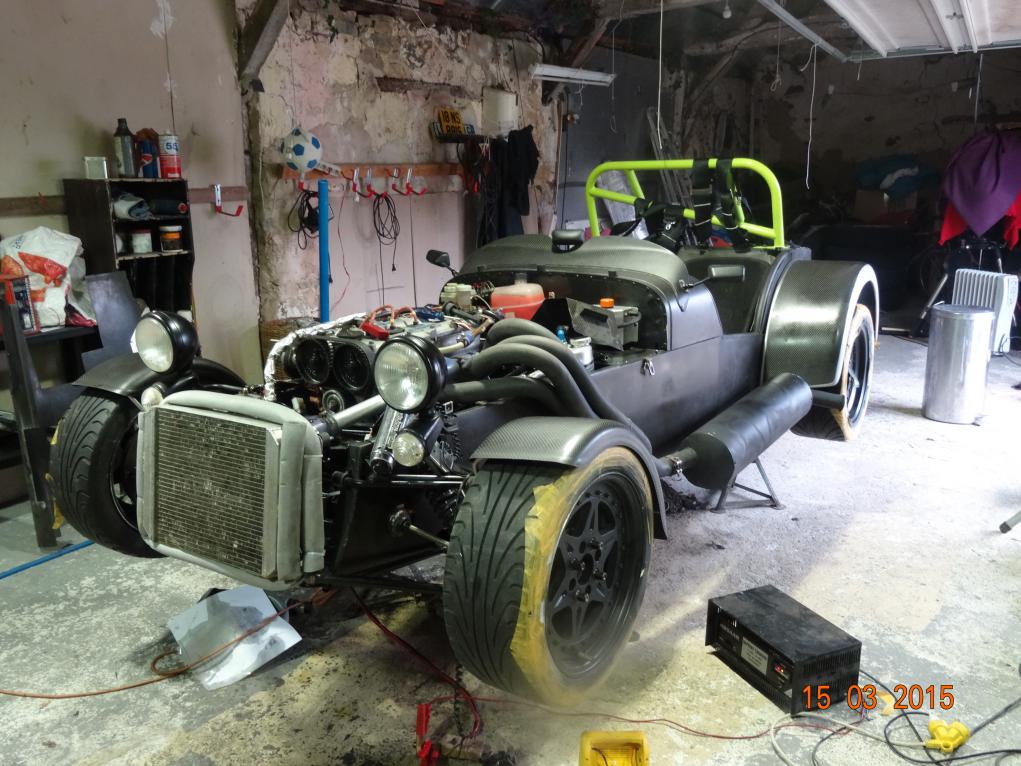
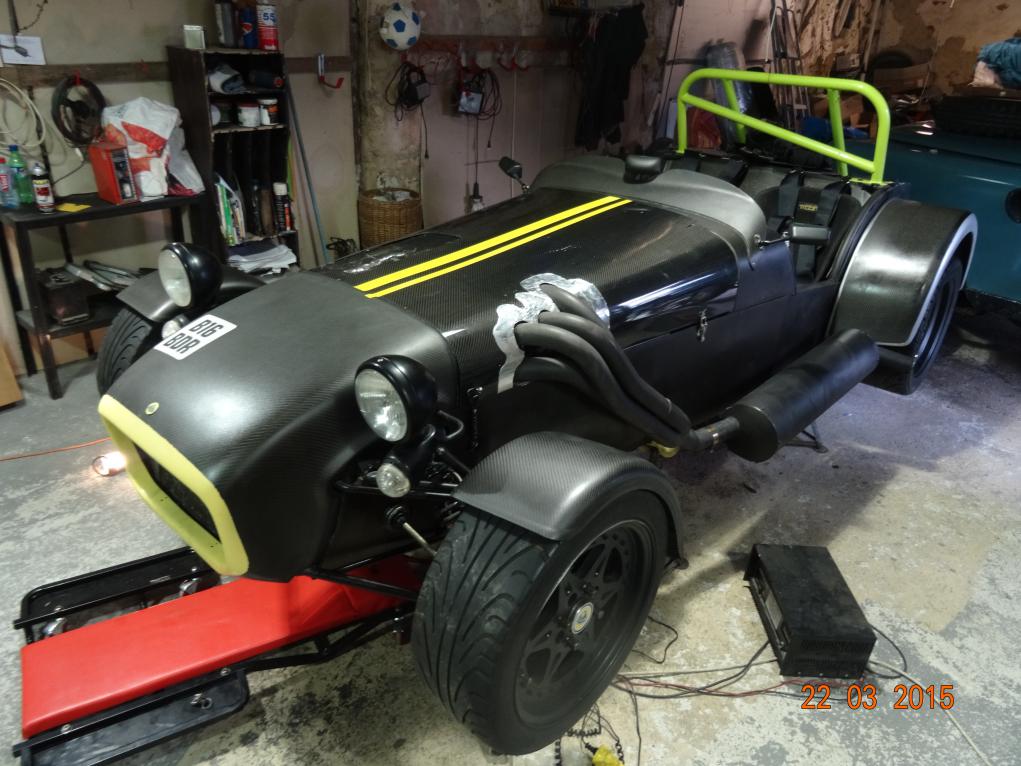
It's now 2300 on Wednesday 8th. The car is running!
Off to the doctor in the morning, then shopping so I'll finish the oil change and look at the ignition timing in the afternoon.
.jpeg)
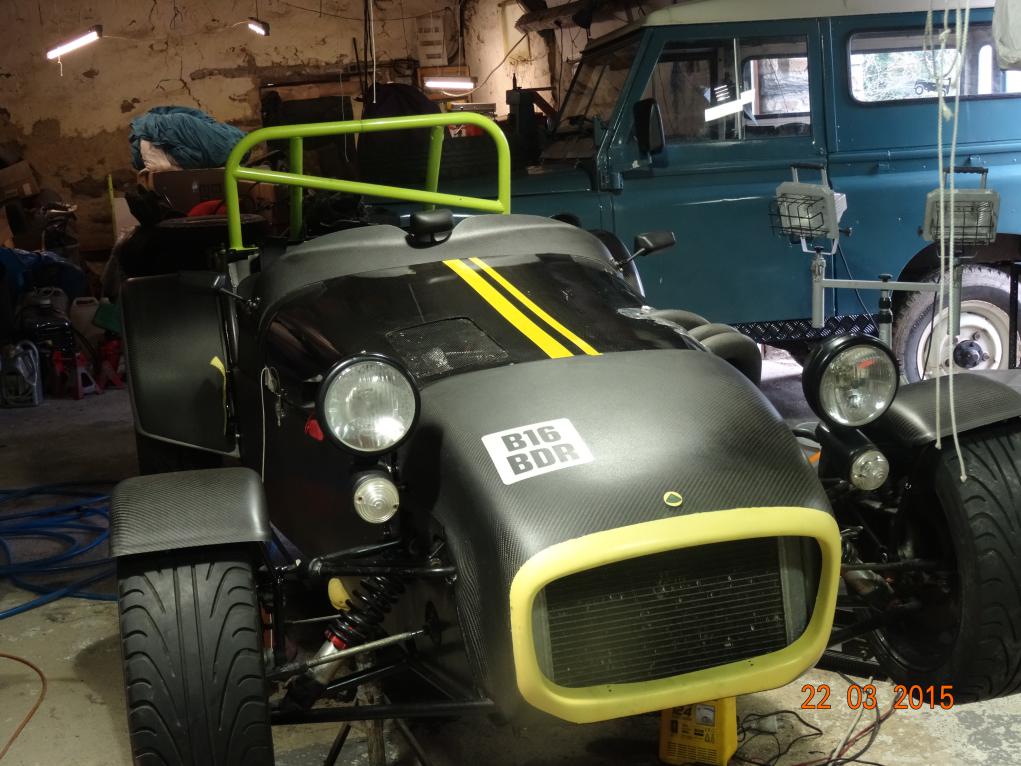
First time on the road for two years. Only third time driven in nearly 4
Body needs cleaning, tyres need pumping, more work needed, as above, but I will be out in it this summer.....if I get time off from rebuilding the MG TC.
Sunday 12th April 2015.
I've been struggling with the ignition timing. Runs like a dog when it's 25 degrees BTDC at 4,500 RPM but is much better at 35 degrees BTDC. Then that little light came on. The petrol in the tank has been in there for 3 years and will have lost most of its octane. I'll give it a long run, use all the fuel and refill then check the timing again. Not worked on it today, had a day at the races. Great day, great company and Lynne won all her money back with 4 out 5 bets.
It's now 22nd April 2015. I have drained the fuel into a 20 litre container and refilled with a gallon which is about 4 months old. Then I refitted the nose cone and bonnet and went to Segre to refill with 98 Octane. No problems either going or coming (once I'd adjusted the mirrors). The seat is probably a tad too high but I'll leave it for now. I feel like I'm sitting on the car rather than in it.
I'll will wait until it's cooled down a bit then reset the ignition timing to 25 Degrees BTDC at 4,500 RPM. It's near that now but a final adjustment won't hurt. I'll have to take the scuttle off - again, the dipped lights and a few other things aren't working. The gauges need turning so that the temperature has 75 c at the top, oil pressure has 58 psi at the top and the oil temperature has 80 at the top. The rest are OK (ed: What rest, that's all there is that have a definite point).
I will have to change the exhaust manifold gaskets which will arrive with the MG (next Tuesday). It's blowing and I've checked they're all tight. It's a big job and may be easier to remove the engine (at least half way out). Then, of course, I've got to polish it. I'll wait until I'm stuck for parts on the MG and it's a nice day. I can sit outside and polish to my hearts content. Final job will be to stick the rest of the stripes on and the LOTUS decals.
The new clutch is perfect, no, it's better than perfect, sublime, It's easy to push down, has a fair bit of travel and makes it a pleasure to drive the car. Before it needed two feet (and some) to press it down and the difference between in and out was about 1" movement.